Lettuce on Toast
This example illustrates how to edit paths. The aim is to create the picture illustrated in Figure 11.11.
- Let's start with the toast first. To begin with create
a rectangle with a brown
fill colour. (If you are using
the CMYK model, you can get brown from 0% Cyan, 81% Magenta,
100% Yellow and 60% Black. If you are using the RGB model,
you can get brown from 40% Red, 8% Green and 0% Blue.) Create the
rectangle shown in Figure 11.6.
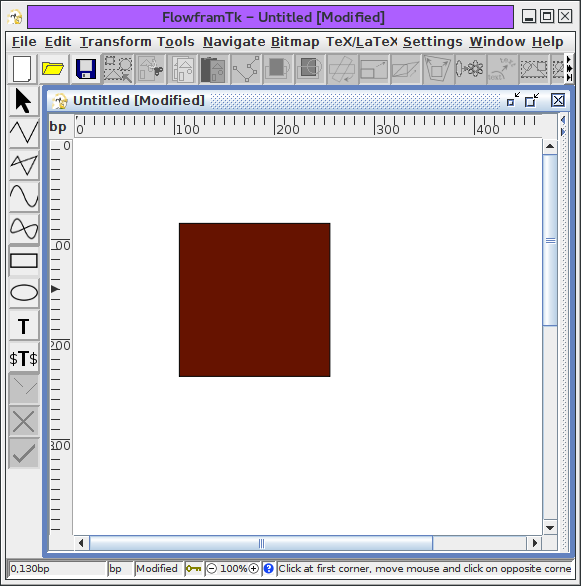
Figure 11.6: Lettuce on Toast Example--Brown Rectangle - Bread quite often has a curved top, so let's
edit the rectangle
so that the top is slightly curved. To do this,
select the rectangle, and
then either click on the edit path button or select the
Edit->Path->Edit Path menu item. This will display
the path in edit mode (Figure 11.7(a).)
Select the top segment, this will then be highlighted in red
(Figure 11.7(b)).

(a) 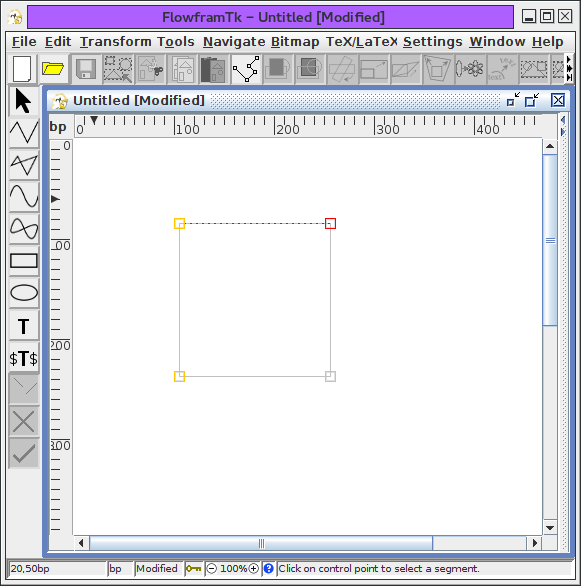
(b) Figure 11.7: Lettuce on Toast Example--editing the rectangle: (a) edit mode; (b) select top segment. - Use the edit path popup menu to convert the line segment to a
curve (Figure 11.8).

(a) 
(b) Figure 11.8: Lettuce on Toast Example--converting the top segment to a curve: (a) edit path popup menu; (b) segment converted to a curve. - The segment now has two extra
control points, these need to be moved
to change the curvature (Figure 11.9(a)). Deselect
the edit path tool (Edit->Path->Edit Path or Ctrl-I) to exit
the edit path mode (Figure 11.9(b)). Note that if
you have the grid lock enabled, you may find it easier to
temporarily disable it while you are editing the curvature control
points.
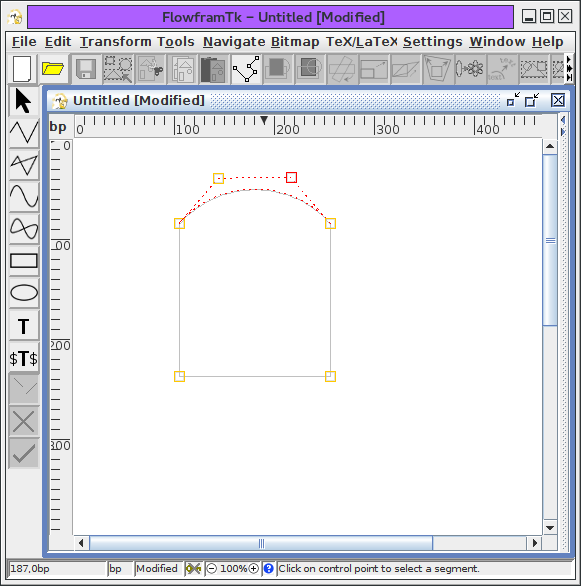
(a) 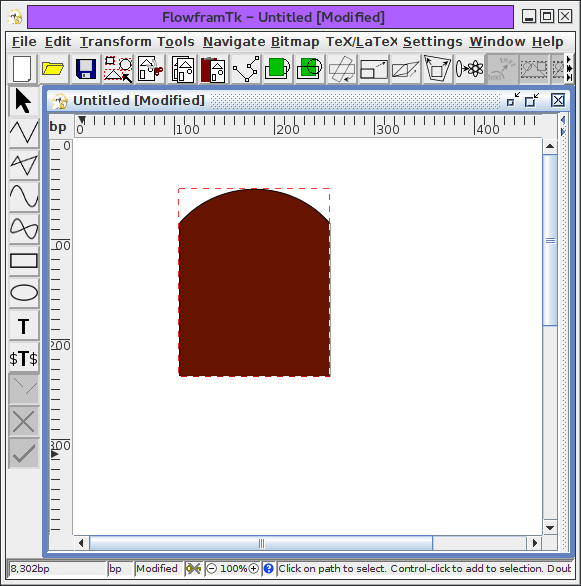
(b) Figure 11.9: Lettuce on Toast Example--finish editing the curve: (a) changing the curvature by moving the control points; (b) exit edit path mode. - To make the lettuce, select the
closed curve tool, and set the
fill colour to green.
Make a rough outline of the lettuce leaf,
clicking on each vertex, and double-click to close the path. Then,
if necessary, edit the path to modify the
control points (Figure 11.10).
Set the fill colour to transparent, and using the open curve tool, add in some paths to give the lettuce leaf some creases and edit as appropriate (Figure 11.11).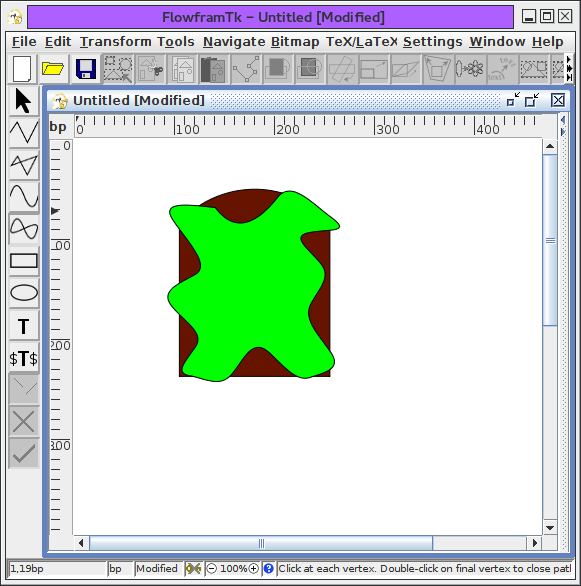
Figure 11.10: Lettuce on Toast Example--Adding a Closed Curve Path 
Figure 11.11: Lettuce on Toast Example--Completed Image
To save the picture, select the File->Save As menu item, and enter the filename.
To include the image in a LaTeX document, select the File->Export menu item, and save it as a LaTeX file (click on the File of Type drop-down list and select pgf environment (*.tex, *.ltx), and name the file e.g. lettuce.tex. To include it in your LaTeX document, remember to use the pgf package:
\usepackage{pgf}
and to include the image use \input, e.g.:
\begin{figure}
\centering
\input{lettuce}
\caption{Lettuce on Toast}
\end{figure}