A Brochure
This example illustrates how to use FlowframTk to create a class that loads the flowfram package. The aim is to produce a two-sided document with different recto and verso headers and footers.
- For this example I'm going to start with the Tschichold grid.
Use Settings->Grid->Grid Settings to open the grid
dialog box. Select the Tschichold tab
and set the Major Divisions to 100pt, as shown in
Figure 11.81. Make sure that the grid lock is on
(Settings->Grid->Lock Grid).
Use Settings->Configure TeX/LaTeX Settings to open the TeX/LaTeX Settings dialog and select the Document Settings tab. Set the Normal Font Size to 10pt, as shown in Figure 11.82, and make sure the Use default class radio button is selected.
Figure 11.81: Brochure Example--Setting the Grid 
Figure 11.82: Brochure Example--Setting the Normal Font Size - Set the image storage unit to pt using
Settings->Configure Image Settings dialog box, as shown in
Figure 11.83
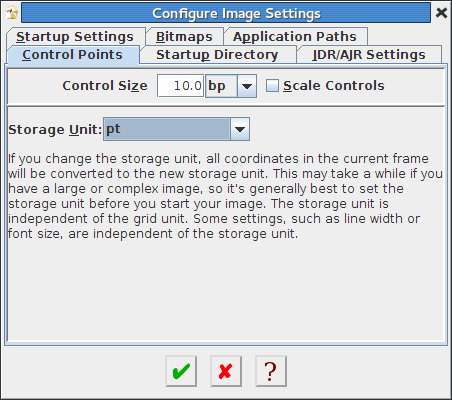
Figure 11.83: Brochure Example--Setting the Storage Unit - Select the rectangle tool (either via
Tools->Rectangle or Ctrl-R) and draw the rectangle
with three of its vertices on the diagonals, as shown in
Figure 11.84. With the grid lock on, you are limited to
only fourteen tick marks.
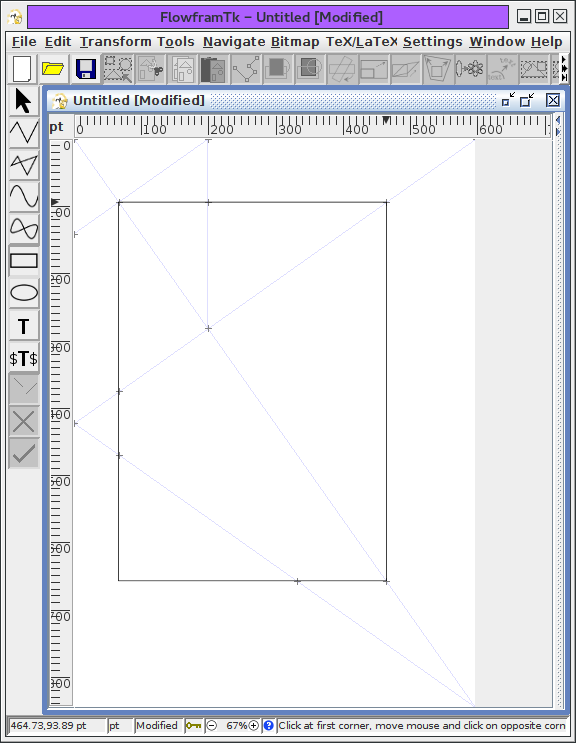
Figure 11.84: Brochure Example--Draw a Rectangle - Switch to the select tool (Tools->Select or
Ctrl-P) and select the rectangle. Then open the
Typeblock dialog using
TeX/LaTeX->Flow Frames->Set Typeblock. Click on the
Compute Margins From Selected Path button. (If this button
is disabled, close the dialog and check that the rectangle has been
selected.) This will fill the margins, but it looks a bit untidy
with all those decimal places and since a pt is so small such
precision seems unnecessary so round the
Left and
Top margins to the nearest
pt (66pt and 94pt, respectively). Make sure
the Adjust width to nearest field is set to
1pc and click on the Adjust Width button.
This should alter the Right field.
Make sure the Baselineskip radio button
is selected and click on the
Adjust Height button. Finally, click on
the Compute button to calculate
the even page shift. The settings should now be as shown in
Figure 11.85. Click on the okay button to apply these
settings and close the dialog.

Figure 11.85: Brochure Example--Setting the Typeblock - The typeblock is slightly smaller than the rectangle so,
making sure the rectangle is still selected, use the menu item
TeX/LaTeX->Flow Frames->Scale to Fit Typeblock to
scale the rectangle so that it's the same size as the typeblock.
Then use the TeX/LaTeX->Flow Frames->Set Frame menu item to
open the Set Frame dialog. Set the
Type to Flow,
set the Label to "main" and set the
Border to
None, as shown in
Figure 11.86. The margins and shifts should all be
zero and the page list All.
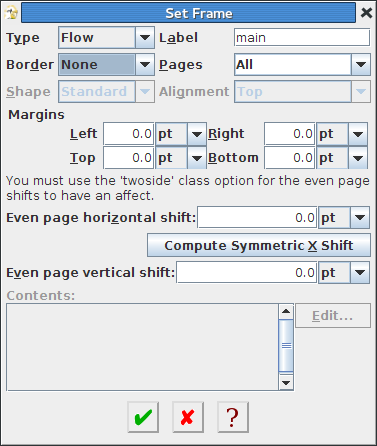
Figure 11.86: Brochure Example--Setting the Main Flow Frame - Now use Settings->Grid->Grid Settings to switch the grid
to a rectangular grid with 100pt major divisions and use the
ellipse tool (Tools->Ellipse or Ctrl-E) to create a
circle with a 100pt radius centred on
(400,700), as shown in
Figure 11.87.
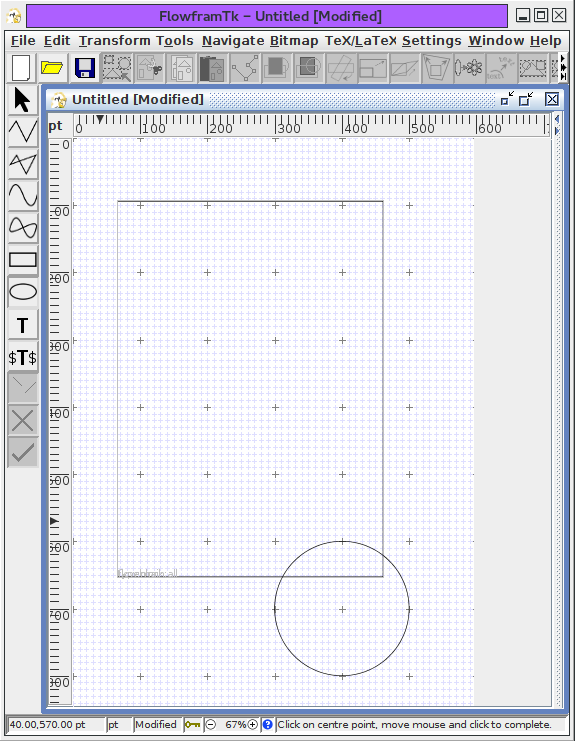
Figure 11.87: Brochure Example--Draw a Circle - Switch to the select tool (Tools->Select or
Ctrl-P), select the circle and switch to edit path mode
(Edit->Path->Edit Path or Ctrl-I). Use the
popup menu to remove the segment from (500,700) to
(400,800), convert the curve segments from (400,800)
to (300,700) and from (400,600) to
(400,800) into line segments, and move the control at
(400,800) to (400,700). The path should
now appear as shown in Figure 11.88.

Figure 11.88: Brochure Example--Change the Circle into an Arc - Exit the edit path mode and move the path to the bottom
right edge of the canvas, as shown in
Figure 11.89.
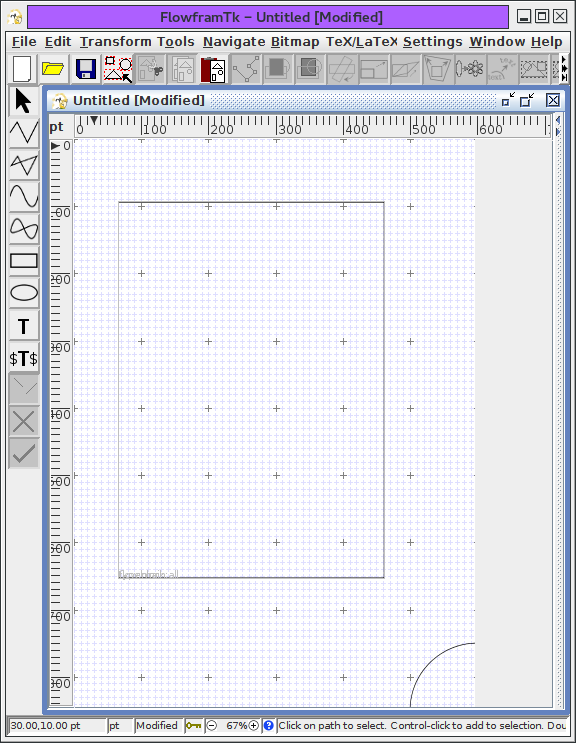
Figure 11.89: Brochure Example--Move the Arc to the Bottom Right Corner - Use Edit->Fill Colour to change the fill
colour to orchid (68% red, 36% green, 100% blue) and use
Edit->Path->Line Colour to change the line
colour to transparent. The arc should now appear as shown in
Figure 11.90.

Figure 11.90: Brochure Example--Apply a Fill Paint to the Arc - Make sure the arc is still selected and open the
Set Frame dialog using
TeX/LaTeX->Flow Frames->Set Frame menu item. Set the
Type to
Dynamic, set the
Label to "footer", set the
Border to
As Shown,
set the Pages to
Odd and set the
Alignment to
Middle. Set the
Left and
Top margins to 40pt and the
Right and
Bottom margins to 10pt.
Next, click on the Edit button to open
the mini TeX editor and enter:
\bfseries\color{white}\Hugeas shown in Figure 11.91(a). Click on the okay button to close the editor and return to the Set Frame dialog, which should now look like Figure 11.91(b).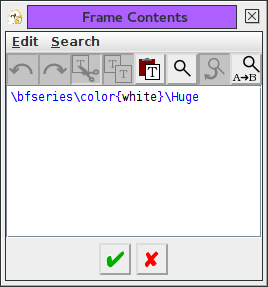
(a) 
(b) Figure 11.91: Brochure Example--Setting the odd footer: (a) entering the frame contents; (b) the frame settings. - Click okay to apply the new settings and close the dialog. The
image should now appear as shown in Figure 11.92.
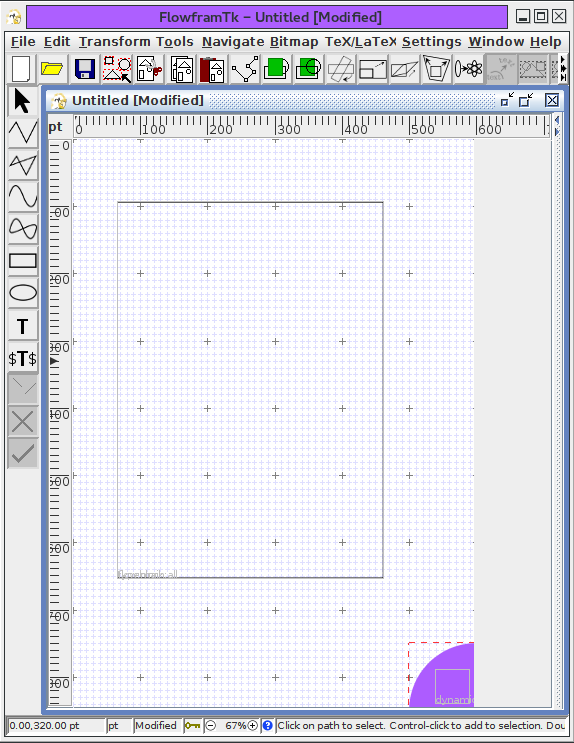
Figure 11.92: Brochure Example--Arc is Now an Odd Footer - Copy (Edit->Copy or Ctrl-C) and paste
(Edit->Paste or Ctrl-V) the arc to create a
duplicate. The duplicate should now be the only object selected. Use Transform->Scale to open the
Scale Selection dialog and set the
Scale X field to -1, as shown in
Figure 11.93. Click on the okay button and this should
flip the duplicate arc.

Figure 11.93: Brochure Example--Flipping the Duplicate Arc - With the duplicate arc still selected, use
TeX/LaTeX->Flow Frames->Set Frame to open the
Set Frame dialog box again. Set the
Label to "evenfooter", set the
Pages to
Even, set the
Left margin to 10pt and the
Right margin to 40pt.
The dialog should now appear as shown in Figure 11.94.

Figure 11.94: Brochure Example--Setting the Even Footer - Use TeX/LaTeX->Flow Frames->Display Page to open the
Display Frames dialog and select the
Even Pages radio button, as shown in
Figure 11.95.

Figure 11.95: Brochure Example--Changing the Display Page The canvas should now look as shown in Figure 11.96. The "footer" frame is no longer displayed as it's only defined on odd pages.
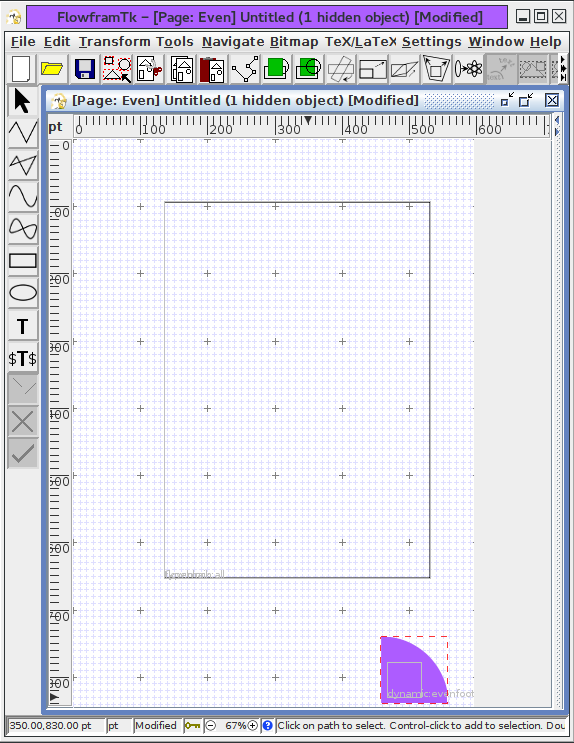
Figure 11.96: Brochure Example--Even Pages Display - Move the "evenfooter" frame to the bottom left corner, so
that it now appears as shown in Figure 11.97.
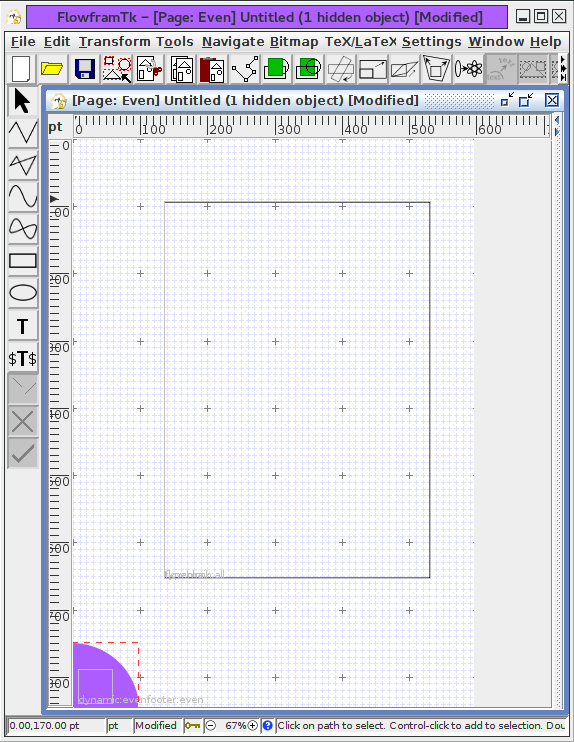
Figure 11.97: Brochure Example--Moving the Even Footer - Use TeX/LaTeX->Flow Frames->Display Page to open the
Display Frames dialog again and select the
All Pages radio button and click on the okay
button. The canvas should now look like
Figure 11.98. The "evenfooter" frame now appears in
a different location, but that's just its odd page position. Since
the page list is set to even pages only, it won't actually be
displayed in that location in the document.
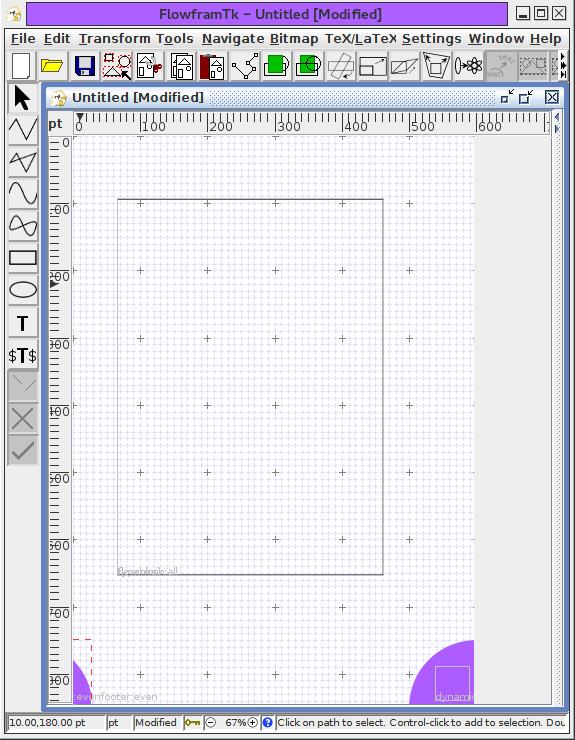
Figure 11.98: Brochure Example--"all pages" display mode shows all objects in their odd-page location. - Use the closed-line tool (Tools->Closed Line)
to create the path shown in Figure 11.99. The
co-ordinates are: (310,0), (360,50),
(600,50) and (600,0).
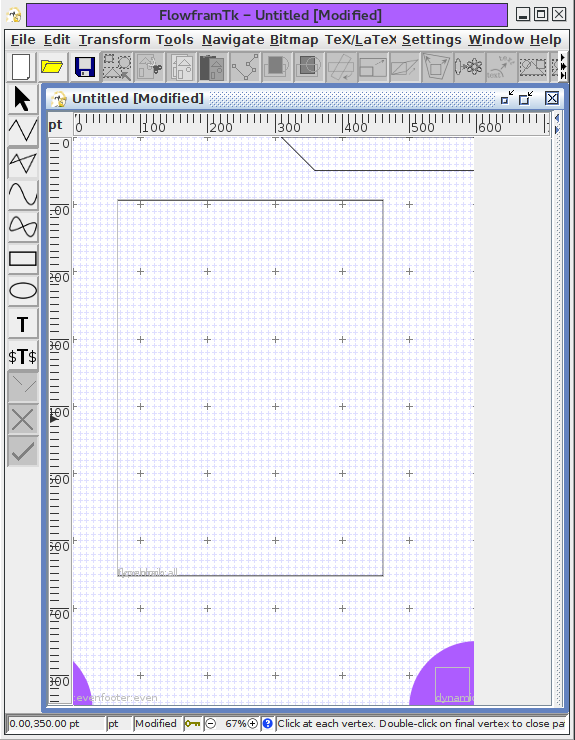
Figure 11.99: Brochure Example--Adding a Closed Polygon - Switch to the select tool (Tools->Select) and
select this new polygon. Set the fill to orchid and line colour to transparent, as done earlier for the arc. Then use
TeX/LaTeX->Flow Frames->Set Frame to open the
Set Frame dialog again. Set the
Type to
Dynamic, set the
Label to "header",
set the Pages to
Odd,
set the Border to
As Shown, set the
Alignment to
Middle, set the
Left to 50pt and set the
remaining margins to 10pt. Then click on the
Edit button to open the editor, and set
the contents to:
\bfseries\Large
as shown in Figure 11.100(a). Click on the okay button to go close the editor and go back to the Set Frame dialog, which should now look like Figure 11.100(b).
(a) 
(b) Figure 11.100: Brochure Example--Setting the odd header: (a) entering the frame contents; (b) the frame settings. - Click on the okay button to apply these settings and close the
dialog. Keep the polygon selected and copy and paste it to create a
duplicate, as shown in Figure 11.101.
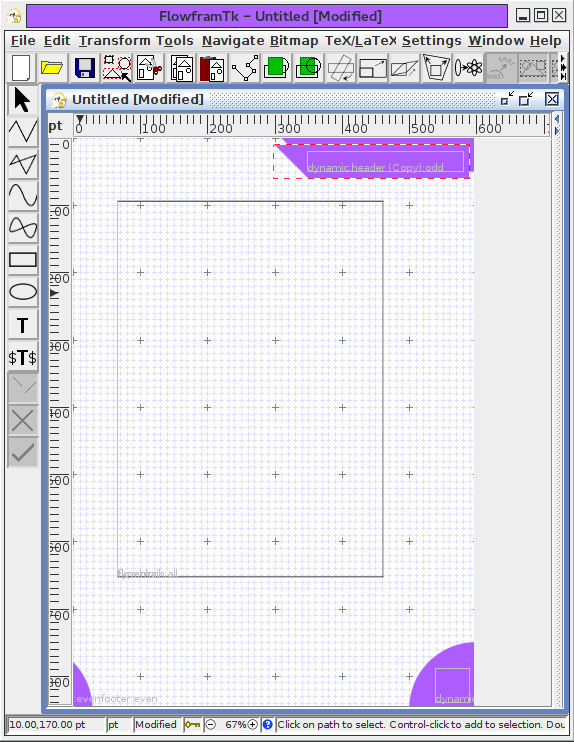
Figure 11.101: Brochure Example--Create a Duplicate Polygon - Flip the duplicate using the same method as earlier
(Transform->Scale) and, keeping the duplicate
selected, use TeX/LaTeX->Flow Frames->Set Frame to open the
Set Frame dialog again. Set the
Label to "evenheader" and change the
left margin to 10pt and the right margin to 50pt, as
shown in Figure 11.102.

Figure 11.102: Brochure Example--Setting the Even Header - Use TeX/LaTeX->Flow Frames->Display Page to open the
Display Frames dialog again and select the
Even Pages radio button to switch to the even
page view, as shown in Figure 11.103.

Figure 11.103: Brochure Example--Even Pages Display (Two Objects Hidden) - Move the "evenheader" frame to the top left corner of the
canvas, as shown in Figure 11.104.

Figure 11.104: Brochure Example--Move Even Header As with the "evenfooter" frame, when you switch back to the "all pages" view, the frame will be displayed in its odd page position, but since the page list is set to even pages only, it won't be displayed in the document at that location.
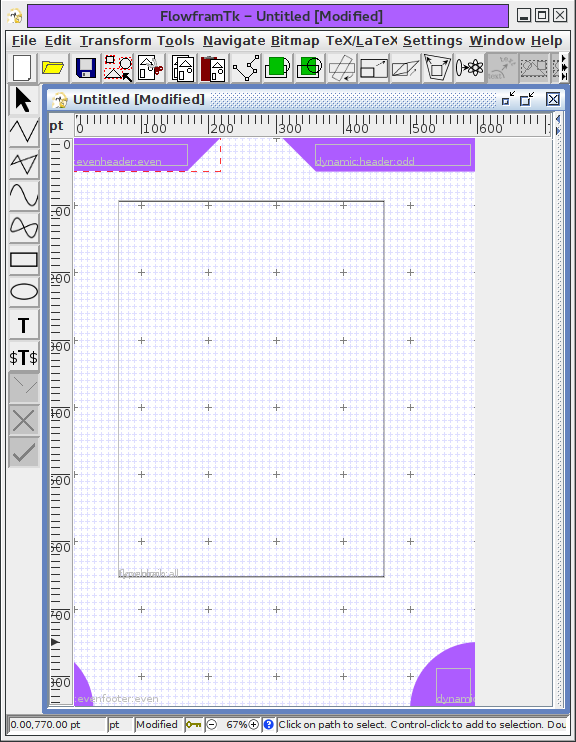
Figure 11.105: Brochure Example--All Pages View Again (All Frames Shown in their Odd Page Position) - Save the image as brochure.jdr or
brochure.ajr using the File->Save As menu
item. Then use File->Export to open the
Export dialog. Select the
Class (*.cls) filter and export the image as
brochure.cls.
- Create a document that uses this new class. I've used the
blindtext package to generate pages of dummy text for
illustrative purposes:
\documentclass[twoside]{brochure}

\usepackage[T1]{fontenc}
\usepackage[utf8]{inputenc}
\usepackage{lmodern}

\usepackage{blindtext}

\begin{document}
\Blinddocument
\end{document}
A double-page spread view of the resulting document (pages 2 and 3) is shown in Figure 11.106.
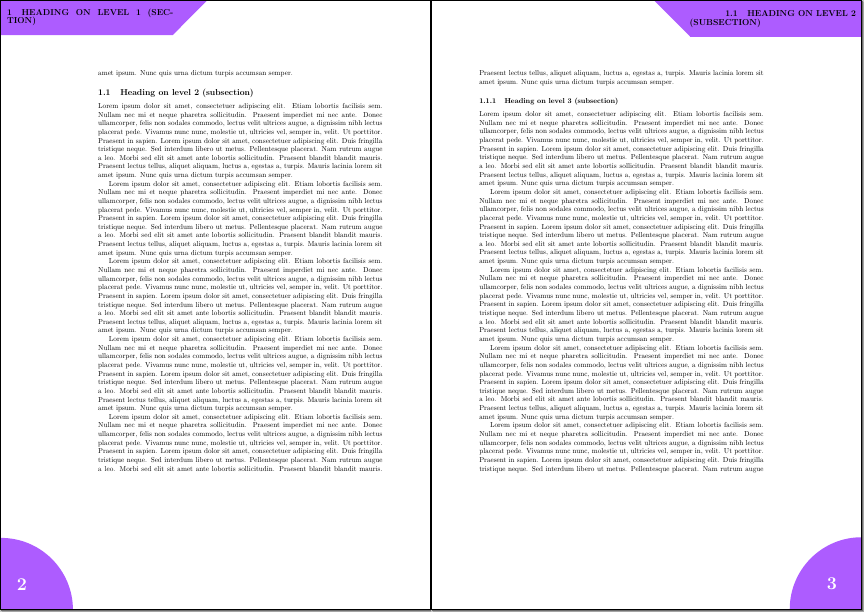
Figure 11.106: Brochure Example--Double-Page Spread View of Brochure