A House With No Mouse
This example illustrates how to create and edit pictures without using the mouse.
- For this example I'm going to use bp units, both for the
grid and for the storage unit. First for the grid, use the menu mnemonics
Alt-S G G. This will open up the
Grid Settings dialog box shown in
Figure 11.107. The Major Divisions
field should already have the focus, but if not, you can do
Alt-M. Set this value to 100. Press the
Tab key to move to the unit drop-down list. Press the
b key to select bp. Press Tab or
Alt-S to select the
Sub-Divisions field. Set this value to 10.
Then press Enter or Shift-Enter to
apply these settings and close the dialog box.

Figure 11.107: No Mouse Example--Grid Settings Dialog Box - Use the menu mnemonics Alt-S C to open
the Configure Image Settings dialog
(Figure 11.108). If the
Control Points tab isn't already visible, you can
do Alt-N to select it. Then do
Alt-U to move the focus to the
storage unit drop-down list. Press b to select
bp or use the up/down cursor keys. If the focus is on
a drop-down list you need to use Shift-Enter to apply these
settings and close the dialog box. If you move the focus to another
component, you can use Enter instead.

Figure 11.108: No Mouse Example--Storage Unit - Make sure that you don't have the grid lock on as some of the
co-ordinates that this example uses lie between tick marks.
Shift-F2 or Alt-S G L
toggles between setting the grid lock on and off.
- Select the rectangle tool,
using either Ctrl-R or Alt-O R.
- The rectangle forming the main part of the house will go from
(100bp, 100bp) to (250bp, 200bp). To move the mouse either press
F5 or use the menu mnemonic Alt-N G.
This will open up the dialog box shown in
Figure 11.109. Set the x field
to 100bp and the y field to 100bp. (You can
use the Tab key to move to the next focusable component, or you
can use Alt-X to select the x field
and Alt-Y to select the y field.)
Then press Enter or Shift-Enter.

Figure 11.109: No Mouse Example--Go To Co-Ordinate Dialog Box - Press F4 to emulate a mouse click. This will anchor the
rectangle at (100bp, 100bp). Then use either F5 or
Alt-N G to display the
Go To dialog box. Set the
x field to 250bp and the
y field to 200bp. Then press Enter or
Shift-Enter.
- To complete the rectangle, press either Enter or F4.
(See Figure 11.110.)
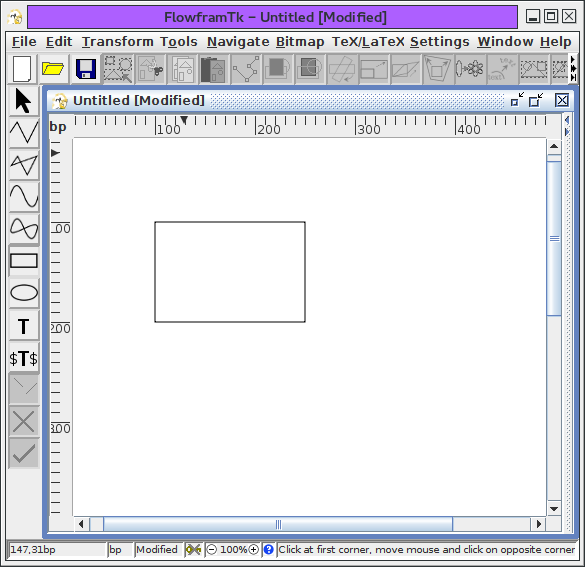
Figure 11.110: No Mouse Example--Completed Rectangle - Let's make it a yellow brick house. To change the rectangle's
fill colour, we first need to switch to the select tool. To do this
either use Ctrl-P or use the menu mnemonic
Alt-O S.
- To select the rectangle, use either F6 or
Alt-N K.11.2 Alternatively, you can use
Alt-N D which will show a dialog box
with a drop-down list that you can use to select an object.
- To change the fill colour use the menu mnemonic
Alt-E L. This will open up
the dialog box shown in Figure 11.111.

Figure 11.111: No Mouse Example--Set Fill Colour Dialog Box - To select the Colour radio button,
either do Alt-L or press Tab until
the Colour button has the focus, and then
press Space.
- The single colour selector will now be enabled. To change the
colour to yellow, you can do one of the following:
- Press Tab until the yellow swatch
is selected, and then press Space.
- Press Alt-R to select the
RGB panel and set the
Red field to 100, the
Green field to 100, the
Blue field to 0 and the
Alpha field to 100.
- Press Alt-K to select the CMYK panel and set the Cyan field to 0, the Magenta field to 0, the Yellow field to 100, the Black field to 0 and the Alpha field to 100.

Figure 11.112: No Mouse Example--Fill Colour Set - Press Tab until the yellow swatch
is selected, and then press Space.
- Next we need to construct a triangle for the roof. The
closed line path tool
is needed for this, so either use Ctrl+Shift-L or use the menu
mnemonic Alt-O I.
- The triangle vertices will be at (80bp, 100bp),
(175bp, 50bp) and (270bp, 100bp). Move to the first co-ordinate
using either F5 or
Alt-N G, and set the x
field to 80bp and the y field to 100bp in the
Go To dialog box. Press Enter or
Shift-Enter to close the dialog box and move
the mouse to the required location, and press F4 to set the first
vertex.
- Repeat the process for the second and third vertices, and press
Enter to complete the path. The path will automatically close.
(See Figure 11.113.)
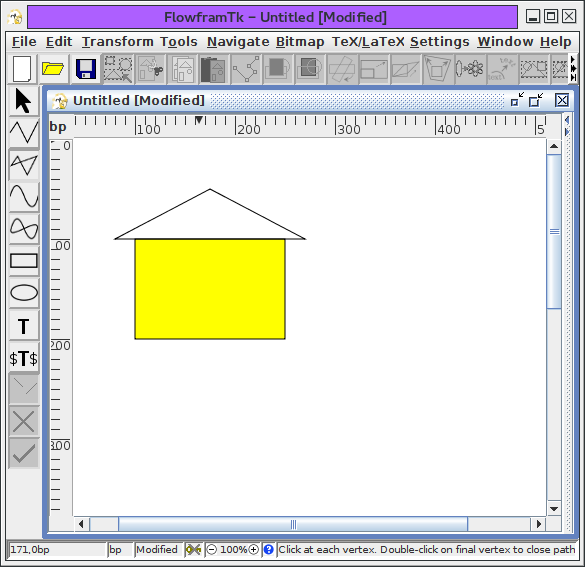
Figure 11.113: No Mouse Example--Completed Triangle - Let's make the roof red. First switch to the select tool
using either Ctrl-P or Alt-O S.
- Select the triangle using F6 or
Alt-N K.
- Open the fill colour dialog box using the menu mnemonic
Alt-E L.
- Use Alt-L to select the
Colour radio button.
- To set the colour to red either use the Tab key to move
the focus to the red colour swatch and press Space or use
Alt-R to select the
RGB tab and set the
Red field to 100, the
Green and Blue
fields to 0 and the Alpha field to 100.
- Press Enter or Shift-Enter to set the
fill colour and close the dialog box. (See
Figure 11.114).

Figure 11.114: No Mouse Example--Triangle Fill Colour Set to Red - Now for the windows: press Ctrl-R or use the menu mnemonic
Alt-O R to select the rectangle tool.
- Create four rectangles using the method described above with
opposing vertices at:
- Window 1: (120bp, 180bp), (145bp, 155bp)
- Window 2: (120bp, 135bp), (145bp, 110bp)
- Window 3: (205bp, 135bp), (230bp, 110bp)
- Window 4: (205bp, 180bp), (230bp, 155bp)

Figure 11.115: No Mouse Example--Windows Added - To change the fill colour of the window rectangles, you will
first need to switch to the select tool using either Ctrl-P
or Alt-O S.
- It's more efficient to select all four of the window rectangles
and change their fill colour simultaneously, rather than setting
the fill colour individually. Since the four small rectangles are
at the front of the stack, pressing Shift-F6 four times will
select these four rectangles.
- Now use the menu mnemonic
Alt-E L to set the fill colour
to white, following the same process as before to produce the
image shown in Figure 11.116.
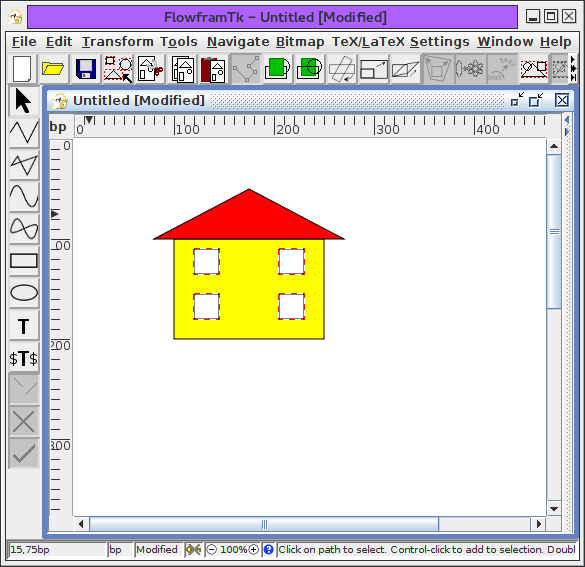
Figure 11.116: No Mouse Example--Window Fill Colour Set - Now make a black rectangle with
opposing corners at (160bp, 200bp) and (190bp, 160bp) using the
same method as above, to produce the image shown in
Figure 11.117.

Figure 11.117: No Mouse Example--Completed House - To illustrate how to move objects using the keyboard, let's
now shift the house 100bp to the right and 50bp down. First make
sure you are using the select tool. Then select all the objects using
either Ctrl-A or Alt-E A.
- Then either press F7 or use the menu mnemonic
Alt-E M. This will open up the dialog box
shown in Figure 11.118. Set the
x field to 100bp and the
y field to 50bp.

Figure 11.118: No Mouse Example--Move Dialog Box - To illustrate how to edit a path using only the keyboard,
let's make the roof a bit shallower. First deselect all the objects
using Ctrl+Shift-A or Alt-E D.
- Press F6 repeatedly until the triangle is selected.
- To enter edit mode, use either Ctrl-I or
Alt-E H E. You should now see the
path in edit mode. (See Figure 11.119.)
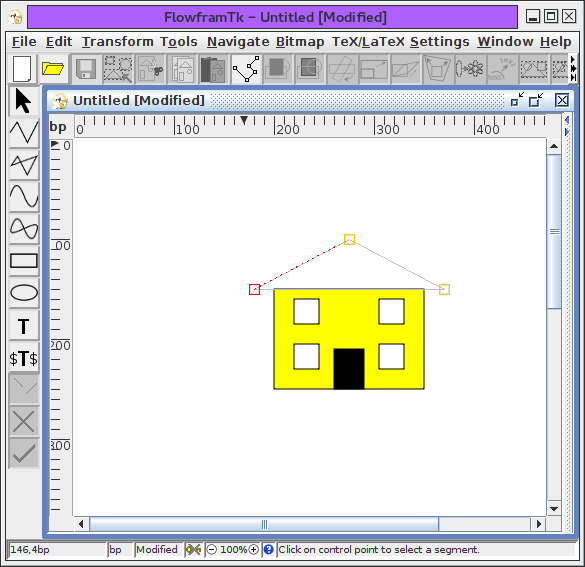
Figure 11.119: No Mouse Example--Edit Mode - Press F6 until the highest vertex is selected.
- Press F3 to popup the edit path menu
(Figure 11.120).
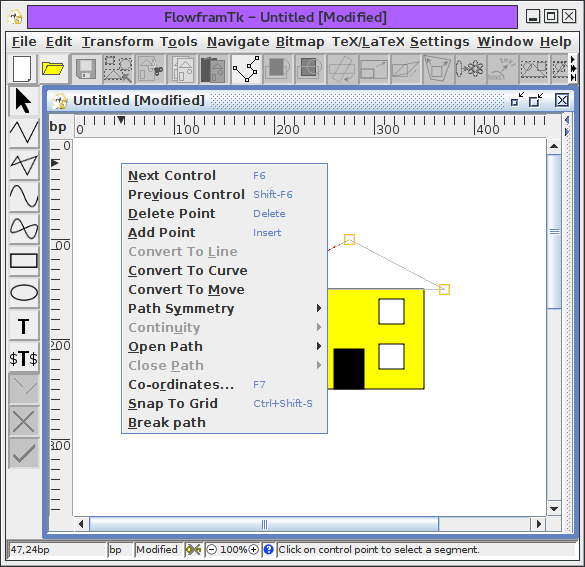
Figure 11.120: No Mouse Example--Edit Path Menu - Press Alt-R to display the
dialog box shown in Figure 11.121.
Set the y field to 120bp, and press Enter.
Figure 11.121: No Mouse Example--Control Point Co-Ordinates Dialog Box Press Ctrl-I to exit edit path mode. The image should now look like Figure 11.122.

Figure 11.122: No Mouse Example--Editing Finished - To illustrate how to create a text area using
the keyboard, let's add a label. First select the
text tool using either Ctrl-T or Alt-O T.
- Press F5 or Alt-N G to display
the Go To dialog box. Set the
x field to 200bp and the
y field to 100bp.
- Press F4 to start the text area. You should now see a
small pale rectangle with a cursor, as illustrated in
Figure 11.123. Whilst this rectangle contains a
cursor, you can type in text or press F3 to display the
text area popup menu.
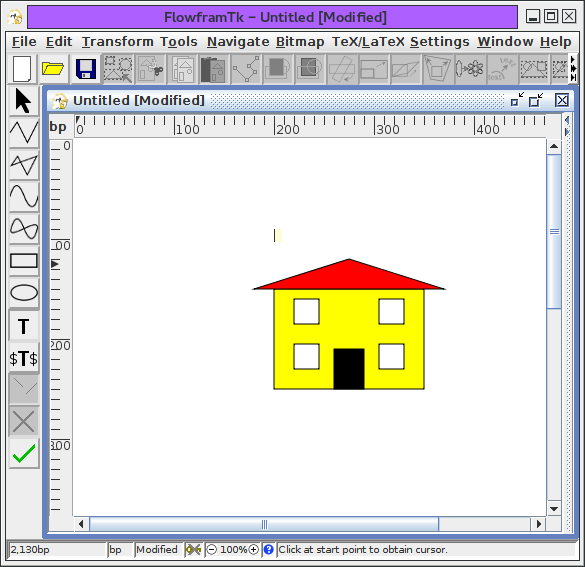
Figure 11.123: No Mouse Example--Creating a New Text Area - Type in the text
House #1, then switch to the select tool (using Ctrl-P or Alt-O S.) - The text area contains one of TeX's special characters,
namely the hash (#) character. This will cause a problem if you want
to save your image as a pgfpicture environment if the
auto escape special characters facility is
not enabled. If so, you will need to modify the text area so
that it has an alternative text to be used if the image is saved in
a LaTeX file. You can do this as follows:
- Press F6 to select the text area.
- Press Ctrl+Shift-I or Alt-E X E
to display the Edit Text dialog box. Select the
Different button (either Tab to it and
press Space or use Alt-D.) This will enable
the alternate text field. Change the text to
House \#1(Figure 11.124).
Figure 11.124: No Mouse Example--Editing Text Area - Press Enter or Shift-Enter to update the text area, and close the dialog box.
- Press F6 to select the text area.
- It would look better if the label was centred over the
house. In order to use the align function, it is necessary to
group all the objects that make up the house. This is done as
follows:
- Assuming you created all the objects in the same order as
listing in this example, the text area should be at
the front of the stack, then the door, the four windows, the roof
and lastly the body of the house. You should still have the
text area selected, and nothing else. If not, deselect all
objects (Ctrl+Shift-A) and press F6 to select the text area.
- Press F6 to deselect the text area and select
the next object in the stack (the door).
- Press Shift-F6 to add the next object to the selection.
Keep pressing Shift-F6 until everything has been selected except
the text area.
- Press Ctrl-G or Alt-T G to
group the selected objects.
- Press Shift-F6 to add the text area to the selection.
- Press Ctrl-G or Alt-T G to group
the selected objects.
- Use the menu mnemonic
Alt-T J C to centre the
objects.
- Press Ctrl-U or Alt-T U to
ungroup the objects. The image should now look like
Figure 11.125. Note that the house had to be grouped
and that group then grouped with the text area to
ensure that the individual house components maintained their
position relative to each other.

Figure 11.125: No Mouse Example--Text is Now Centred - If you want to save your image as a pgfpicture
environment, you will need to change the
anchor
settings to ensure that the text area in the LaTeX file remains centred. (Otherwise font differences may cause the text
to appear slightly off centre.) To do this:
- Ensure that the text area is selected.
- Use the menu mnemonic
Alt-E X F A H to
display the Horizontal Anchor Setting dialog box.
- If the drop-down list doesn't already have the focus,
press Alt-A.
- Press c or use the arrow keys to set the
horizontal setting to Centre.
- Press Enter or Shift-Enter to apply the settings and close the dialog box.
(Note that you don't need to do this if the Auto Adjust Anchor checkbox is selected in the TeX/LaTeX Settings dialog as it will automatically update the anchor when you align the text area.)
- Ensure that the text area is selected.
Footnotes
- ...skip.11.2
- Since there is only one object on the canvas, you could use any of the other select functions in the Navigate menu, but F6 is easier to type.