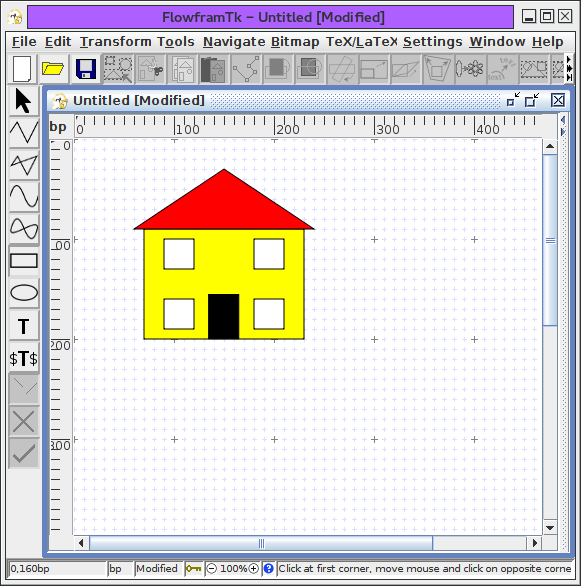
A House
This example illustrates the basics. The aim is to create a simple image of a house (shown in Figure 11.3).
- The main part of the house will be constructed from a
rectangle, so select the
rectangle tool.
- Let's make it a
yellow brick house, so use Settings->Styles to select
a yellow fill colour.
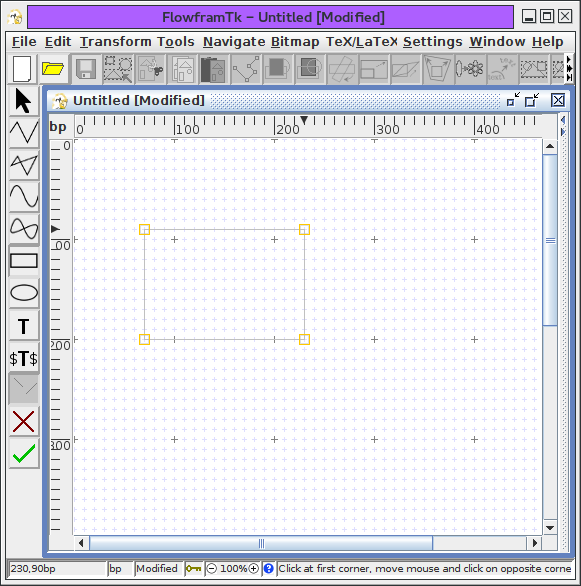
- Click where you want the bottom left hand corner to go,
and move (not drag) the mouse to the opposite corner
(Figure 11.1(a)).
Click to complete the rectangle. You will only see the fill colour once
the rectangle has been completed (Figure 11.1(b)).
(a) 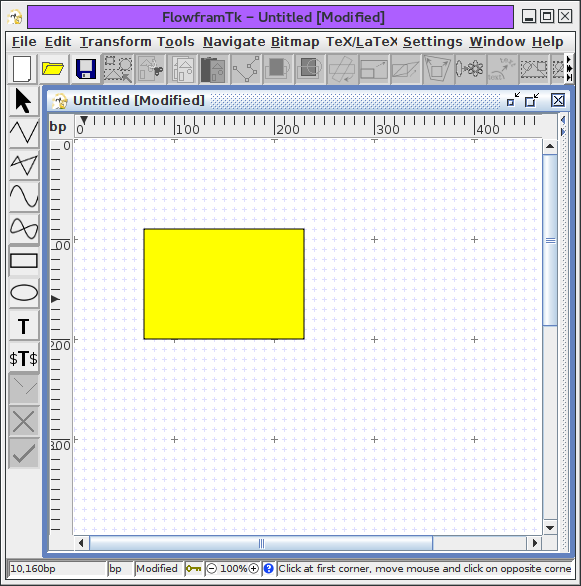
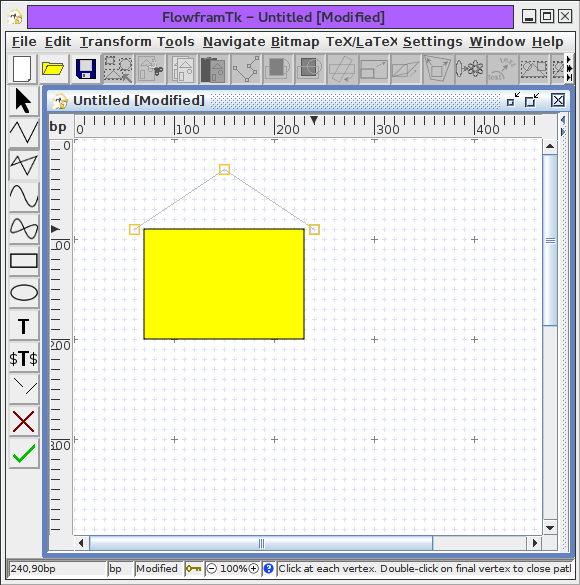
(b) Figure 11.1: House Example-- creating a rectangle: (a) rectangle under construction, (b) completed rectangle. - Next do the roof. Let's make the roof using a triangle.
For this you will need to use the
closed line path tool. Select this
tool using either the closed line button or
the Tools->Closed Line menu item.
- Let's make it a red roof, so use
Settings->Styles to select a red
fill colour.
- Click on each of the three vertices that form the
triangle (Figure 11.2(a)). To complete the path,
double click when you click on the third vertex, or click on the
third vertex and then press Enter, or use the finish path button.
You will only see the fill colour once the path has been
completed (Figure 11.2(b)).
(a) 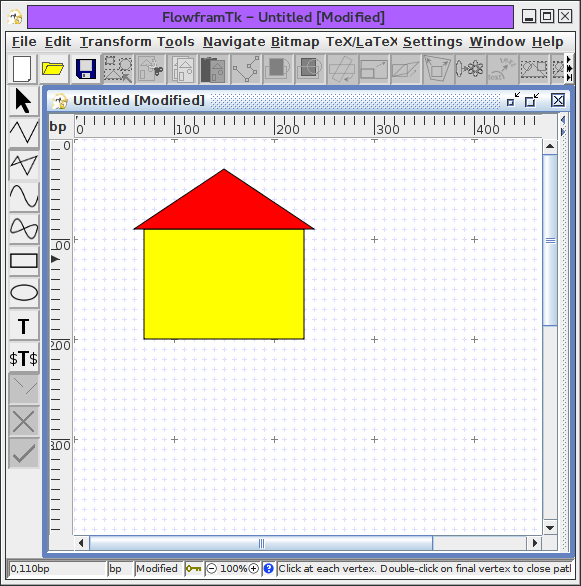
(b) Figure 11.2: House Example-- creating a triangle: (a) triangle under construction, (b) completed triangle. - Lastly comes the door and windows. These are all
rectangles, so follow the same procedure as above.
Let's make the door black and the windows white.
Remember to set the fill colour before creating the rectangles
(Figure 11.3).
 |
 |
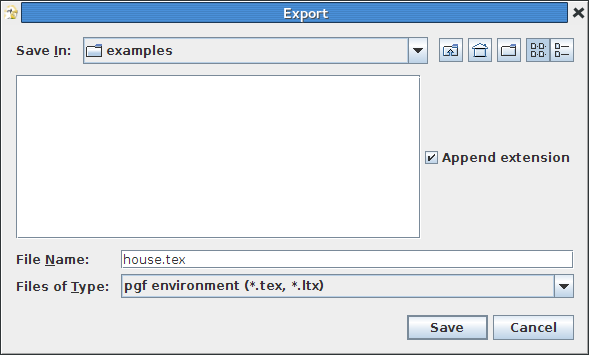
To include the image in a LaTeX document, select the File->Export menu item, and save it as a LaTeX file (click on the File of Type drop-down list and select pgf environment (*.tex, *.ltx), and name the file e.g. house.tex Figure 11.5.) Remember to use the pgf package:
\usepackage{pgf}
and to include the image later in the document use \input, e.g.:
\begin{figure}
\centering
\input{house}
\caption{A House}
\end{figure}
 |