Text
![]()
![]() Text areas can be created to annotate images. Each
text area has text that's displayed on the canvas but may
have alternative text to use when exporting to
a LaTeX file. (This includes the export functions that create a
temporary LaTeX file, such as the export to PDF function.) There
are two tools to create a text area: the text tool and the
maths tool. These affect the default alternative text for the new
text area in different ways. You can later edit the
alternative text, if the default isn't suitable.
Text areas can be created to annotate images. Each
text area has text that's displayed on the canvas but may
have alternative text to use when exporting to
a LaTeX file. (This includes the export functions that create a
temporary LaTeX file, such as the export to PDF function.) There
are two tools to create a text area: the text tool and the
maths tool. These affect the default alternative text for the new
text area in different ways. You can later edit the
alternative text, if the default isn't suitable.
![]() The maths tool (which can be selected either by clicking on the
maths tool button or by selecting Tools->Maths)
will automatically insert the maths-shift $ symbol at the start
and end of the alternative text. In addition, if the
Auto escape maths symbols setting is
on, certain characters will be replaced
by a command (or commands) in the alternative LaTeX text. If these
commands require a package, the mapping function will automatically
add the package to the image's early-preamble.
The mapping function will first search the early-preamble code to
check if the package is already present, but it doesn't check the
mid- or late-preamble code or the code in the
default preamble.
The maths tool (which can be selected either by clicking on the
maths tool button or by selecting Tools->Maths)
will automatically insert the maths-shift $ symbol at the start
and end of the alternative text. In addition, if the
Auto escape maths symbols setting is
on, certain characters will be replaced
by a command (or commands) in the alternative LaTeX text. If these
commands require a package, the mapping function will automatically
add the package to the image's early-preamble.
The mapping function will first search the early-preamble code to
check if the package is already present, but it doesn't check the
mid- or late-preamble code or the code in the
default preamble.
![]() The text tool (which can be selected either by clicking on the text
tool button or by selecting Tools->Text) will only
create an alternative LaTeX text if the
Auto escape text symbols setting is on
and there is an appropriate mapping. Again, if these LaTeX
commands require a package, the mapping function will automatically
add the package to the image's early-preamble.
The text tool (which can be selected either by clicking on the text
tool button or by selecting Tools->Text) will only
create an alternative LaTeX text if the
Auto escape text symbols setting is on
and there is an appropriate mapping. Again, if these LaTeX
commands require a package, the mapping function will automatically
add the package to the image's early-preamble.
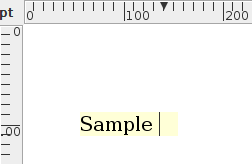
In either case, once you have selected the required tool, click with the primary mouse button at the position where you want the text to start. This will produce a shaded area with a cursor in which you can type no more than a single line of text (Figure 6.3). Clicking inside this shaded area will move the cursor around the text area under construction.
 |
When you want to complete a text area, press Enter (which will start a new text area on the line below) or click anywhere on the canvas outside of the current text area (which will start a new text area at the new location) or use the finish button or Tools->Finish. Selecting another tool whilst a text area is under construction will finish the current text area, unless you're switching between the text and maths tools. (If you do switch between the text and maths tools, the alternative LaTeX text is only created when you finish the text area, so the mappings applied will be governed by the tool currently selected when you completed the text area.)
Once a text area has been completed, the only way to edit it is via the edit text function. If you click the mouse on the location of a completed text area (while the text/maths tool is selected) you will simply create a new overlapping text area.
If your operating system supports drag and drop, you can also drag and drop text onto the canvas. If the drop point is inside the text area construction field, the dropped text will be inserted into the field (newline characters will be converted to spaces). If the drop point is outside the text area construction field, a new text area will be created for each line of dropped text. The mapping applied to the dropped text will be according to the currently selected text tool. If text is dropped onto the canvas in select mode, the text mappings (not maths mappings) will be applied. If a file is dropped onto the canvas in text- or maths-mode, the file path (or URI) will be added as a new text area.
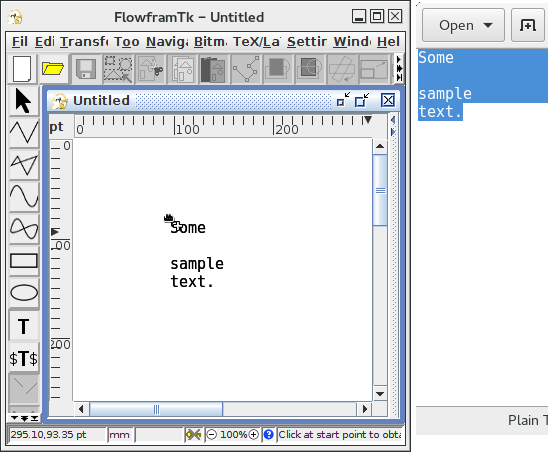
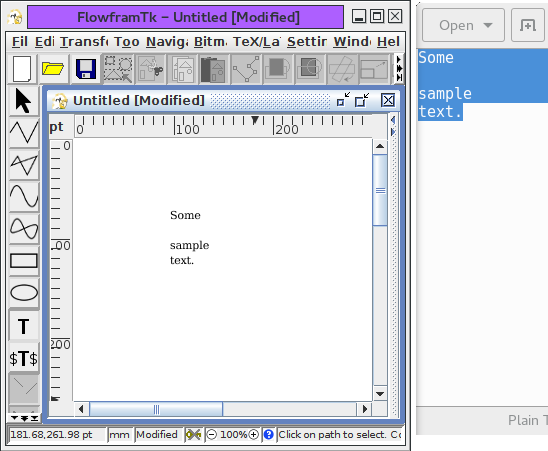
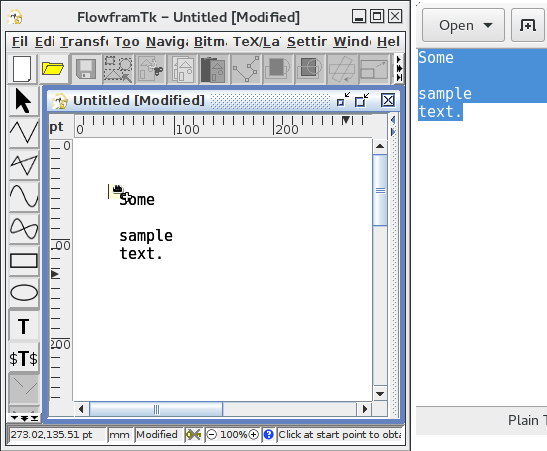
Figure 6.4 illustrates drag and drop to create new text areas. In Figure 6.4(a) I have four lines of text selected in a text editor. The second line simply contains two space characters (which aren't visible). These four lines of text are then dragged onto the canvas, Figure 6.4(b), and dropped. The drop location (the location of the pointer when the mouse button was released) is directly on the canvas, not on the text area construction field (which currently isn't visible). This creates three new text areas, Figure 6.4(c). The line solely consisting of white space hasn't created a text area but has contributed to the vertical offset of the following text area. In Figure 6.4(d), the same three lines of text are dragged onto the text area construction field and dropped at the cursor, Figure 6.4(e). This has inserted the dropped text into the text area construction field. The new line characters have been converted to spaces and the text area construction field is awaiting further input.


Whilst a text area is under construction, you can activate the text area popup menu, illustrated in Figure 6.5, with a menu-click (or use the context-menu key).
 |
The text area popup menu provides the following functions:
- Copy (Ctrl-C)
- Copies selected text to the clipboard.
- Cut (Ctrl-X)
- Cuts selected text to the clipboard.
- Paste (Ctrl-V)
- Pastes text from the clipboard.
- Select All (Ctrl-A)
- Selects all the text.
- Insert Symbol (Insert)
- Opens the Insert Symbol dialog box if you want to enter a symbol that doesn't appear on your keyboard.
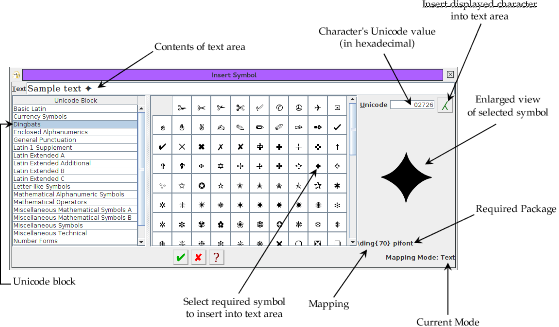
The Insert Symbol dialog box (see
Figure 6.6) has a field at the top which contains
the text currently in the text area. If you know the hexadecimal
Unicode value for the character you want to insert, you can type the
number into the Unicode box and press the
Select button
![]() to insert
it into the text area at the caret.
to insert
it into the text area at the caret.
On the right hand panel below the Unicode field there is an enlarged image of the selected character. If there's an associated mapping it will be displayed below the image (see Figure 6.6), but remember that this mapping may change if you switch between the text and maths tools before completing the text area.
Alternatively, you can use the button panels on the left to select the character you want to insert into the text field. Use the left hand list to display the require Unicode block and either click on the button with the required character on it to insert and display the symbol or hold the shift key down while you click to just display the symbol in the right hand panel without inserting it into the text field. The available Unicode blocks and symbols are govern by the language configuration setting in the Configure User Interface dialog.
 |
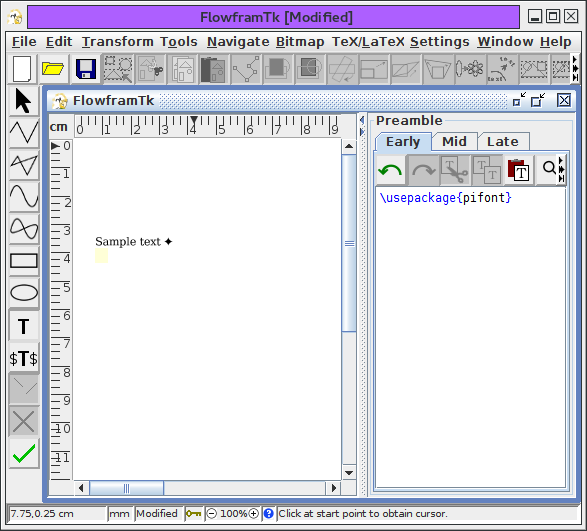
Once the text area has been finished (by clicking on the finish button or by pressing return or by switching to a non-text tool) any packages that are required by the mappings will be added to the early-preamble pane, as shown in Figure 6.7. Note that the canvas and the preamble panes have separate undo/redo managers so if you undo a new text area it will remove the new text area but won't remove the modification to the preamble. You will need to switch to the early-preamble panel and use its undo button or popup menu item.
 |
Note that the text in your pgfpicture environment may not look exactly the same as in FlowframTk due to font differences as well as the translation of LaTeX commands.
See also:
- Editing Text Areas
- Anchor
- TeX Settings Dialog
- Adding Commands to the Preamble
- Text Colour
- Text Style
- Converting a Text Area, Text-Path or Pattern to a Path
- Splitting Text Areas
- Export to Single-Paged Document
- Step-by-Step Example: An Artificial Neuron
- Step-by-Step Example: A House With No Mouse