Gallery: Acronyms (No Descriptions)
long-short acronym style with the long
glossary style. I’ve used the acronym option to create the
acronym glossary. Since I’m not using the main
glossary, there’s no point defining it, so I’ve used nomain
to suppress its creation. Obviously, if you want to adapt this
example so that it also uses the main glossary, you should
remove the nomain option.
Note that the extension package glossaries-extra has its own abbreviation mechanism that’s more flexible than the abbreviation handling provided by the base glossaries package. (See Abbreviation Styles.) To help disambiguate between them, the base package uses “acronym” and the extension package uses “abbreviation”.
The initial comment lines below are arara directives. You can remove them if you don’t use arara.
% arara: pdflatex
% arara: makeglossaries
% arara: pdflatex
\documentclass{report}

\usepackage[colorlinks]{hyperref}
\usepackage[nopostdot,toc,
 acronym,% create "acronym" glossary
 nomain% don't create "main" glossary
]{glossaries}

\makeglossaries

\setacronymstyle{long-short}

\loadglsentries[acronym]{example-glossaries-acronym}

\begin{document}

\chapter{Sample}

First use:

\forglsentries{\thislabel}{\gls{\thislabel}. }

Next use:

\forglsentries{\thislabel}{\gls{\thislabel}. }

\printglossary[type=acronym,style=long]

\end{document}
This document loads the hyperref package, which
creates hyperlinks from the entries in the document (referenced
using commands like \gls) to their definition in the
glossary. These hyperlinks are displayed in red text. I’ve used
\forglsentries for this example to iterate over all the defined
entries. In practice, you would typically just use commands like
\gls{label} in the text. For example:
Here is a reference to the term \gls{lid}.
The entries have all been defined in the file
example-glossaries-acronym.tex,
which you should find installed in the same location as the
glossaries package (or in a sub-directory called
test-entries). The entry definitions look like this:
\newacronym[type=\glsdefaulttype]{lid}{LID}{lorem ipsum dolor}

\newacronym[type=\glsdefaulttype]{stc}{STC}{sit amet consectetuer}

\newacronym[type=\glsdefaulttype]{aeu}{AEU}{adipiscing elit ut}

\newacronym[type=\glsdefaulttype]{pev}{PEV}{purus elit vestibulum}
Note that I’ve used type=\glsdefaulttype to allow for
situations where I might want to load the entries into a different
glossary. (For example, I may want to have multiple lists of
acronyms for different subject areas.) The target glossary is
specified in the optional argument of \loadglsentries.
If you don’t use arara, you need to run the following commands:
pdflatex acronym-nodesc
makeglossaries acronym-nodesc
pdflatex acronym-nodesc
(See Incorporating makeglossaries or makeglossaries-lite or bib2gls into the document build.)
I’ve used the toc option to add the glossary to the
table of contents. I’ve also used the nopostdot option
to remove the terminating full stop that is placed by default after
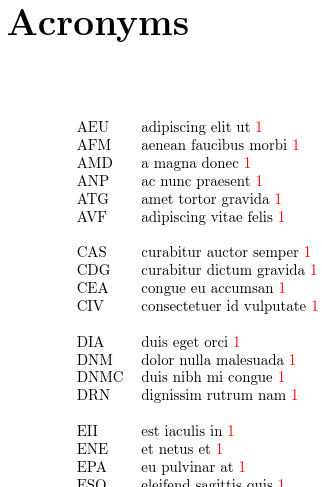
the description. The entries all have a “1” after the description.
This is the page number on which the entry was referenced. In this
sample document all the entries were referenced on page 1. If you don’t want these numbers you can use the nonumberlist option.
Download: PDF (38.12K), source code (547B), sample glossary definitions (2.83K).