Dickimaw Books - Gallery (All Predefined Glossary Styles)
This is a list of all the styles provided by the glossaries package and the glossaries-extra extension package. You can download the test file used to generate the documents below for just the base package, not including the newtree* and mcoltree*
which have their own test files.
Some of the glossaries-extra
examples use different test files.
In general, it’s best to prevent unnecessary packages from being
loaded, so I recommend you use nolong and
nosuper, at the very least, if you don’t require
the “long” or “super” styles.
The following files containing test entries are used in the examples: example-glossaries-brief.tex, example-glossaries-symbols.tex, example-glossaries-childnoname.tex, example-glossaries-childmultipar.tex, example-glossaries-parent.tex, example-glossaries-multipar.tex or example-glossaries-user.tex. These are all provided with the glossaries package. If you have the glossaries package installed, they should already be on your path. If you get any undefined control sequence or undefined style errors, then you probably need to update your version of glossaries (or glossaries-extra, where appropriate). You can click on the sample images below to view the PDF.
The bookindex, longextra,
topic
and
table
styles
require the glossaries-extra
extension package. The bib2gls examples in those
sections use entries defined in sample .bib files provided by the
glossaries-extra package and the
testidx-glossaries package.
The number 1 appearing in red after
the description indicates the position of the location (number)
list. The locations are all page 1 in these examples, as the
entries were all indexed on the first page of the sample document.
In general, the location list will typically contain a
comma-separated list of page numbers or number ranges. The number
list can be suppressed using the nonumberlist option.
(The number appears in red because the hyperref package has been loaded with internal
hyperlinks set to that colour.)
Package options that affect the appearance of predefined styles are listed in section 2.3 Glossary Appearance Options of the glossaries user manual.
The glossary is typically divided into groups: symbols, numbers and
then each letter group. In the case of the letter groups, the
identifying group is given by the initial letter of the sort
key. Most of the styles provide a visual separation between the
letter groups. This may be either just a vertical gap or a group
heading. If your glossary hasn’t been sorted alphabetically,
then don’t have a visual indicator between groups, as the grouping
no longer makes sense. Most of the basic predefined styles allow you
to suppress the vertical gap between groups with the
nogroupskip option.
Note that some styles use the post description hook
\glspostdescription. This displays a full stop and adjusts
the space factor if nopostdot=false and does nothing if
nopostdot=true. The hook can be suppressed on an individual
basis by using \nopostdesc in the entry’s description. The glossaries-extra
package modifies \glspostdescription so that it first does
\glsxtrpostdescription, which allows further customization
according to the entry’s category. Version 1.02 of
glossaries-extra provides patches to all the predefined
styles that are missing \glspostdescription through the
glossaries-extra-stylemods package. For example, to patch
the styles in the glossary-longbooktabs package:
\usepackage{glossaries-extra}
\usepackage{glossary-longbooktabs}
\usepackage{glossaries-extra-stylemods}
or, more simply:
\usepackage[stylemods=longbooktabs]{glossaries-extra}
For other examples of glossary styles, see the main gallery.
glossary-tree
The glossary-tree package is automatically loaded by the glossaries package unless you have used thenotree or nostyles options. If you have short
descriptions, you might want to consider one of the mcol styles that wrap the tree styles in the
multicols environment. Alternatively, the bookindex style can be used if no descriptions
are required.
tree* 🔗
The tree* style is new to glossaries
version 4.59 (but make sure you have the corrected v4.6) and is more flexible
than the older styles provided by
the glossary-tree package, listed below.
Unlike the older styles, which have user-level commands that may be
redefined to adjust the style, the tree* is mostly adjusted
via a = interface.
For example:
\GlsTreeSetup{
 group-headings,
 name-style={name symbol}
}
Alternatively:
\setupglossaries{
 style-options =
  {
    tree* =
     {
       group-headings,
       name-style={name symbol}
     }
  }
}
The test files for tree* use \makenoidxglossaries and
\printnoidxglossary which means they only require two
LaTeX calls to create the completed document. However, you will not
only need to ensure that you have glossaries v4.6+
installed, but will also need datatool v3.0+.
Note that datatool v3.0+ has localisation
support, which needs to be installed separately. At the time of
writing, there is only limited support. Only the
datatool language support
(not the region support)
is applicable to \printnoidxglossary
(see datatool-english).
The test document doesn't specify any language support, so sorting
is mostly by character code (first converting to lowercase to ensure
a case-insensitive order).
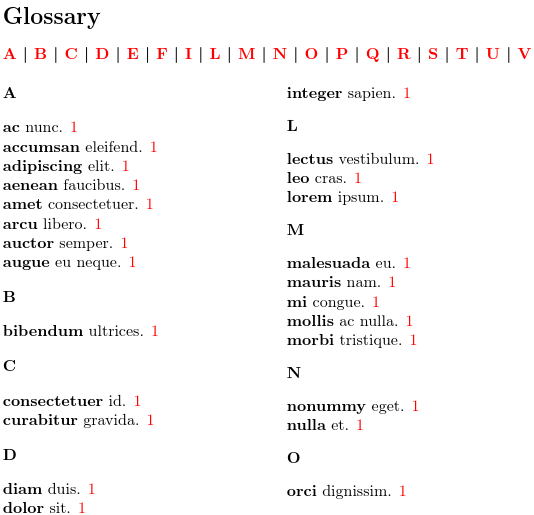
tree* style: default settings 🔗
The tree* style is designed for hierarchical
glossaries, which can be demonstrated with the
example-glossaries-parent.tex
file:
\documentclass{article}
\usepackage[colorlinks]{hyperref}
\usepackage[style=tree*]{glossaries}
\makenoidxglossaries
\loadglsentries{example-glossaries-parent}
\glsaddall
\begin{document}
\printnoidxglossary
\end{document}
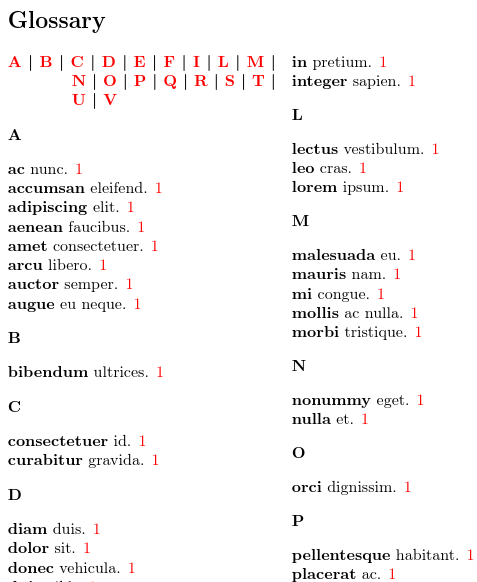
The thumbnail image below is truncated at the end of the “N” letter group. Click on the image to view the PDF of the complete document.
The names are shown in bold and each hierarchical level is indented. This set of test entries don’t have symbols, but if they did, the symbol would appear in parentheses after the name and before the description.
This looks very similar to the older tree
style. The default gap between letter groups (the “group skip”) is
slightly shorter with the tree*
than with the tree style.
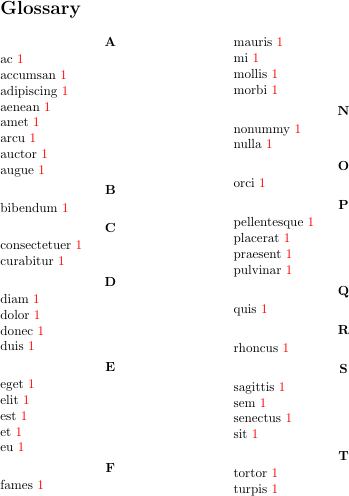
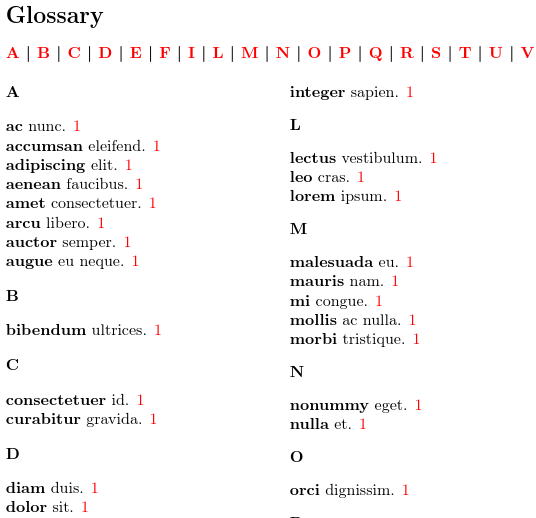
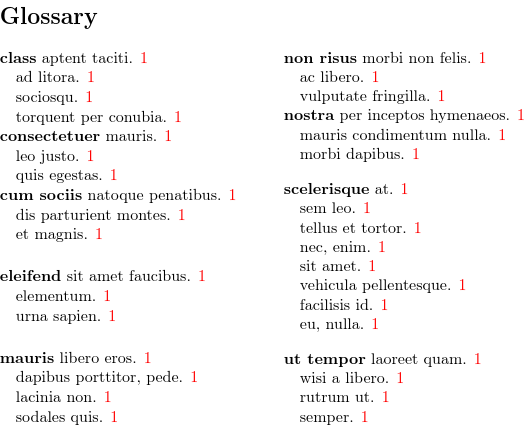
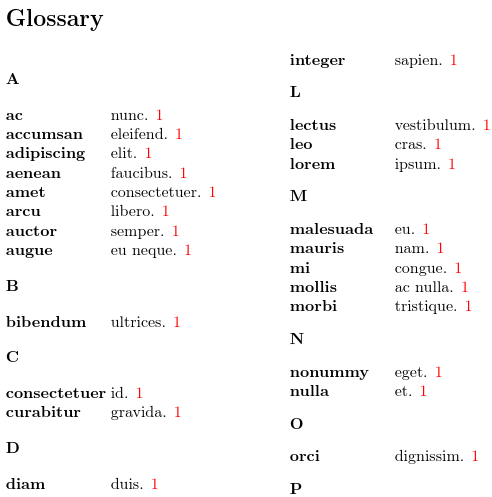
tree* style: letter group headings 🔗
The group-headings boolean option will show header
groups:
\GlsTreeSetup{group-headings}
This now has letter groups headings (A,
C and N), flush left and in bold.
This looks very similar to the
treegroup style, but the
vertical gap between the heading and the entry following it is smaller
with the tree* style.
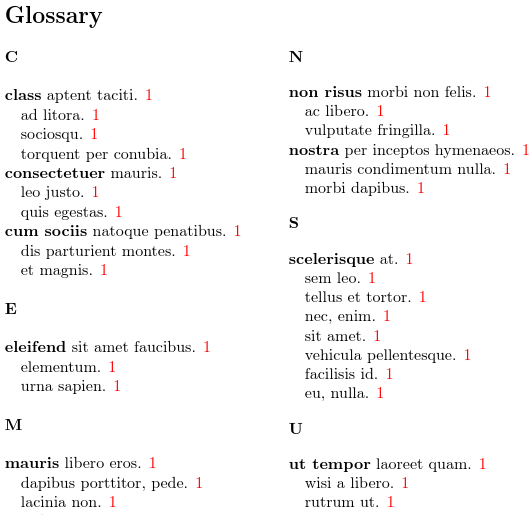
tree* style: sub-groups 🔗
The tree* style also supports sub-groups,
which is only available with bib2gls
and the group-level resource option.
This example will require glossaries-extra
(and glossaries v4.6):
\documentclass{article}
\usepackage[colorlinks]{hyperref}
\usepackage[style=tree*,nostyles,stylemods={tree},record]{glossaries-extra}
\BibGlsOptions{group}
\GlsXtrLoadResources[
 src={example-glossaries-parent},
 selection=all,
 group-level=all
]
\GlsTreeSetup{
 group-headings
}
\begin{document}
\printunsrtglossary
\end{document}
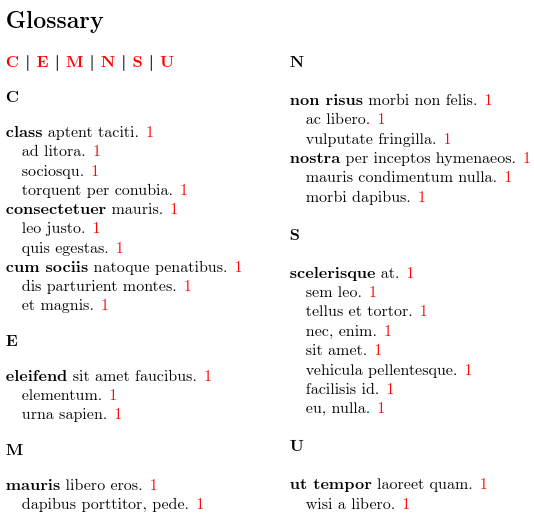
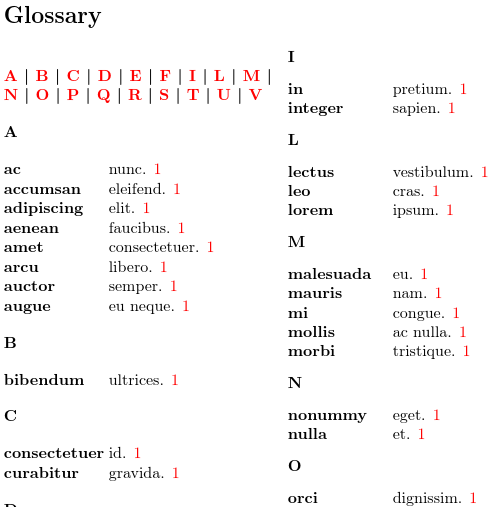
tree* style: hyper-navigation strip 🔗
The hyper-nav option can be combined with the
group-headings option from the
earlier groups example to add a
navigation strip at the start of the glossary with hyperlinks to
each group.
\GlsTreeSetup{
 group-headings,
 hyper-nav
}
This requires an extra LaTeX run to get the document up-to-date.
The thumbnail image below is again truncated at the end of the “N” letter group, but the navigation strip shows all the letter groups included in the glossary.
This looks very similar to the
treehypergroup
style.
tree* style: names and symbols 🔗
You may instead prefer PDF bookmarks to help navigate around a
large glossary. This is best done with the toc option:
\setupglossaries{
 toc,
 style-options =
  {
    tree* =
     {
       group-headings,
       bookmark-groups
     }
  }
}
Again, this requires an extra LaTeX run to get the document up-to-date.
The glossary is as for the earlier example with the
group-headings setting on, but now there are PDF
bookmarks.
The exact style of the bookmarks varies according to the PDF viewer, but most have a tree-like format with collapsible elements.
tree* style: names and symbols 🔗
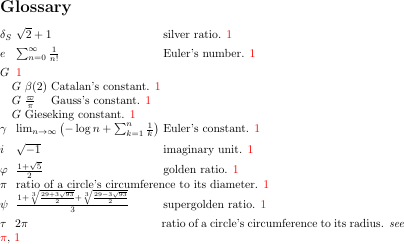
The example-glossaries-parent.tex file
used in the above examples doesn’t have any symbols.
The example-glossaries-user.tex file,
new to glossaries v4.59,
has hierarchical entries with symbols. The name key is
set to the notation representing a mathematical constant,
such as \(\delta_S\) for the silver ratio, and the symbol key is set
to the formula, such as \(\sqrt{2}+1\). In some cases, such as for
pi \(\pi\), the symbol key isn’t set.
\documentclass{article}
\usepackage[colorlinks]{hyperref}
\usepackage[style=tree*]{glossaries}
\makenoidxglossaries
\loadglsentries{example-glossaries-constants}
\glsaddall
\begin{document}
\printnoidxglossary
\end{document}
The default style governing the name and symbol is
name-style={name (symbol)}, which means that the name
comes first, followed by (if set) the symbol in parentheses.
This looks a bit odd for the psi \(\psi\) supergolden ratio, which
has quite a tall symbol.
tree* style: fixed width name and symbol 🔗
The default setting is for the name and symbol to simply take up
their natural width, but it’s possible to put them in fixed width
boxes. You can either set separate widths for the name and symbol or
a combined width. You can specify an explicit dimension, such as
name-width=2.5cm, or you can specify the widest name or
symbol and indicate that the corresponding box should be the width
of that name or symbol.
This can be done by first typesetting the glossary with the
default natural width setting and then inspecting the PDF to
visually determine which name and symbol is the widest.
Alternatively, if you are using \printnoidxglossary
or \printunsrtglossary, you can make use of the
applicable loop item hook to perform the calculations.
With glossaries v4.59+, the applicable
hook with \printnoidxglossary is
\glsnoidxitemhook:
\renewcommand{\glsnoidxitemhook}[2]{%
 \GlsTreeUpdateWidestNameOrSymbol[#1]{#2}%
}
The applicable hook with \printunsrtglossary is
\printunsrtglossaryentryprocesshook:
\renewcommand{\printunsrtglossaryentryprocesshook}[1]{%
 \GlsTreeUpdateWidestNameOrSymbol{#1}%
}
There is no convenient hook for use with
\printglossary, as the code for typesetting the
glossary is simply input from a file that’s created by makeindex or
xindy. You could iterate over all entries with \forglsentries
before \printglossary but that may include entries that
have been defined but not indexed, which could affect the
calculations. The other possibility is to use the pre-item
hook \glossaries_tree_pre_item:nnn to make the
calculations while the glossary is being typeset, save the result in
the aux file and fetch it on the next run, but that complicates the
document build.
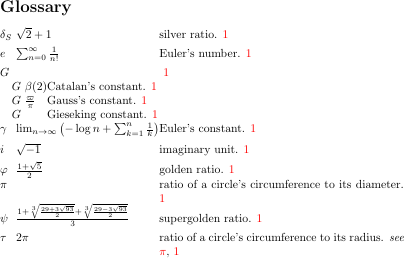
The width settings should now be set to “widest”. The parentheses around the symbol can be removed by changing the name style:
\GlsTreeSetup{
  name-width=widest,
  symbol-width=widest,
  sub-name-width=widest,
  sub-symbol-width=widest,
  name-style={name symbol}
}
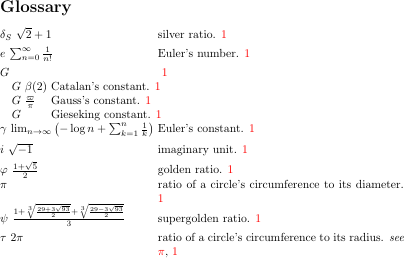
tree* style: aligning name, symbol and short descriptions 🔗
Note that although the name and symbol are set in separate fixed width boxes, which aligns them according to the hierarchical level, the description still follows on normally from the name and (if set) symbol in the same paragraph. Since some entries don’t have a symbol, this means that the descriptions aren’t aligned. The description wraps around to the next line according to the normal paragraph behaviour.
You can additionally set a fixed width for the outer box that encompasses the name and symbol, and calculate the hanging indentation required to align the descriptions:
\GlsTreeSetup{
  name-width=widest,
  symbol-width=widest,
  sub-name-width=widest,
  sub-symbol-width=widest,
  name-style={name symbol},
  name-symbol-width=widest,
  sub-name-symbol-width=widest,
  hang-indent=calculated
}
tree* style: aligning short descriptions 🔗
If you don’t need to have the symbols aligned, but you still want the descriptions aligned, then you need a fixed width for the outer box but not for the inner name and symbol boxes. You still need to supply the widest name and symbol if you want the dimension to be calculated, but now it needs to the name and symbol for the entry where the combined width is wider than for any other entry for the same hierarchical level.
\renewcommand{\glsnoidxitemhook}[2]{%
 \GlsTreeUpdateWidestNameAndSymbol[#1]{#2}%
}

\GlsTreeSetup{
  name-symbol-width=widest,
  sub-name-symbol-width=widest,
  name-style={name symbol},
  hang-indent=calculated
}
Note that this will only align the top-level descriptions. The sub-levels will have a fixed width box for the name and symbol area but the hanging indentation for sub-levels will prevent them from being aligned if the description is long enough to line wrap. So this technique is only really designed for short child paragraphs or no child entries.
tree* style: omitting the name and symbol for child entries 🔗
Other variations include omitting the symbol
(name-style=name) or swapping the
name and symbol round (name-style={symbol name})
or omitting the child name and symbol. For example, the following
omits the symbol for top-level entries and omits both the name and
symbol for child entries. The subentrycounter option is
used to number level 1 entries:
\usepackage[style=tree*,subentrycounter]{glossaries}
\makenoidxglossaries
\loadglsentries{example-glossaries-constants}
\glsaddall

\GlsTreeSetup{
 name-style=name,
 child-name-style=omit
}
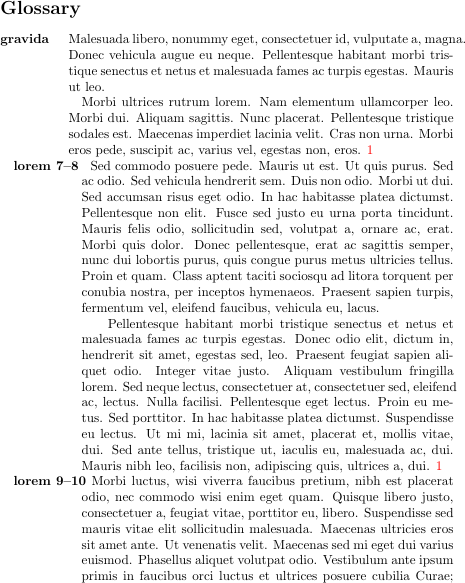
tree* style: multi-paragraph descriptions 🔗
The example-glossaries-childmultipar.tex file contains top-level and level 1 entries with long descriptions. The test document is now just:
\documentclass{article}
\usepackage[colorlinks]{hyperref}
\usepackage[style=tree*]{glossaries}
\makenoidxglossaries
\loadglsentries{example-glossaries-childmultipar}
\glsaddall
\begin{document}
\printnoidxglossary
\end{document}

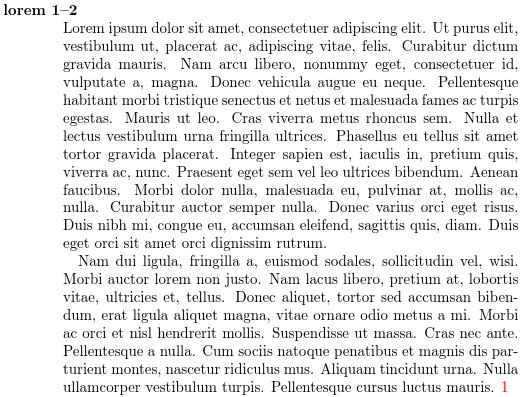
tree* style: setting hang-indent and par-indent 🔗
The tree* style is the only style provided by
glossary-tree.sty that works well with
multi-paragraph descriptions with its default settings.
If you change the hanging indentation, you will likely also need to change the paragraph indentation. For example:
\GlsTreeSetup{
  hang-indent=2em,
  par-indent=3em
}

tree* style: calculated hang-indent 🔗
The example-glossaries-childmultipar.tex
file doesn’t have any descriptions, so if you want a fixed width
box, you only need to calculate the widest name. If you are using
bib2gls and the name only contains text,
then you can use the set-widest resource option.
With \printnoidxglossary, you can use:
\ExplSyntaxOn
\renewcommand{\glsnoidxitemhook}[2]{
  \glossaries_tree_update_widest_name:nn
   { #1 }
   { \glsentryname { #2 } }
}
\ExplSyntaxOff
Alternatively:
\renewcommand{\glsnoidxitemhook}[2]{
 \ifcase#1
   \GlsTreeSetup{update-widest-name=\glsentryname{#2}}%
 \or
   \GlsTreeSetup{update-widest-sub-name=\glsentryname{#2}}%
 \or
   \GlsTreeSetup{update-widest-sub-sub-name=\glsentryname{#2}}%
 \fi
}
The hanging indentation can be calculated as with
the earlier example
in order to align the descriptions, but remember to
adjust the paragraph indentation as well.
\GlsTreeSetup{
  name-style=name,
  name-symbol-width=widest,
  hang-indent=calculated,
  par-indent={\hangindent+1em}
}
Note that the hanging indentation for the child entries is
calculated as times
plus the top-level hanging indent (where
is the hierarchical level and the offset is the
child-offset value).
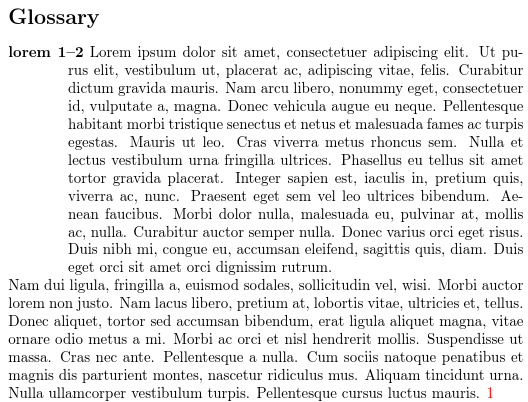
tree* style: paragraph break before description 🔗
If you want the description to start a new paragraph, remember
that the key=value interface doesn’t allow \par, but
you can instead use \glspar. The following starts a new
paragraph and suppresses the paragraph indentation at the start of
the description, but a horizontal space the width of the hanging
indentation is need to align the first line of the paragraph with
the remainder.
\documentclass{article}
\usepackage[colorlinks]{hyperref}
\usepackage[style=tree*]{glossaries}
\makenoidxglossaries
\loadglsentries{example-glossaries-childmultipar}
\glsaddall
\GlsTreeSetup{
  hang-indent=2em,
  par-indent=3em,
  pre-description={\glspar\noindent\hspace{\hangindent}}
}
\begin{document}
\printnoidxglossary
\end{document}

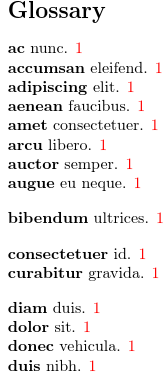
index 🔗
Theindex style is like a standard index except that
the entry name appears in bold (adjust by redefining
\glstreenamefmt) and the symbol, if present, is placed in
parentheses. A vertical gap appears between each letter group, so
use nogroupskip for documents where the entries haven’t
been sorted alphabetically. As with the standard
theindex environment, this only allows for up to three
levels (\item, \subitem and \subsubitem).
This has a similar look to the
list style
but it's more compact, without the excess spacing caused by the
description environment.
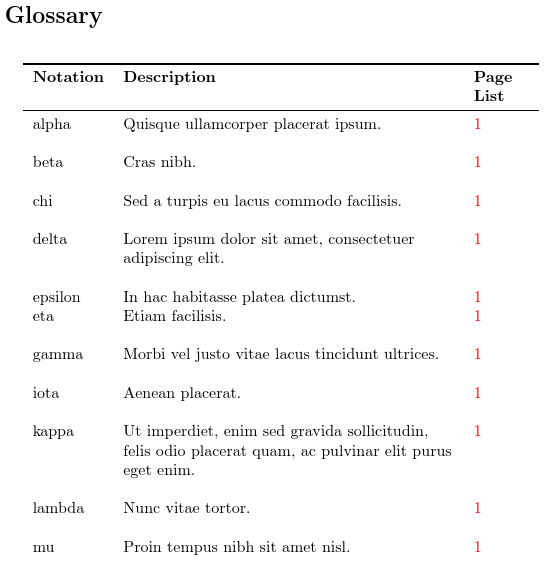
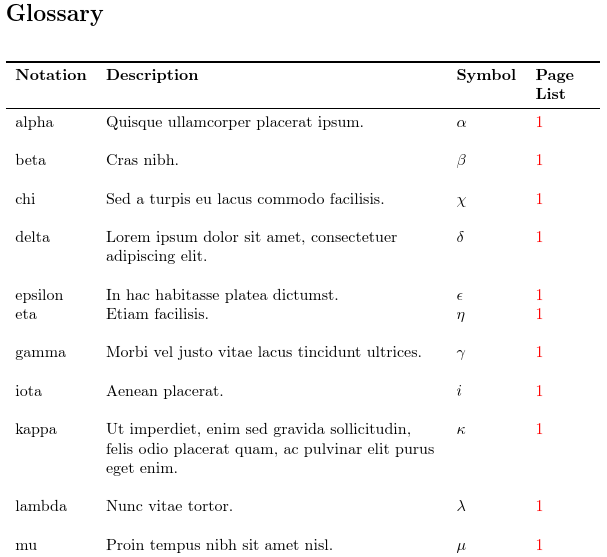
To illustrate the way this style displays symbols, the test file can
be modified to use
example-glossaries-symbols.tex instead of
example-glossaries-brief.tex. This will also require the
package option nopostdot as the symbol dummy entries
contain the required sentence terminators.
To illustrate the way this style displays child entries, the test file can be modified to use example-glossaries-parent.tex.
The child names are shown in bold, just like the top-level names, but each hierarchical level is indented. This set of test entries don’t have symbols, but if they did, the child symbol would appear in parentheses before the description, just like the top-level symbols.
The left indentation for the top-level entries is created with
\glstreeitem, which just uses \@idxitem
(if defined) by default, which is used by
standard indexes. The indentation is actually a hanging indent,
created with \hangindent, rather than a paragraph
indent. This means that the name is flush with the left margin, but
subsequent lines in the same paragraph will all be indented.
Level 1 sub-entries start with \glstreesubitem, which
behaves like \subitem, used in standard indexes. This
does the same hanging indent as \glstreeitem, followed
by a horizontal space of 20pt. This means that if a child entry has
a long description, then subsequent lines of the description will
simply have the same level of indentation as the top-level.
Level 2 sub-entries start with a similar command
\glstreesubsubitem. Any deeper levels will be treated
as a level 2.
Note that the index style isn’t well-suited for
multi-paragraph descriptions. To illustrate this, the test
file can be modified to use
example-glossaries-multipar.tex.
Only the first paragraph of the description for each entry obeys the hanging indent. The subsequent paragraphs have lost the left indent.
This can be overcome for multi-paragraph descriptions in top-level entries with glossaries v4.26 and the following adjustment:
\renewcommand{\glstreeitem}{%
 \parindent0pt\par\hangindent40pt
 \everypar{\parindent50pt\hangindent40pt}}
This now produces:

Now the second paragraph has the left indent and has the
additional paragraph indentation for the first line of the
paragraph. (Child entries will need to have \glstreesubitem
and \glstreesubsubitem redefined, as appropriate.)
This provides a convenient alternative to the list style. An alternative to
altlist can be achieved
by adding:
\renewcommand{\glstreepredesc}{\par
  \glstreeitem\parindent\hangindent}
This has the name in bold (flush with the left margin), and the first paragraph starting with a hanging indent on the next line. Both paragraphs are indented as before.
A better method with glossaries v4.6+
is to use the tree* style instead.
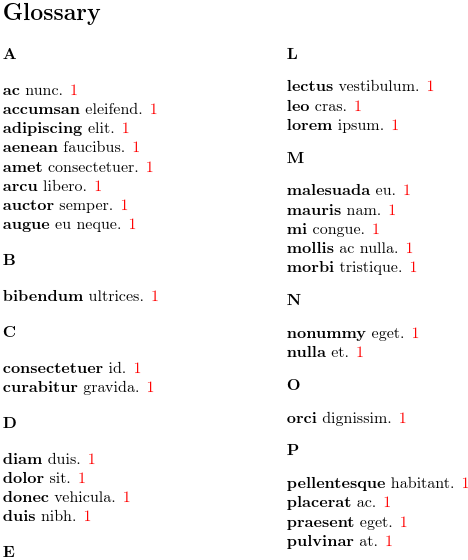
indexgroup 🔗
Theindexgroup style is like the index group
style but it inserts group headers. This style is not
appropriate for documents where the entries haven’t been sorted
alphabetically.
The group heading is followed by \indexspace, which
is also what \glsgroupskip does unless the
nogroupskip setting is used. This means that with the
default setting, there will be an equal vertical space above and
below the group headings (except for the first one), but if you use
\glsgroupskip you will have no space before the
heading, but still have space after it.
With the glossaries-extra-stylemods
package, the vertical space is added with \glstreegroupheaderskip
which prevents a page break.
indexhypergroup 🔗
Theindexhypergroup style is like the
indexgroup group
style but it also has a navigation line at the start of the list.
This is only of any use if your document has hyperlinks enabled.
tree 🔗
Thetree style is like the index style except that
there’s no maximum depth for sub-levels (to within the limits of the
line width, naturally). Note that the more sub-levels that you have,
the more confusing it can be to the reader, but may be useful for
taxonomies. As with the
index style, a vertical gap is inserted between the letter
groups so use nogroupskip if your document doesn’t sort the
entries alphabetically.
With no sub-entries or long lines, this appears the same as the index style.
Unlike the index style, the
tree style sets both the paragraph indent and hanging
indent to 0pt.
To illustrate the way this style displays child entries, the test file can be modified to use example-glossaries-parent.tex.

With no long lines, this appears the same as the index style.
Sub entries have the paragraph indent and hanging indent set to
n times the value of \glstreeindent (10pt by
default), where n is the hierarchical level.
treegroup 🔗
Thetreegroup style is like the tree
style but it inserts group headers. This style is not
appropriate for documents where the entries haven’t been sorted
alphabetically.
With no long lines, this appears the same as the indexgroup style.
As with the indexgroup
style, \indexspace is placed after the group title.
With the glossaries-extra-stylemods
package, the vertical space is added with \glstreegroupheaderskip
which prevents a page break.
treehypergroup 🔗
Thetreehypergroup style is like the
treegroup
style but it also has a navigation line at the start of the list.
This is only of any use if your document has hyperlinks enabled.

With no long lines, this appears the same as the indexhypergroup style.
treenoname 🔗
Thetreenoname style is like the tree style except that,
as it’s designed for homographs, the sub-entries don’t have the name
displayed. If you don’t have any sub-entries, it appears the same as
the tree style, so for the sample below I switched the
dummy entry file from example-glossaries-brief.tex to
example-glossaries-childnoname.tex. As with the
tree style, a vertical gap is inserted between the letter
groups, but even with the nogroupskip option, this style is
still inappropriate for entries that haven’t been sorted
alphabetically as sub-entries may become separated
from their parent entry. You may want to use this style with the
subentrycounter option, which will automatically number
the sub-entries. The following doesn’t do this, so the child entries
simply show the description followed by the location list.
treenonamegroup 🔗
Thetreenonamegroup style is like the
treenoname
style but it inserts group headers. As with the treenoname
example, the sample below uses the
example-glossaries-childnoname.tex test file.
treenonamehypergroup 🔗
Thetreenonamehypergroup style is like the
treenonamegroup
style but it also has a navigation line at the start of the list.
This is only of any use if your document has hyperlinks enabled. As
with the treenoname example, the sample below uses the
example-glossaries-childnoname.tex test file.
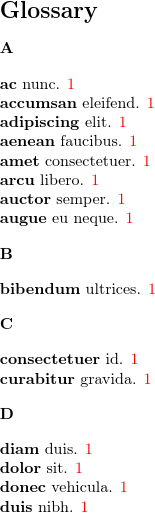
alttree 🔗
Thealttree style is like the tree style except
that the width available for the entry names must be supplied by the
user. This can be a useful alternative to the tabular-like styles, such
as the long style.
The widest name can be specified with the command:
\glssetwidest[level]{widest name}
where widest name is the widest entry name. For example,
for the test file example-glossaries-brief.tex:
\glssetwidest{consectetuer}
The optional argument can be used to set the name width for
sub-levels. (The default value is 0 for the top-level.)
If you forget to set the widest entry, the description
will overlap the name. If no widest name has been specified for a
particular sub-level, then the top-level name is used.
The drawback with this is that it means you need to know the widest name or work it out programmatically by looping over all entries. As from v4.22, the glossary-tree package provides
\glsfindwidesttoplevelname[glossary list]which iterates over all the glossaries listed in the optional argument and finds the widest name over all entries that don’t have a parent. If the optional argument is omitted, the list contains all defined glossaries. For example:
\glsfindwidesttoplevelname
\setglossarystyle{alttree}
\printglossaries
This ensures that all the glossaries have the same width available
for the name. Alternatively, you can redefine
\glossarypreamble to compute the widest entry just for the
current glossary. For example:
\renewcommand{\glossarypreamble}{\glsfindwidesttoplevelname[\currentglossary]}
\setglossarystyle{alttree}
\printglossaries
As with the
tree style, a
vertical gap is inserted between letter groups, so use the
nogroupskip option if your entries aren’t sorted
alphabetically.
This has the appearance of a two column table with the
name in the first “column”, without actually
using a tabular-like environment. The effect is achieved by setting
the hanging indent and paragraph indent to the width of the widest
name and then starting the paragraph with a right-justified
zero-width box that contains a left-justified box of the indent
width, which contains the name. This shifts the name leftwards into
the indent space, allowing the remaining content (symbol, if
present, description and number list) to be formatted in the
indented paragraph, which can be broken across a page (unlike a
paragraph cell in a longtable environment).
As with the index
and tree styles, the hanging
indent is reset at the end of the paragraph.
The location of the zero-width box is shown in red below:
If a zero-width box contains left-justified text, the text will overlap the content to the right.
If a zero-width box contains right-justified text, the text will overlap the content to the left. In this case, the content on the left is the empty space caused by the indent.
This would make the name right-justified, which is why a left-justified inner box of the same width as the indent is needed.
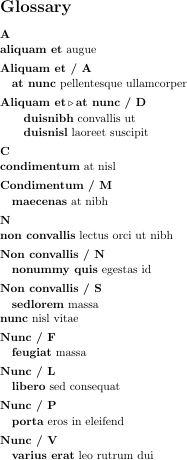
If the widest name for any sub-entry level hasn’t been specified, the child names are given the same width box as the top-level names. This can lead to strange results. In the sample below I’ve used the example-glossaries-parent.tex file with:
\renewcommand{\glossarypreamble}{%
 \glsfindwidesttoplevelname[\currentglossary]%
}
Since this only sets the widest name for the top-level, the second
sub-level isn’t wide enough for “nonummy quis” (so it collides with
its description) and the third level has excess space.

This can be corrected with:
\glssetwidest[1]{nonummy quis}
\glssetwidest[2]{duisnibh}
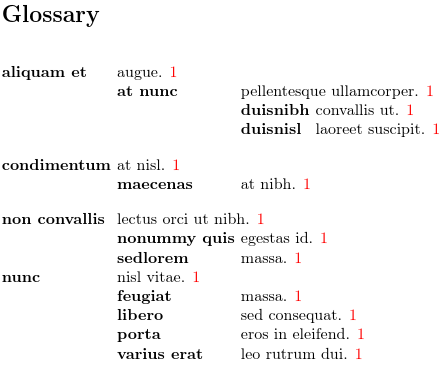
This gives a tabbing effect, where each sub-level has been tabbed
further to the right, without actually using the
tabbing environment.
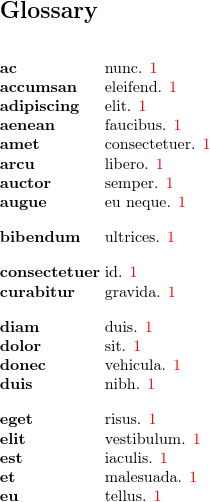
alttreegroup 🔗
Thealttreegroup style is like the
alttree
style but it inserts group headers. This style is not
appropriate for documents where the entries haven’t been sorted
alphabetically. As with the alttree style, you need to
indicate the widest entry name.
As with the treegroup,
each heading is followed by \indexspace, regardless of
the nogroupskip setting (which only affects the space
before the heading).
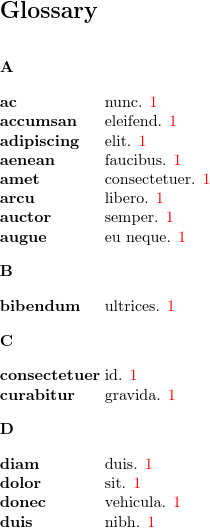
alttreehypergroup 🔗
Thealttreehypergroup style is like the
alttreegroup
style but it also has a navigation line at the start of the list.
This is only of any use if your document has hyperlinks enabled.

The navigation line is as the
treehypergroup style.
glossary-mcols
The glossary-mcols package must be explicitly loaded using:
\usepackage{glossary-mcols}
This automatically loads the multicol package and the
glossary-tree package (if not already loaded). The styles
provided by this package are analogous to the tree styles above but the multicols
environment is also used.
Except for the new mcoltree* style, the number of columns is given by
\glsmcols, which defaults to 2.
For example, to have a
three column glossary:
\renewcommand{\glsmcols}{3}
\setglossarystyle{mcolindex}
These styles essentially “inherit” from the
corresponding glossary-tree style, so they
use the same formatting commands. The adjustments are mostly limited
to redefining the theglossary environment.
Take care not to confuse this with the columns within the
tabular-like styles, such as the long style.
If you don’t want the description displayed, you may prefer the
bookindex style provided with the
glossaries-extra extension package.
Alternatively use the mcoltree* style with the tree*
boolean omit-description option.
mcoltree* 🔗
The mcoltree* style is new to glossaries
version 4.59 (but make sure you have the corrected v4.6) and is more flexible than the older styles provided by
the glossary-mcols package, listed below.
It’s based on the tree* style, and essentially just
wraps the tree* style glossary code inside
either the multicols or multicols*
environment. It will therefore reflect the current
tree* settings. Options that are specific to
mcoltree* need to be set with the mcoltree*
key within style-options. For example:
\setupglossaries{
 style-options =
  {
    mcoltree* =
     {
        columns=3
     },
    tree* =
     {
       group-headings,
       name-style={name symbol}
     }
  }
}
The following test document shows the default settings:
\documentclass{article}
\usepackage[colorlinks]{hyperref}
\usepackage{glossaries}
\usepackage{glossary-mcols}
\makenoidxglossaries
\loadglsentries{example-glossaries-brief}
\glsaddall
\begin{document}
\printnoidxglossary[style=mcoltree*]
\end{document}
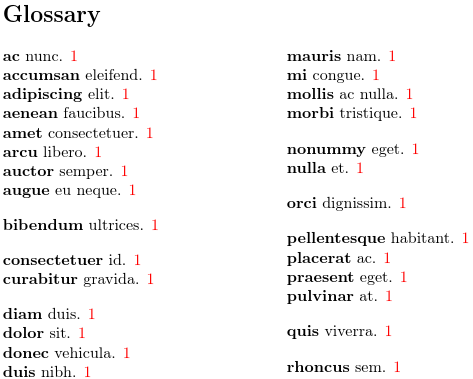
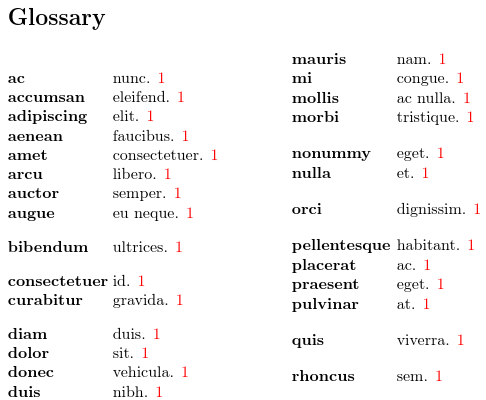
This has two columns showing the name and description. (The test
file doesn’t have any entries with the symbol key set.)
Letter group headings and PDF bookmarks can be added as
for the earlier tree* example.
The descriptions may be omitted and the bold font removed from the
name. The alignment for the letter group headings can also be
adjusted. The following settings produce a similar result to the
bookindex style.
\setupglossaries{
 toc,
 style-options =
  {
    tree* =
     {
       group-headings,
       bookmark-groups
       name-font={},
       omit-description,
       header-align=center,
     }
  }
}
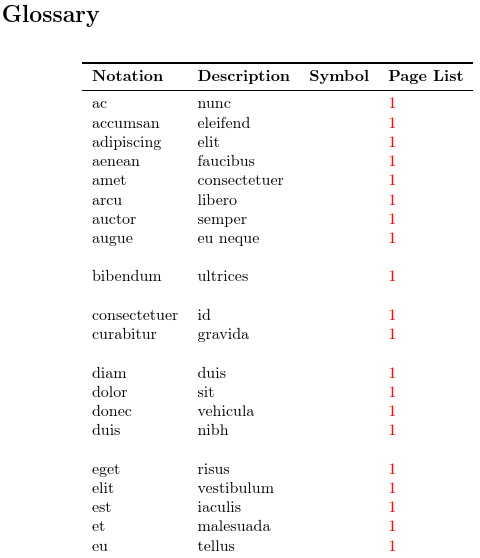
mcolindex 🔗
Themcolindex style is like the
index style but is
contained within a multicols environment. As with the
index style, a vertical gap is inserted between the letter
groups so use nogroupskip if your document doesn’t sort the
entries alphabetically.
The effect is similar to using the
index style in a two-column
page, except that the multicols environment balances
the columns to make them approximately the same length.
mcolindexgroup 🔗
Themcolindexgroup style is like the
indexgroup style but
contained within a multicols environment. As with the
indexgroup style, this style is inappropriate for entries
that haven’t been alphabetically sorted. (An alternative to this
style is the bookindex style provided with the
glossaries-extra extension package.)
The effect is similar to using the
indexgroup style in a two-column
page, except that the multicols environment balances
the columns to make them approximately the same length.
mcolindexhypergroup 🔗
Themcolindexhypergroup style is like the
indexhypergroup style but
contained within a multicols environment. As with the
indexhypergroup style, this style is inappropriate for
documents that don’t have hyperlinks enabled.
The effect is similar to using the
indexhypergroup style in a two-column
page, except that the multicols environment balances
the columns to make them approximately the same length.
Note that this style bunches up the navigation line at the start of
the first column (which is what you get if you put the
indexhypergroup style
in a multi-column page).
If you feel this is inappropriate, the next style
mcolindexspannav may look better.
mcolindexspannav 🔗
Themcolindexspannav style (new to v4.22) is like the
mcolindexhypergroup
style but the navigation line is placed
inside the optional argument of the multicols environment.
This allows it to span across the columns.
The effect is like the
mcolindexgroup style with
the navigation line spanning the line width below the section
header.
mcoltree 🔗
Themcoltree style is like the tree style but
contained within a multicols environment. As with the
tree style, a vertical gap is inserted between the letter
groups so use nogroupskip if your document doesn’t sort the
entries alphabetically.
The effect is similar to using the
tree style in a two-column
page, except that the multicols environment balances
the columns to make them approximately the same length.
mcoltreegroup 🔗
Themcoltreegroup style is like the
treegroup style but
contained within a multicols environment. As with the
treegroup style, this style isn’t suitable for documents
that don’t sort the entries alphabetically.
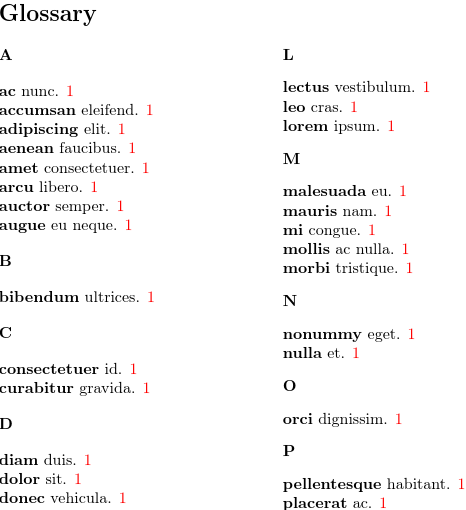
The effect is similar to using the
treegroup style in a two-column
page, except that the multicols environment balances
the columns to make them approximately the same length.
mcoltreehypergroup 🔗
Themcoltreehypergroup style is like the
treehypergroup style but
contained within a multicols environment. As with the
treehypergroup style, this style is inappropriate for
documents that don’t have hyperlinks enabled.

The effect is similar to using the
treehypergroup style in a two-column
page, except that the multicols environment balances
the columns to make them approximately the same length.
Note that this style bunches up the navigation line at the start of
the first column. If you feel this is inappropriate, the next style
mcoltreespannav may look better.
mcoltreespannav 🔗
Themcoltreespannav style (new to v4.22) is like the
mcoltreehypergroup
style but the navigation line is placed
inside the optional argument of the multicols environment.
This allows it to span across the columns.
The effect is like the
mcoltreegroup style with
the navigation line spanning the line width below the section
header.
mcoltreenoname 🔗
Themcoltreenoname style is like the treenoname style but
contained within a multicols environment. As with the
treenoname example above, the sample below uses the
example-glossaries-childnoname.tex test file.
The effect is similar to using the
treenoname style in a two-column
page, except that the multicols environment balances
the columns to make them approximately the same length.
mcoltreenonamegroup 🔗
Themcoltreenonamegroup style is like the treenonamegroup style but
contained within a multicols environment. As with the
treenonamegroup example above, the sample below uses the
example-glossaries-childnoname.tex test file.
The effect is similar to using the
treenonamegroup style in a two-column
page, except that the multicols environment balances
the columns to make them approximately the same length.
mcoltreenonamehypergroup 🔗
Themcoltreenonamehypergroup style is like the treenonamehypergroup style but
contained within a multicols environment. As with the
treenonamegroup example above, the sample below uses the
example-glossaries-childnoname.tex test file.
The effect is similar to using the
treenonamehypergroup style in a two-column
page, except that the multicols environment balances
the columns to make them approximately the same length.
Note that this style bunches up the navigation line at the start of
the first column (which isn’t particularly obvious in this example).
If you feel this is inappropriate, the next style
mcoltreenonamespannav may look better.
mcoltreenonamespannav 🔗
Themcoltreenonamespannav style (new to v4.22) is like the
mcoltreenonamehypergroup
style but the navigation line is placed
inside the optional argument of the multicols environment.
This allows it to span across the columns.
The effect is like the
mcoltreenonamegroup style with
the navigation line spanning the line width below the section
header.
mcolalttree 🔗
Themcolalttree style is like the alttree style but
contained within a multicols environment. As with the
alttree style, the widest name must be specified using
\glssetwidest or \glsfindwidesttoplevelname, as
described above for the alttree style.
The effect is similar to using the
alttree style in a two-column
page, except that the multicols environment balances
the columns to make them approximately the same length.
Note that the columns are slightly unbalanced at the top, with
the first line of the first column lower than the first line of the
second column. If you are using the
glossaries-extra package, this effect is corrected by the
glossaries-extra-stylemods package, which
shifts the initialisation code outside of the multicols
environment.
mcolalttreegroup 🔗
Themcolalttreegroup style is like the alttreegroup style but
contained within a multicols environment. Again, the widest
name must be specified.
The effect is similar to using the
alttreegroup style in a two-column
page, except that the multicols environment balances
the columns to make them approximately the same length.
Note that, as with the mcolalttree style, the
columns are slightly unbalanced at the top. Since the mcolalttreegroup
style uses the mcolalttree style, the
correction applied by the glossaries-extra-stylemods package, will also
correct this style. Likewise for the following styles.
mcolalttreehypergroup 🔗
Themcolalttreehypergroup style is like the alttreehypergroup style but
contained within a multicols environment. Again, the widest
name must be specified.
The effect is similar to using the
alttreehypergroup style in a two-column
page, except that the multicols environment balances
the columns to make them approximately the same length.
Note that this style bunches up the navigation line at the start of
the first column. If you feel this is inappropriate, the next style
mcolalttreespannav may look better.
mcolalttreespannav 🔗
Themcolalttreespannav style (new to v4.22) is like the
mcolalttreehypergroup
style but the navigation line is placed
inside the optional argument of the multicols environment.
This allows it to span across the columns.

The effect is like the
mcolalttreegroup style with
the navigation line spanning the line width below the section
header.
glossary-inline
The glossary-inline package must be explicitly loaded using
\usepackage{glossary-inline}
This package only provides one style.
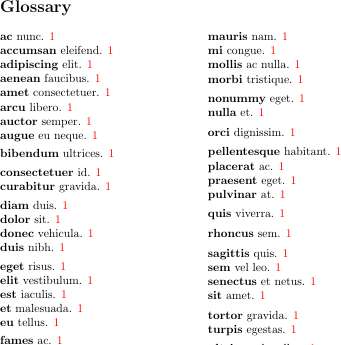
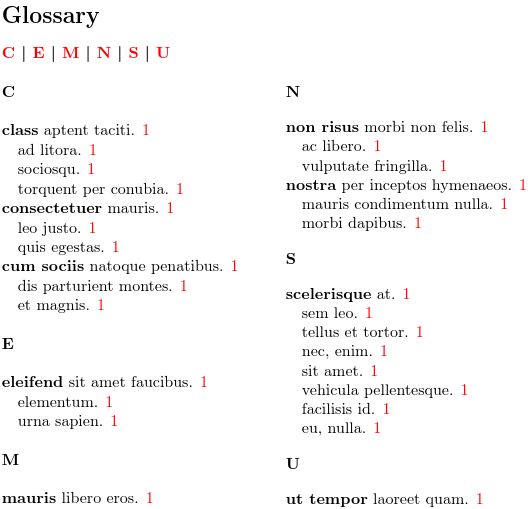
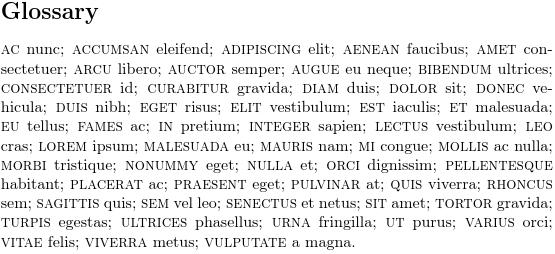
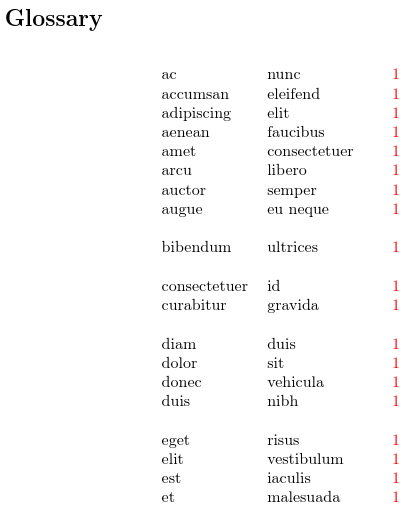
inline 🔗
Theinline style is for in-line glossaries. This by
default suppresses the location list (regardless of the
nonumberlist setting) and the symbol (if provided). The chances
are that you will probably also need to suppress the section header,
which you can do using
\renewcommand*{\glossarysection}[2][]{}
or change it to a non-sectioning tag, for example:
\renewcommand*{\glossarysection}[2][]{\textbf{#2}: }
Note that the post description hook is done just once at the end of
the glossary rather than after each entry. The
glossaries-extra-stylesmods package changes this style to use just the
\glsxtrpostdescription hook after each description, and
doesn’t use the \glspostdescription hook.
The name is formatted using \glsinlinenameformat. The
default definition is:
\newcommand*{\glsinlinenameformat}[2]{\glstarget{#1}{#2}}
This can be redefined as required. For example, to make the name
appear in small caps:
\renewcommand*{\glsinlinenameformat}[2]{\glstarget{#1}{\textsc{#2}}}
One-level sub-entries are supported, but the child name won’t be
displayed. For example, using the
example-glossaries-childnoname.tex dummy entries and the
subentrycounter option, which automatically numbers the
sub-entries:
Note that this inserts a colon between the top-level description and the sub-level entry.
glossary-list
The glossary-list package is automatically loaded by the glossaries package, unless explicitly excluded using the package optionnolist or nostyles. The list
styles use a description environment, which is
defined by the document class and may be altered by packages, so the
exact format can vary between documents.
All the list styles ignore the symbol field. You may prefer one of the tree-like styles instead.
Most of the list styles are incompatible with
classicthesis. If you are using the classicthesis
package with glossaries, you will need to change the
default style (unless you are using glossaries v4.26+ which checks for
classicthesis and switches the default style to
index).
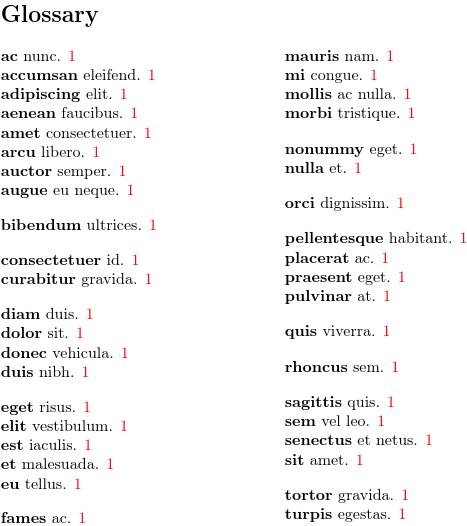
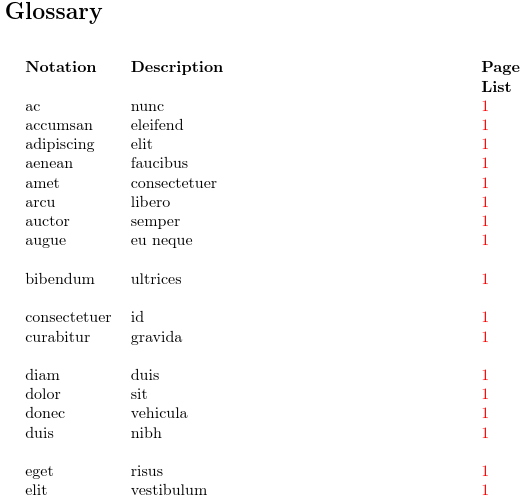
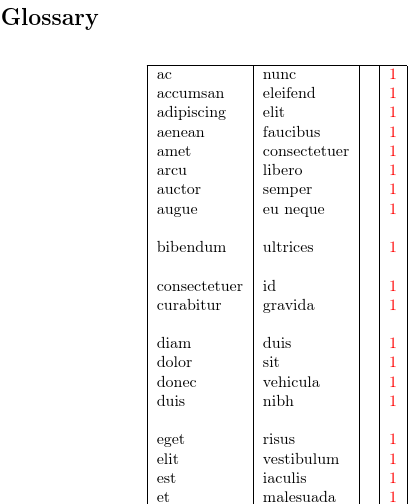
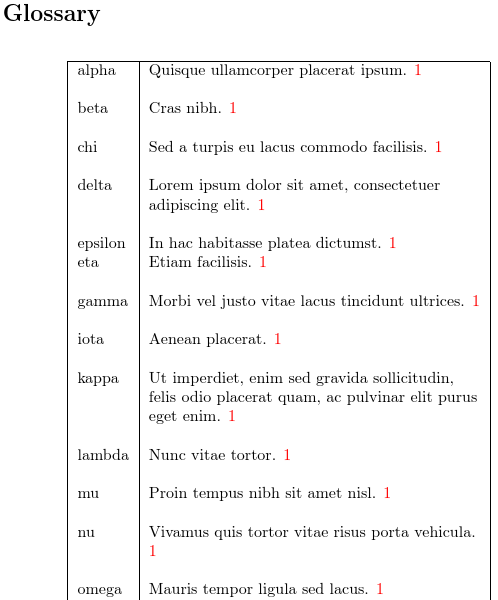
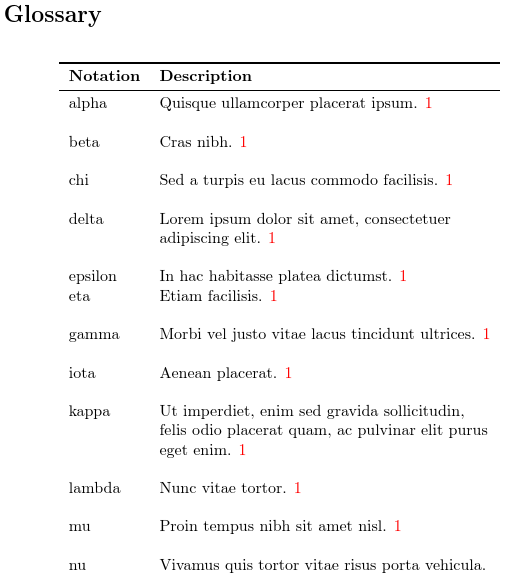
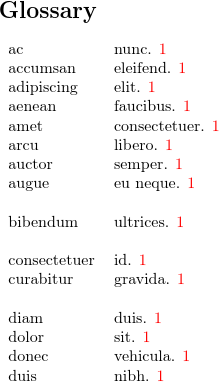
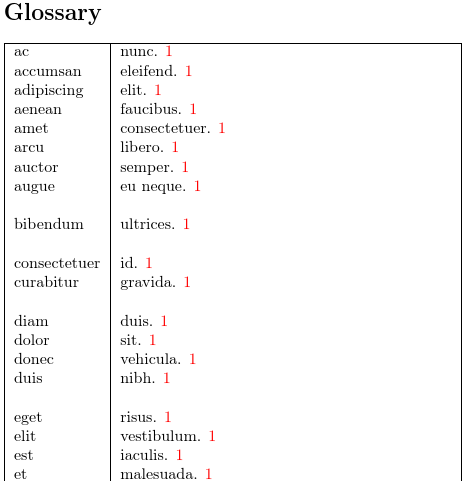
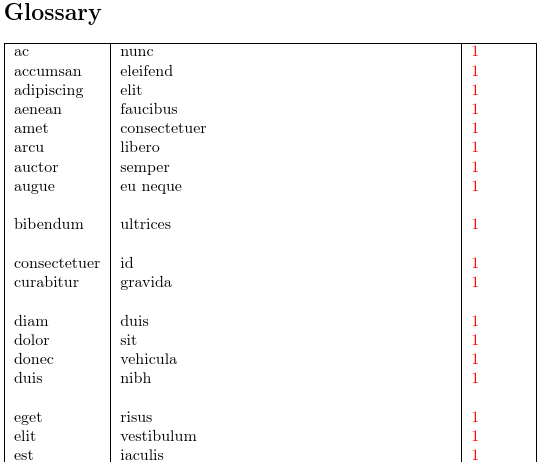
list 🔗
Thelist style puts the name in the optional argument
of \item and so is not generally suitable for glossaries
with long entry names. It works best with long descriptions. If you
have short names and short descriptions, consider using one of the
mcol styles. For long names and long
descriptions, consider using one of the altlist styles
instead. An extra vertical gap is inserted between letter groups, so
use the nogroupskip option if your entries haven’t been
sorted alphabetically.
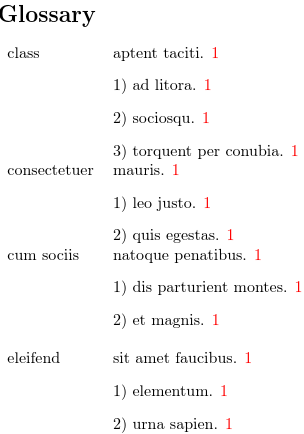
Note that the list style doesn’t display the names of
sub-entries, and generally doesn’t work well with child entries. If
I change the test file to
example-glossaries-childnoname.tex then the glossary is as
shown below. The space before the location list and the dot after it
are hard-coded into the sub-entry style, so this style isn’t
suitable for sub-entries with the location lists suppressed.
If you have sub-entries, consider one of the other styles
instead. (Versions below 4.22 were missing the space before the
sub-entry descriptions, which made the location lists run into the
next description, but even with that fixed, it’s still not a good
style for glossaries with child entries.)
listgroup 🔗
Thelistgroup style is like the list style but
adds a heading to each letter group. This style is inappropriate for
entries that haven’t been sorted alphabetically.
listhypergroup 🔗
Thelisthypergroup style is like the
listgroup style but
also adds a navigation line at the start of the list. There’s no
point using this style if your document doesn’t have hyperlinks.
altlist 🔗
Thealtlist style is like the list style but
inserts a paragraph break after the name. This style is best suited
for entries with long names and long descriptions. As with the
list style, an extra vertical gap occurs between letter
groups.
The altlist style allows one-level child entries and will
start a new paragraph for each child entry, but the child name won’t
be displayed. In the sample below I’ve used the
example-glossaries-childnoname.tex file with the
subentrycounter package option, which automatically numbers
the sub-entries. This just makes them a bit easier to see in the
sample and distinguishes them from the parent entry’s
description.
altlistgroup 🔗
Thealtlistgroup style is like the
altlist style but
adds a heading to each letter group. This style is inappropriate for
entries that haven’t been sorted alphabetically.
altlisthypergroup 🔗
Thealtlisthypergroup style is like the
altlistgroup style but
also adds a navigation line at the start of the list. There’s no
point using this style if your document doesn’t have hyperlinks.
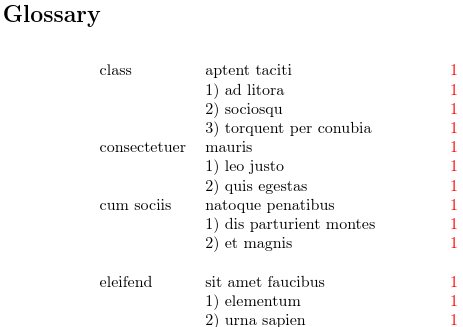
listdotted 🔗
Thelistdotted style leaves the optional argument of
\item empty and after it places a box whose horizontal width
is given by \glslistdottedwidth.
(This length may be adjusted using \newlength as required.)
This box contains the name and dotted leaders. The description
is placed after the box. The location list is ignored regardless of the
nonumberlist setting. The post description hook is also
ignored (unless you use
glossaries-extra-stylemods). This style is only suitable for
glossaries with both short entry names and short descriptions.
This style inserts an extra vertical gap between groups, so use
nogroupskip if you haven’t sorted your entries.
This style is inappropriate for child entries. In the sample below,
I’ve used the example-glossaries-parent.tex file with the
subentrycounter option on, which automatically numbers the
child entries.
The numbering helps to highlight the sub-entries but the hierarchy has been flattened to just the top-level and one sub-level.
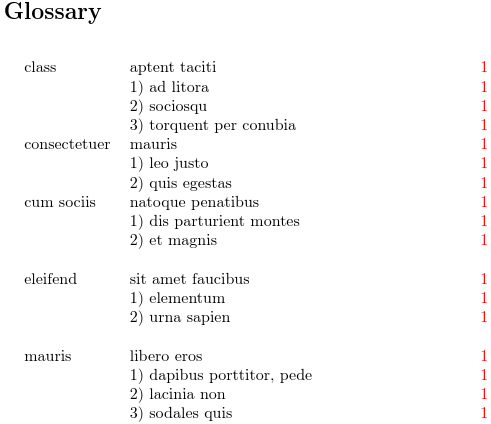
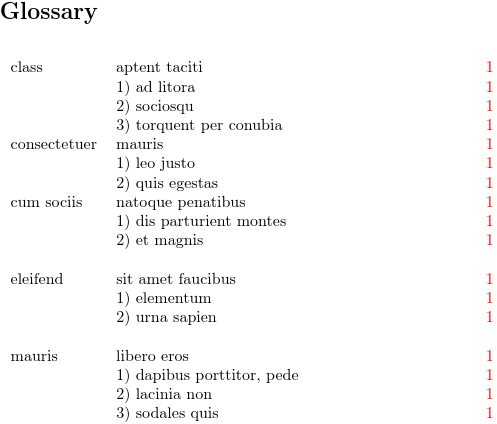
sublistdotted 🔗
Thesublistdotted style is only suitable for one sub-level
hierarchical entries. The parent (top-level) entry only has the name
displayed (not the description). The top-level name is placed in the
optional argument of \item and so will typically appear
bold. This style is not suitable for documents where entries haven’t been
sorted alphabetically. The post description hook isn’t used (unless you use
glossaries-extra-stylemods).
The above shows how poorly this style performs for glossaries with only top-level entries, since all it does is show the name in bold. If the sample file switches from example-glossaries-brief.tex to example-glossaries-parent.tex for the dummy entries, the result is much better:
glossary-long
The glossary-long package is automatically loaded by the glossaries package, unless explicitly excluded using the package optionnolong or nostyles. The
long styles use the longtable environment, so the
glossary-long package automatically loads the
longtable package.
Similar styles are available with the glossary-longragged, glossary-longbooktabs, and glossary-longextra packages.
Take care not to confuse these table styles with the
mcols styles.
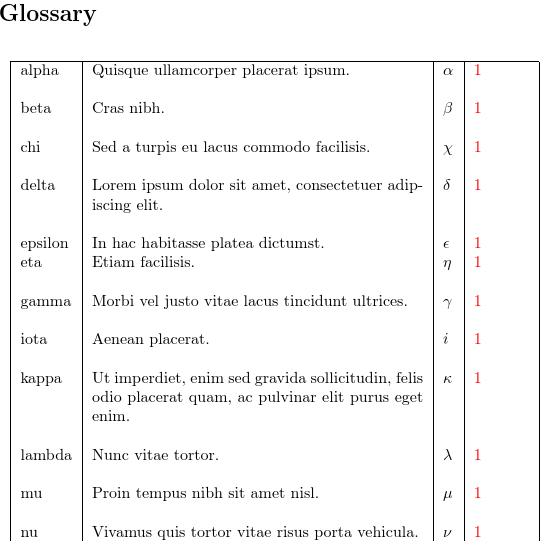
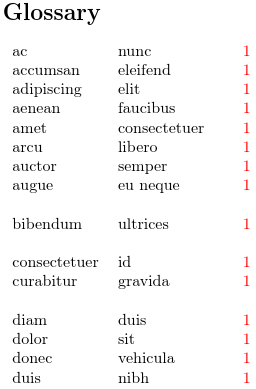
long 🔗
Thelong style starts the longtable
environment with:
\begin{longtable}{lp{\glsdescwidth}}
The first column (left-aligned) is used for the entry name and the
second column (a paragraph column whose width is given by
\glsdescwidth) is used for the description and location
list. The symbol field is ignored. If you want to change the
horizontal alignment of the entire table, you can redefine the
theglossary environment after you’ve set the style. For
example:
\setglossarystyle{long}
\renewenvironment{theglossary}%
 {\begin{longtable}[l]{lp{\glsdescwidth}}}%
 {\end{longtable}}
(see the longtable documentation for
further details). Note that the default is to centre the table, but
this may not be apparent with brief descriptions. If you temporarily
switch to the longborder,
style you will be able to see the table bounds.
An extra vertical gap is inserted between letter groups, so
use the nogroupskip option if your entries haven’t been
sorted alphabetically.
This style omits the name for sub-entries and is unsuitable for
deeper than one-level sub-entries. The sample below uses the
example-glossaries-childnoname.tex file with the
subentrycounter option set, which automatically numbers the
sub-entries.
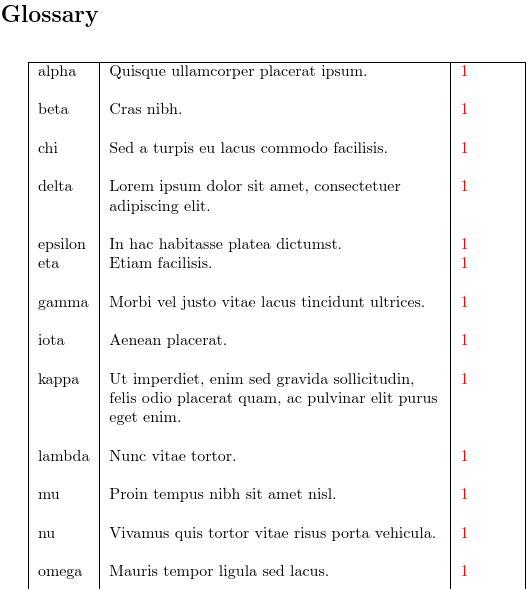
longborder 🔗
Thelongborder style is like the long style, but includes vertical
and horizontal rules. Note that the long-booktabs
style looks better, but this style can be useful for testing
purposes if you’re not sure how much space the table is occupying.
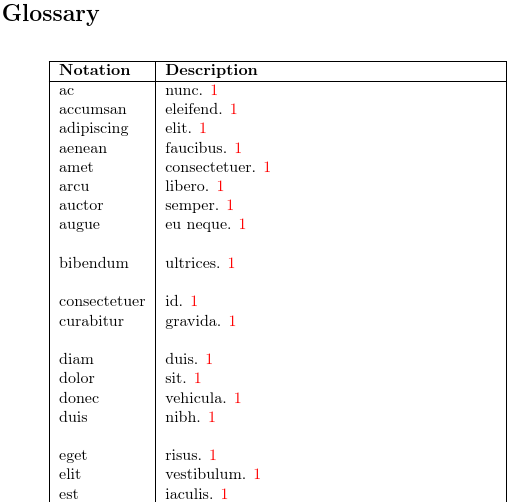
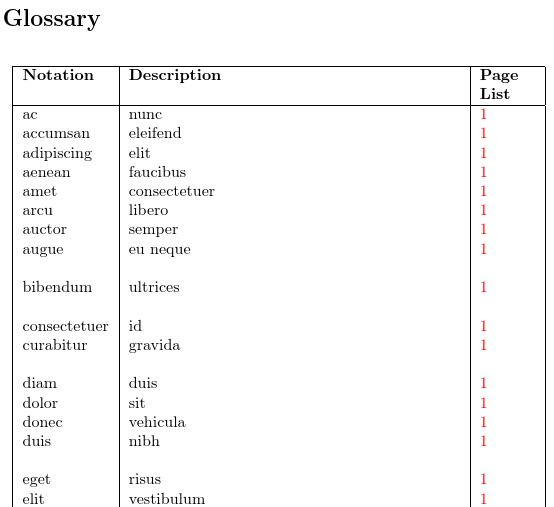
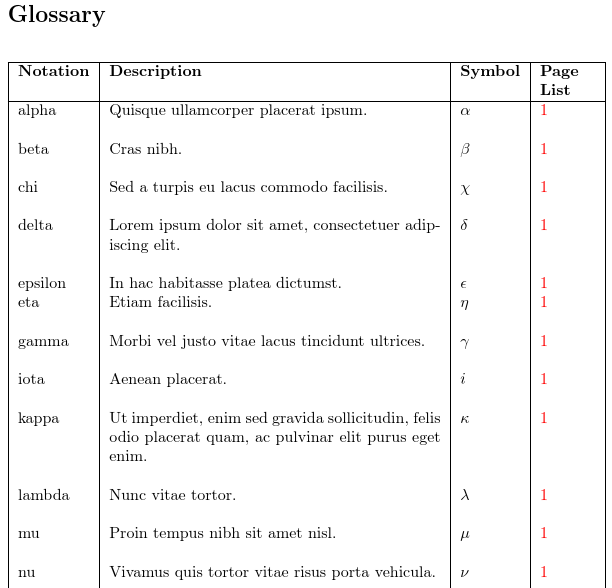
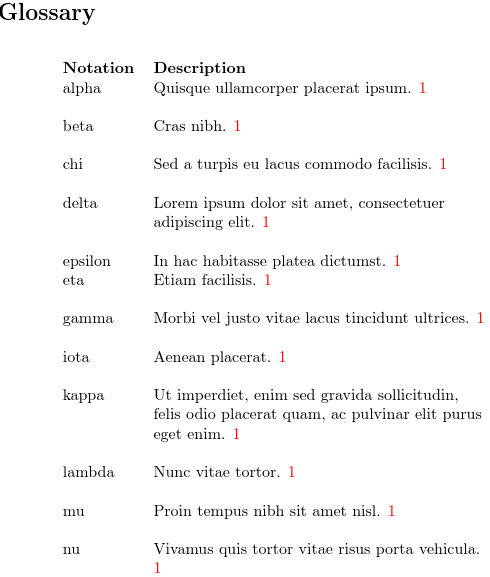
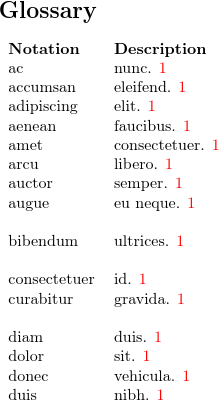
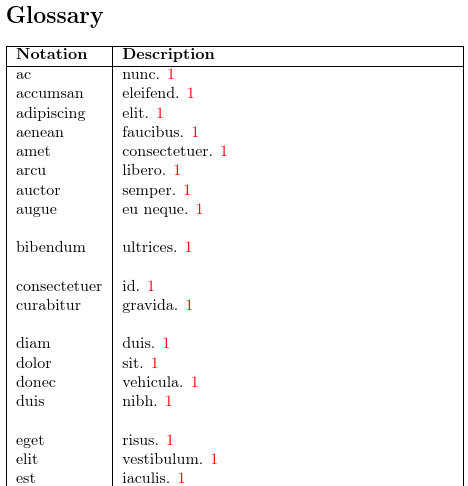
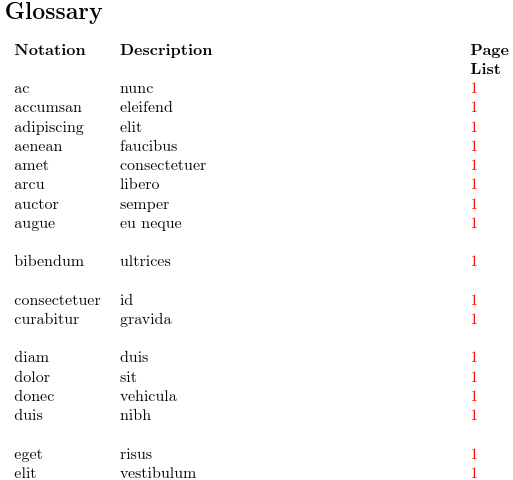
longheader 🔗
Thelongheader style is like the long style, but includes a header
row.

The header text for the first column is given by
\entryname (Notation), and the header text for the
second column is given by \descriptionname
(Description). The header text is formatted in bold.
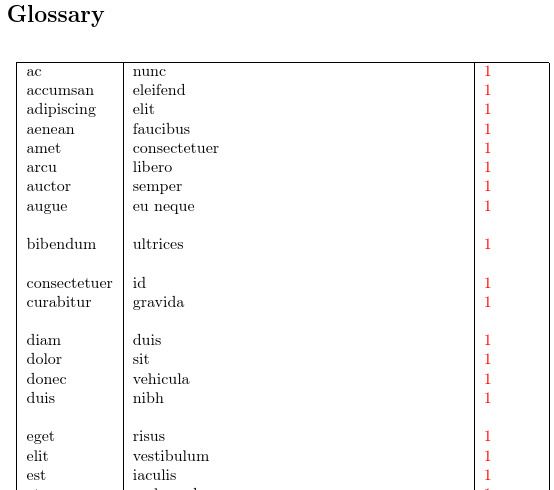
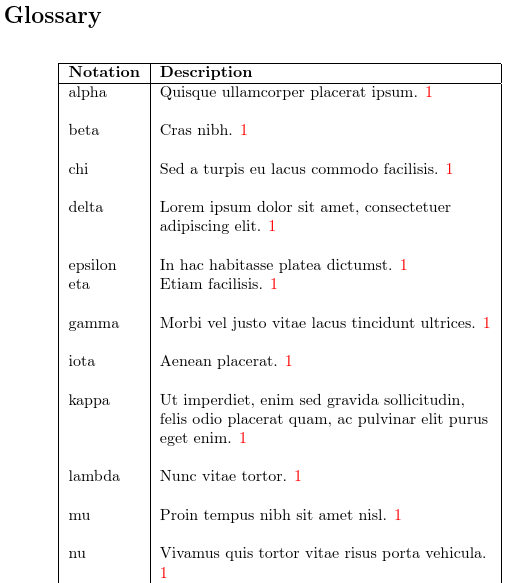
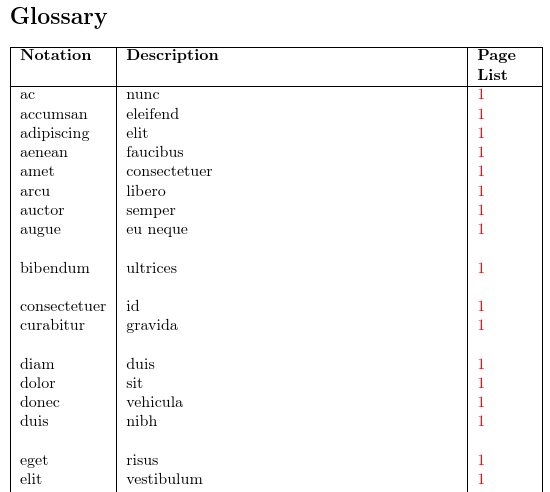
longheaderborder 🔗
Thelongheaderborder style is like a combination of the longheader and longborder styles. Note that
the long-booktabs
style looks better.
The header row is as for the
longheader style.
The border lines are as for the
longborder style, with
an extra horizontal line after the header row.
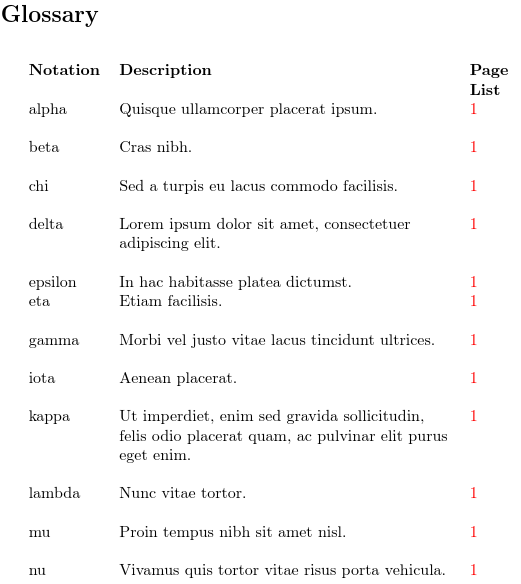
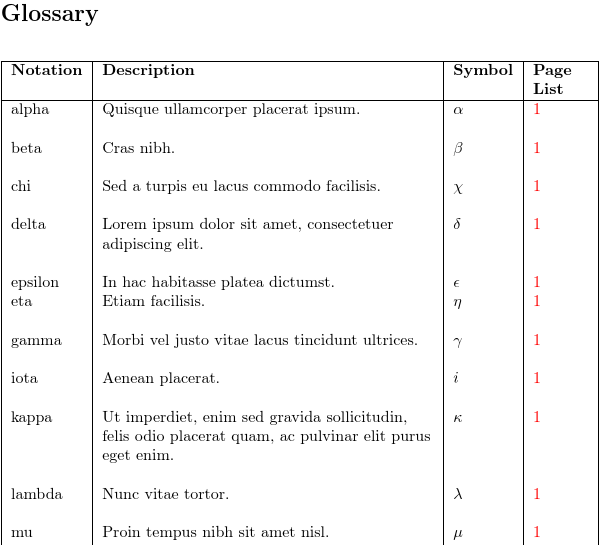
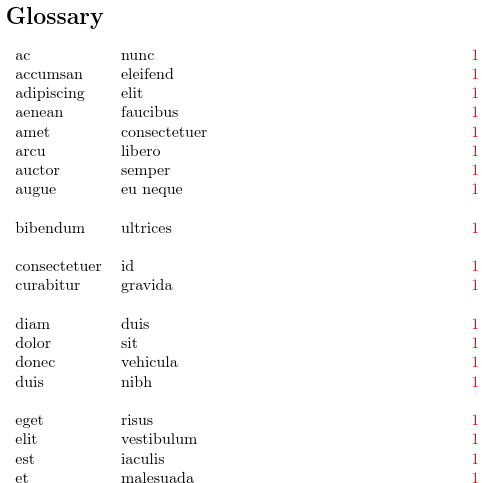
long3col 🔗
Thelong3col style is like the long style, but has three columns
instead of two. In this style, the longtable environment is
begun with:
\begin{longtable}{lp{\glsdescwidth}p{\glspagelistwidth}}
The first column contains the name field, the second column contains
the description and the third column contains the location list.
Note that, as with the long style, the symbol isn’t
displayed. Also, this style doesn’t use the post description hook,
so the nopostdot option is ignored (unless you use
glossaries-extra-stylemods). A vertical gap is
inserted between letter groups, so
use the nogroupskip option if your entries haven’t been
sorted alphabetically.

As with the long style, this style omits the name for sub-entries and is unsuitable for
deeper than one-level sub-entries. The sample below uses the
example-glossaries-childnoname.tex file with the
subentrycounter option set, which automatically numbers the
sub-entries.
long3colborder 🔗
Thelong3colborder style is like the longborder style, but with three
columns.
long3colheader 🔗
Thelong3colheader style is like the longheader style, but with three
columns.
The header text for the first column is given by
\entryname (Notation), the header text for the
second column is given by \descriptionname
(Description), and the header text for the third column is given by
\pagelistname (Page List). The header text is formatted in bold.
long3colheaderborder 🔗
Thelong3colheaderborder style is like the longheaderborder style, but with three
columns. Note that if you want rules, the long3col-booktabs style looks
better.
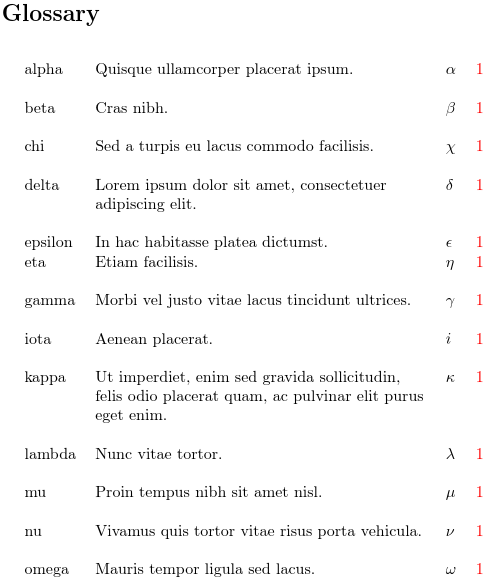
long4col 🔗
Thelong4col style is similar the long style, but has four columns
instead of two. In this style, the longtable environment is
begun with:
\begin{longtable}{llll}
The first column contains the name field, the second column contains
the description, the third column contains the symbol, and the final
column contains the location list. Note that that all four columns
are specified using l which means that no line-breaking is
permitted. Therefore this style is only suitable for entries with
brief descriptions and an accompanying symbol. A vertical gap is
inserted between letter groups, so
use the nogroupskip option if your entries haven’t been
sorted alphabetically. This style doesn’t use the post description
hook (unless you use
glossaries-extra-stylemods).
Note that the test file loads example-glossaries-brief.tex, which doesn’t provide symbols for any of the dummy entries, so the symbol column is blank in the sample below. (The example-glossaries-symbols.tex test file has descriptions that are too long for this style.)
As with the long style, this style omits the name for sub-entries and is unsuitable for
deeper than one-level sub-entries. The sample below uses the
example-glossaries-childnoname.tex file with the
subentrycounter option set, which automatically numbers the
sub-entries.
If you have glossaries v4.51+, there’s
an extra test file example-glossaries-user.tex
which has both symbols and short descriptions, and also has child
entries, and so is a better set to demonstrate
this style (the subentrycounter hasn’t been used):

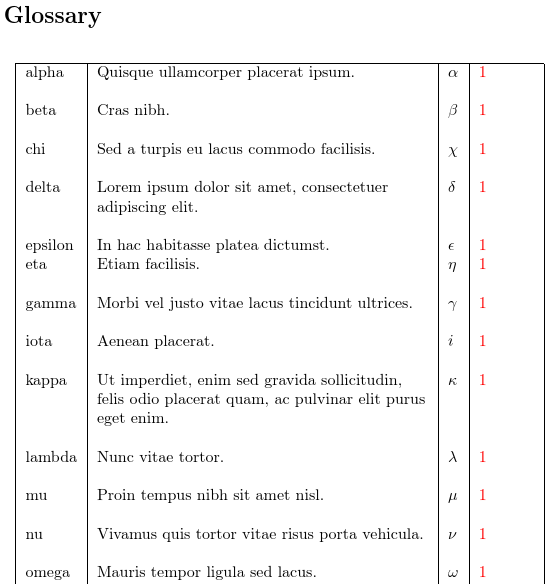
long4colborder 🔗
Thelong4colborder style is like the long4col style, but includes vertical
and horizontal rules. The empty symbol column is more noticeable
with this style.
Compare with the example-glossaries-user.tex test file, which has symbols for top level entries and most (but not all) child entries:

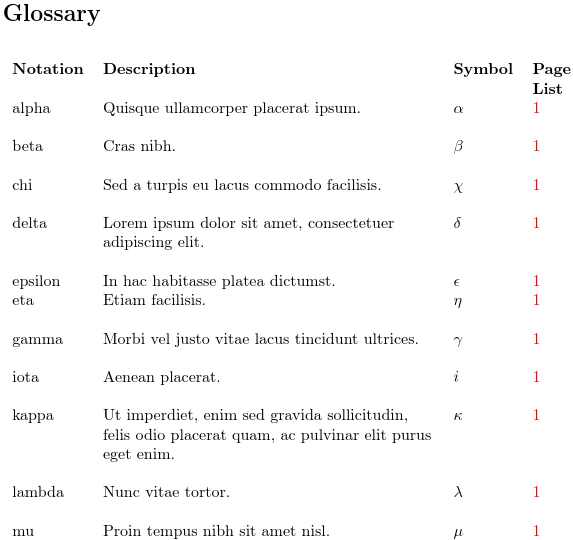
long4colheader 🔗
Thelong4colheader style is like the long4col style, but includes a
header row.

Compare with the example-glossaries-user.tex test file, which has symbols for top level entries and most (but not all) child entries:

The left-alignment of the symbol column is more obvious in this case.
long4colheaderborder 🔗
Thelong4colheaderborder style is like the long4col style, but includes a
header row and rules. Note that the long4col-booktabs style
is preferable.

altlong4col 🔗
Thealtlong4col style is similar the long4col style, but in this style, the longtable environment is
begun using:
\begin{longtable}{lp{\glsdescwidth}lp{\glspagelistwidth}}
This means that multi-lined descriptions and long location lists
may be present.
To illustrate the way this style displays symbols, the test file can
be modified to use
example-glossaries-symbols.tex instead of
example-glossaries-brief.tex. A vertical gap is
inserted between letter groups, so
use the nogroupskip option if your entries haven’t been
sorted alphabetically. This style doesn’t use the post description
hook (unless you use
glossaries-extra-stylemods).

As with the long style, this style omits the name for sub-entries and is unsuitable for
deeper than one-level sub-entries. The sample below uses the
example-glossaries-childnoname.tex file with the
subentrycounter option set, which automatically numbers the
sub-entries. Since this set of test entries don’t have symbols, the
symbol column is empty.
Compare with the example-glossaries-user.tex test file, which has symbols for top level entries and most (but not all) child entries:

altlong4colborder 🔗
Thealtlong4colborder style is like the altlong4col style, but includes vertical
and horizontal rules.
altlong4colheader 🔗
Thealtlong4colheader style is like the altlong4col style, but
includes a header row.

altlong4colheaderborder 🔗
Thealtlong4colheaderborder style is like the altlong4col style, but
includes a header row and vertical and horizontal rules.
Note that the altlong4col-booktabs
style is preferable.
glossary-longragged
The glossary-longragged package is not automatically loaded by the glossaries package, but is loaded by the glossary-longbooktabs package, so you either need
\usepackage{glossary-longragged}
or
\usepackage{glossary-longbooktabs}
The glossary-longragged package will automatically load the
longtable and array packages. The styles provided
in this package are analogous to the styles in the
glossary-long package that have paragraph columns. The
corresponding styles in this package use \raggedright to
make the paragraph columns have ragged-right formatting. With narrow
columns, this can look better than forcing normal paragraph
justification. Note that there are no equivalent styles to the
styles in the glossary-long package that don’t have
paragraph columns (such as the long4col style).
longragged 🔗
Thelongragged style is similar the long style, but in this style, the longtable environment is
begun using:
\begin{longtable}{l>{\raggedright}p{\glsdescwidth}}
As with the long style,
an extra vertical gap is inserted between letter groups, so
use the nogroupskip option if your entries haven’t been
sorted alphabetically. With brief one-line descriptions, this
appears the same as the long style, so the sample images
here use the example-glossaries-symbol.tex test file with the
nopostdot package option. Note that the symbol isn’t
displayed with this style.

The result is like the long style
but has ragged right formatting in the description column.
longraggedborder 🔗
Thelongraggedborder style is like the longragged style, but includes vertical
and horizontal rules.
The result is like the longborder style
but has ragged right formatting in the description column.
longraggedheader 🔗
Thelongraggedheader style is like the longragged style, but includes a header row.
The result is like the longheader style
but has ragged right formatting in the description column.
longraggedheaderborder 🔗
Thelongraggedheaderborder style is like the longragged style, but includes
a header row and vertical and horizontal rules. Note that the
longragged-booktabs
style is preferable.
The result is like the
longheaderborder style
but has ragged right formatting in the description column.
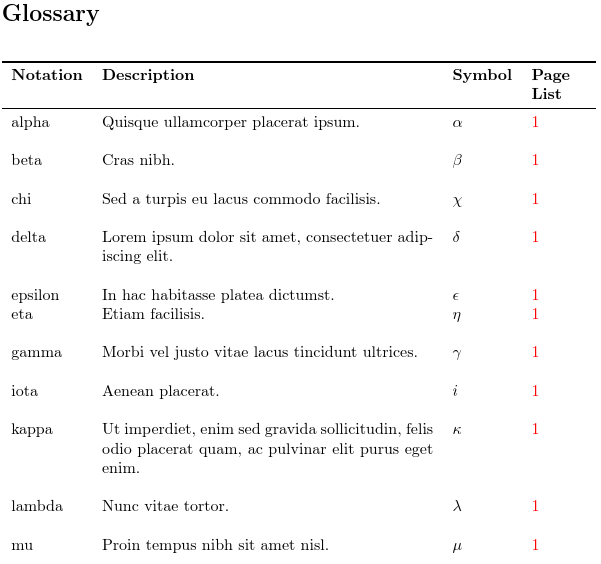
longragged3col 🔗
Thelongragged3col style is similar the long3col style, but in this style, the longtable environment is
begun with:
\begin{longtable}{l>{\raggedright}p{\glsdescwidth}%
       >{\raggedright}p{\glspagelistwidth}}
As with the long3col style,
an extra vertical gap is inserted between letter groups, so
use the nogroupskip option if your entries haven’t been
sorted alphabetically. Again the symbol isn’t displayed. Note that
this style doesn’t use the post description hook so the
nopostdot setting has no effect.

The result is like the
long3col style
but has ragged right formatting in the description and page list
columns.
longragged3colborder 🔗
Thelongragged3colborder style is like the longragged3col style, but includes vertical
and horizontal rules.
The result is like the
long3colborder style
but has ragged right formatting in the description and page list
columns.
longragged3colheader 🔗
Thelongragged3colheader style is like the longragged3col style, but
includes a header row.
The result is like the
long3colheader style
but has ragged right formatting in the description and page list
columns.
longragged3colheaderborder 🔗
Thelongragged3colheaderborder style is like the longragged3col style, but
includes a header row and vertical and horizontal rules. Note that the
longragged3col-booktabs
style is preferable.

The result is like the
long3colheaderborder style
but has ragged right formatting in the description and page list
columns.
altlongragged4col 🔗
Thealtlongragged4col style is similar the altlong4col style, but in this style, the longtable environment is
begun with:
\begin{longtable}{l>{\raggedright}p{\glsdescwidth}l%
       >{\raggedright}p{\glspagelistwidth}}
(Note that there is no analogous ragged style to the
long4col style, as that
style doesn’t have any paragraph columns.)
As with the altlong4col style,
an extra vertical gap is inserted between letter groups, so
use the nogroupskip option if your entries haven’t been
sorted alphabetically. Note that this style doesn’t use the post
description hook (unless you use
glossaries-extra-stylemods), so the nopostdot setting has no effect.
The result is like the
altlong4col style
but has ragged right formatting in the description and page list
columns.
altlongragged4colborder 🔗
Thealtlongragged4colborder style is like the altlongragged4col style, but includes vertical
and horizontal rules.
The result is like the
altlong4colborder style
but has ragged right formatting in the description and page list
columns.
altlongragged4colheader 🔗
Thealtlongragged4colheader style is like the altlongragged4col style, but
includes a header row.
The result is like the
altlong4colheader style
but has ragged right formatting in the description and page list
columns.
altlongragged4colheaderborder 🔗
Thealtlongragged4colheaderborder style is like the altlongragged4col style, but
includes a header row and vertical and horizontal rules. Note that the
altlongragged4col-booktabs
style is preferable.
The result is like the
altlong4colheaderborder style
but has ragged right formatting in the description and page list
columns.
glossary-longbooktabs
Theglossary-longbooktabs style needs to be loaded
explicitly, if required, using
\usepackage{glossary-longbooktabs}
This package automatically loads the booktabs package as
well as the glossary-long and glossary-longragged
packages. The glossary-longbooktabs package applies a patch
to the longtable environment when any of the booktabs
glossary styles are set. If the style setting is localised (for
example, through the style key in \printglossary),
then the patch is also localised. Most of the examples below all use the
example-glossaries-symbols.tex test file, which has entries
defined with an associated symbol.
If you are using glossaries-extra.sty, the longextra styles can be used to provide more
flexibility.
long-booktabs 🔗
Thelong-booktabs style is similar the long style, but there is also a
header row, and the horizontal rules \toprule, \midrule
and \bottomrule provided by the booktabs
package are used. (The top and bottom rules are thicker than the mid
rule.) As with the long style,
an extra vertical gap is inserted between letter groups, so
use the nogroupskip option if your entries haven’t been
sorted alphabetically. Note that the symbol isn’t
displayed with this style.
The result is like the
longheader style
but with horizontal rules above and below the header and at the
bottom of the table. Unlike the
longheaderborder style
there are no vertical rules.
long3col-booktabs 🔗
Thelong3col-booktabs style is similar the long3col style, but there is also a
header row, and the horizontal rules \toprule, \midrule
and \bottomrule provided by the booktabs
package are used. As with the long3col style,
an extra vertical gap is inserted between letter groups, so
use the nogroupskip option if your entries haven’t been
sorted alphabetically. Note that the symbol isn’t
displayed with this style. The post description hook isn’t used (unless you use
glossaries-extra-stylemods).

The result is like the
long3colheader style
but with horizontal rules above and below the header and at the
bottom of the table. Unlike the
long3colheaderborder style
there are no vertical rules.
long4col-booktabs 🔗
Thelong4col-booktabs style is similar the long4col style, but there is also a
header row, and the horizontal rules \toprule, \midrule
and \bottomrule provided by the booktabs
package are used. As with the long4col style,
an extra vertical gap is inserted between letter groups, so
use the nogroupskip option if your entries haven’t been
sorted alphabetically. The test file
example-glossaries-symbols.tex can’t be used with this
example as some of the descriptions are too long, so the
example-glossaries-brief.tex file has been used instead.
Since none of the entries in that file have symbols, the third
column is empty (except for the header). The post description hook
isn’t used by this style (unless you use
glossaries-extra-stylemods).
The result is like the
long4colheader style
but with horizontal rules above and below the header and at the
bottom of the table. Unlike the
long4colheaderborder style
there are no vertical rules.
Compare with the example-glossaries-user.tex test file, which has symbols for top level entries and most (but not all) child entries:

altlong4col-booktabs 🔗
Thealtlong4col-booktabs style is similar the altlong4col style, but there is also a
header row, and the horizontal rules \toprule, \midrule
and \bottomrule provided by the booktabs
package are used. As with the altlong4col style,
an extra vertical gap is inserted between letter groups, so
use the nogroupskip option if your entries haven’t been
sorted alphabetically. The post description hook
isn’t used by this style (unless you use
glossaries-extra-stylemods).
The result is like the
altlong4colheader style
but with horizontal rules above and below the header and at the
bottom of the table. Unlike the
altlong4colheaderborder style
there are no vertical rules.
longragged-booktabs 🔗
Thelongragged-booktabs style is similar the longragged style, but there is also a
header row, and the horizontal rules \toprule, \midrule
and \bottomrule provided by the booktabs
package are used. As with the longragged style,
an extra vertical gap is inserted between letter groups, so
use the nogroupskip option if your entries haven’t been
sorted alphabetically. Note that the symbol isn’t
displayed with this style.
The result is like the
longraggedheader style
but with horizontal rules above and below the header and at the
bottom of the table. Unlike the
longraggedheaderborder style
there are no vertical rules.
longragged3col-booktabs 🔗
Thelongragged3col-booktabs style is similar the longragged3col style, but there is also a
header row, and the horizontal rules \toprule, \midrule
and \bottomrule provided by the booktabs
package are used. As with the longragged3col style,
an extra vertical gap is inserted between letter groups, so
use the nogroupskip option if your entries haven’t been
sorted alphabetically. Note that the symbol isn’t
displayed with this style. The post description hook isn’t used (unless you use
glossaries-extra-stylemods).
If you are using glossaries-extra you may want to consider
the long-name-desc-loc style instead.
The result is like the
longragged3colheader style
but with horizontal rules above and below the header and at the
bottom of the table. Unlike the
longragged3colheaderborder style
there are no vertical rules.
altlongragged4col-booktabs 🔗
Thealtlongragged4col-booktabs style is similar the altlongragged4col style, but there is also a
header row, and the horizontal rules \toprule, \midrule
and \bottomrule provided by the booktabs
package are used. As with the altlongragged4col style,
an extra vertical gap is inserted between letter groups, so
use the nogroupskip option if your entries haven’t been
sorted alphabetically. This style doesn’t use the post description
hook (unless you use
glossaries-extra-stylemods).
If you are using glossaries-extra you may want to consider
the long-name-desc-sym-loc style instead.
The result is like the
altlongragged4colheader style
but with horizontal rules above and below the header and at the
bottom of the table. Unlike the
altlongragged4colheaderborder style
there are no vertical rules.
glossary-super
The glossary-super package is automatically loaded by the glossaries package, unless explicitly excluded using the package optionnosuper or nostyles or
if a known conflicting package has been loaded or if the
supertabular package hasn’t been installed.
The super styles use the supertabular environment, so the glossary-super package automatically loads the
supertabular package.
Note that, in general, longtable is more reliable, but
there are some situations (such as where TeX’s output routine is
altered) where longtable doesn’t work.
Take care not to confuse these table styles with the
mcols styles.
These styles are all analogous to the long styles.
super 🔗
Thesuper style starts the supertabular
environment with:
\tablehead{}\tabletail{}%
\begin{supertabular}{lp{\glsdescwidth}}
The first column (left-aligned) is used for the entry name and the
second column (a paragraph column whose width is given by
\glsdescwidth) is used for the description and location
list. The symbol field is ignored. Note that, unlike the
long style, the glossary isn’t
centred. The alignment can be changed by redefining the
theglossary environment after the super style has been set.
For example:
\setglossarystyle{super}
  \renewenvironment{theglossary}%
    {\centering\tablehead{}\tabletail{}%
     \begin{supertabular}{lp{\glsdescwidth}}}%
    {\end{supertabular}}%
The result is essentially the same as for the
long style.
This style omits the name for sub-entries and is unsuitable for
deeper than one-level sub-entries. The sample below uses the
example-glossaries-childnoname.tex file with the
subentrycounter option set, which automatically numbers the
sub-entries.
Note that this example has problematic page breaks. The
long
style performs much better.
In this case, the result isn’t exactly like the
long style as there’s extra
vertical spacing before the child entries and a spurious page break
before the glossary. It’s better to use the
long style instead, if possible.
superborder 🔗
Thesuperborder style is like the super style, but includes vertical
and horizontal rules.
The result is essentially the same as for the
longborder style.
superheader 🔗
Thesuperheader style is like the super style, but includes a header
row.
The result is essentially the same as for the
longheader style.
superheaderborder 🔗
Thesuperheaderborder style is like a combination of the superheader and superborder styles.
The result is essentially the same as for the
longheaderborder style.
super3col 🔗
Thesuper3col style is like the super style, but has three columns
instead of two. In this style, the supertabular environment is
begun using:
\tablehead{}\tabletail{}%
\begin{supertabular}{lp{\glsdescwidth}p{\glspagelistwidth}}
The first column contains the name field, the second column contains
the description and the third column contains the location list.
Note that, as with the super style, the symbol isn’t
displayed. Also, this style doesn’t use the post description hook (unless you use
glossaries-extra-stylemods),
so the nopostdot option is ignored. A vertical gap is
inserted between letter groups, so
use the nogroupskip option if your entries haven’t been
sorted alphabetically.
The result is essentially the same as for the
long3col style.
This style omits the name for sub-entries and is unsuitable for
deeper than one-level sub-entries. The sample below uses the
example-glossaries-childnoname.tex file with the
subentrycounter option set, which automatically numbers the
sub-entries.
Note that this example has problematic page breaks. The
long3col
style performs much better.

In this case, the result isn’t exactly like the
long3col style as there’s extra
vertical spacing before the child entries and a spurious page break
before the start of the glossary. It’s better to use the
long3col style instead, if possible.
super3colborder 🔗
Thesuper3colborder style is like the superborder style, but with three
columns.
The result is essentially the same as for the
long3colborder style.
super3colheader 🔗
Thesuper3colheader style is like the superheader style, but with three
columns.
The result is essentially the same as for the
long3colheader style.
super3colheaderborder 🔗
Thesuper3colheaderborder style is like the superheaderborder style, but with three
columns.
The result is essentially the same as for the
long3colheaderborder style.
super4col 🔗
Thesuper4col style is similar the super style, but has four columns
instead of two. In this style, the supertabular environment is
begun with:
\tablehead{}\tabletail{}%
\begin{supertabular}{llll}
The first column contains the name field, the second column contains
the description, the third column contains the symbol, and the final
column contains the location list. Note that that all four columns
are specified using l which means that no line-breaking is
permitted. Therefore this style is only suitable for entries with
brief descriptions and an accompanying symbol. A vertical gap is
inserted between letter groups, so
use the nogroupskip option if your entries haven’t been
sorted alphabetically. This style doesn’t use the post description
hook (unless you use
glossaries-extra-stylemods) so the nopostdot option has no effect.
Note that the test file loads example-glossaries-brief.tex, which doesn’t provide symbols for any of the dummy entries, so the symbol column is blank in the sample below. (The example-glossaries-symbols.tex test file has descriptions that are too long for this style.)
The result is essentially the same as for the
long4col style.
This style omits the name for sub-entries and is unsuitable for
deeper than one-level sub-entries. The sample below uses the
example-glossaries-childnoname.tex file with the
subentrycounter option set, which automatically numbers the
sub-entries.

The result is essentially the same as for the
long4col style.
super4colborder 🔗
Thesuper4colborder style is like the super4col style, but includes vertical
and horizontal rules. The empty symbol column is more noticeable
with this style.
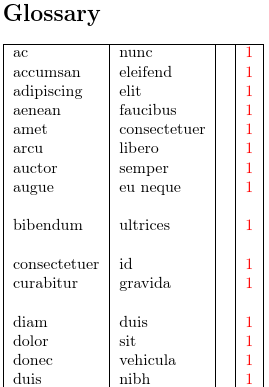
The result is essentially the same as for the
long4colborder style.
super4colheader 🔗
Thesuper4colheader style is like the super4col style, but includes a
header row.
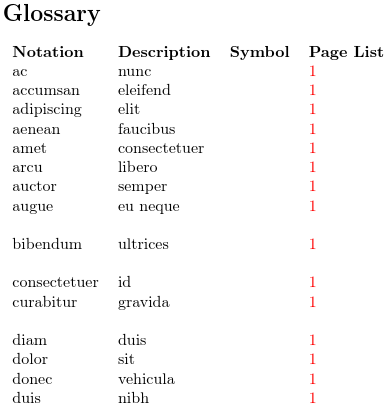
The result is essentially the same as for the
long4colheader style.
super4colheaderborder 🔗
Thesuper4colheaderborder style is like the super4col style, but includes a
header row and rules.
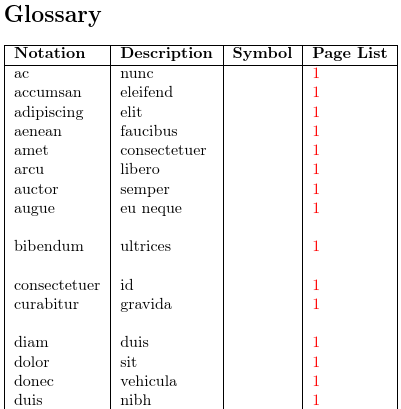
The result is essentially the same as for the
long4colheaderborder style.
altsuper4col 🔗
Thealtsuper4col style is similar the super4col style, but in this
style, the supertabular environment is
begun with:
\tablehead{}\tabletail{}%
\begin{supertabular}{lp{\glsdescwidth}lp{\glspagelistwidth}}
This means that multi-lined descriptions and super location lists
may be present. Note that this style doesn’t use the post
description hook (unless you use
glossaries-extra-stylemods), so the nopostdot setting has no effect.
To illustrate the way this style displays symbols, the test file can
be modified to use
example-glossaries-symbols.tex instead of
example-glossaries-brief.tex. A vertical gap is
inserted between letter groups, so
use the nogroupskip option if your entries haven’t been
sorted alphabetically.

The result is essentially the same as for the
altlong4col style.
This style omits the name for sub-entries and is unsuitable for
deeper than one-level sub-entries. The sample below uses the
example-glossaries-childnoname.tex file with the
subentrycounter option set, which automatically numbers the
sub-entries.
Note that this example has problematic page breaks. The
altlong4col
style performs much better.
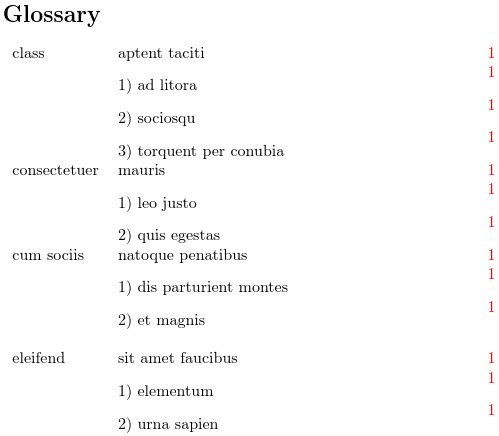
In this case, the result isn’t exactly like the
altlong4col style as there’s extra
vertical spacing before the child entries and a spurious page break
before the glossary. It’s better to use the
long style instead, if possible.
altsuper4colborder 🔗
Thealtsuper4colborder style is like the altsuper4col style, but includes vertical
and horizontal rules.

The result is essentially the same as for the
altlong4colborder style.
altsuper4colheader 🔗
Thealtsuper4colheader style is like the altsuper4col style, but
includes a header row.
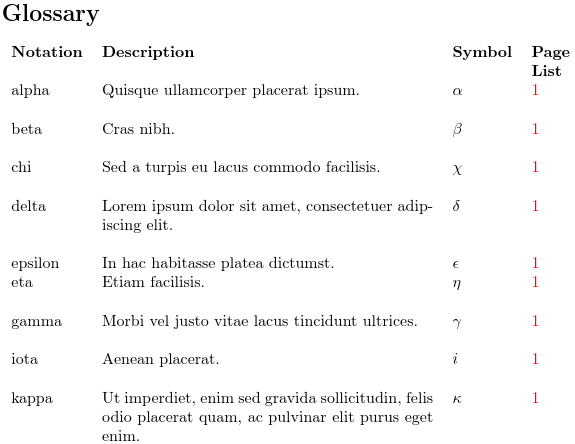
The result is essentially the same as for the
altlong4colheader style.
altsuper4colheaderborder 🔗
Thealtsuper4colheaderborder style is like the altsuper4col style, but
includes a header row and vertical and horizontal rules.
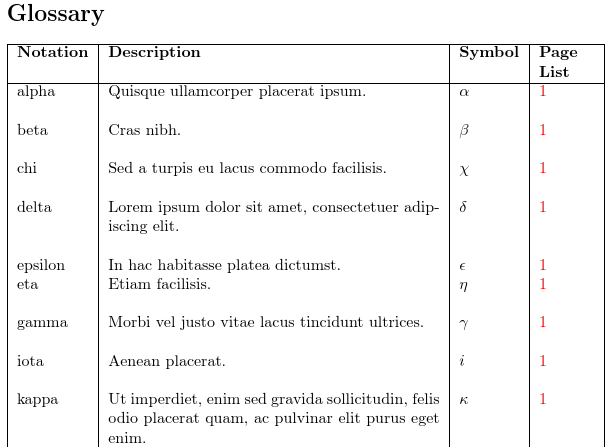
The result is essentially the same as for the
altlong4colheaderborder style.
glossary-superragged
The glossary-superragged package is not automatically loaded by the glossaries package, so you need to use
\usepackage{glossary-superragged}
The glossary-superragged package will automatically load the
supertabular and array packages. The styles provided
in this package are analogous to the styles in the
glossary-super package that define paragraph columns. The
corresponding styles in this package use \raggedright to
make the paragraph columns have ragged-right formatting. With narrow
columns, this can look better than forcing normal paragraph
justification. Note that there are no equivalent styles to the
styles in the glossary-super package that don’t have
paragraph columns (such as the super4col style).
superragged 🔗
Thesuperragged style is similar the super style, but in this style, the
supertabular environment is
begun with:
\tablehead{}\tabletail{}%
\begin{supertabular}{l>{\raggedright}p{\glsdescwidth}}
As with the super style,
an extra vertical gap is inserted between letter groups, so
use the nogroupskip option if your entries haven’t been
sorted alphabetically. With brief one-line descriptions, this
appears the same as the super style, so the sample images
here use the example-glossaries-symbol.tex test file (which
have longer descriptions than the brief dummy entries) with the
nopostdot package option. Note that the symbol isn’t
displayed with this style.
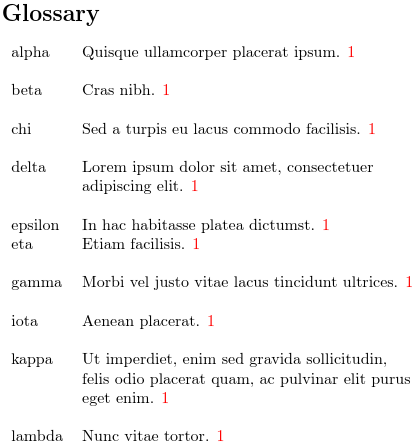
The result is essentially the same as for the
longragged style.
superraggedborder 🔗
Thesuperraggedborder style is like the superragged style, but includes vertical
and horizontal rules.
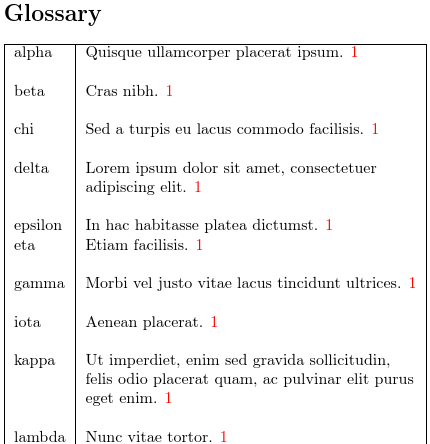
The result is essentially the same as for the
longraggedheader style.
superraggedheader 🔗
Thesuperraggedheader style is like the superragged style, but includes vertical
and horizontal rules.
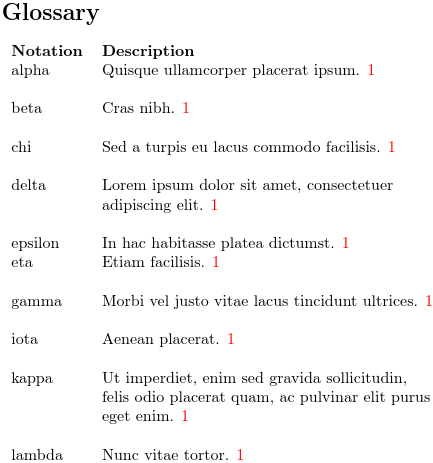
The result is essentially the same as for the
longraggedheader style.
superraggedheaderborder 🔗
Thesuperraggedheaderborder style is like the superragged style, but includes
a header row and vertical and horizontal rules.
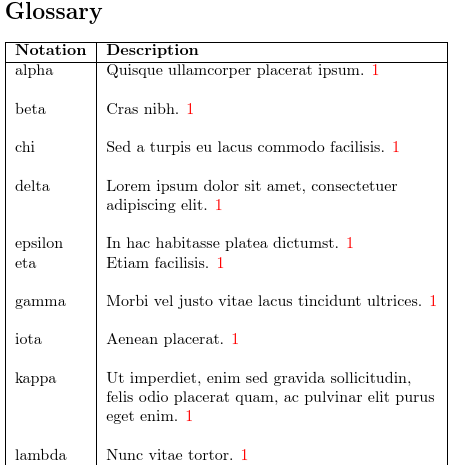
The result is essentially the same as for the
longraggedheaderborder style.
superragged3col 🔗
Thesuperragged3col style is similar the super3col style, but in this
style, the supertable environment is
begun with:
\tablehead{}\tabletail{}%
\begin{supertabular}{l>{\raggedright}p{\glsdescwidth}%
>{\raggedright}p{\glspagelistwidth}}
As with the super3col style,
an extra vertical gap is inserted between letter groups, so
use the nogroupskip option if your entries haven’t been
sorted alphabetically. Again the symbol isn’t displayed. Note that
this style doesn’t use the post description hook (unless you use
glossaries-extra-stylemods) so the
nopostdot setting has no effect.
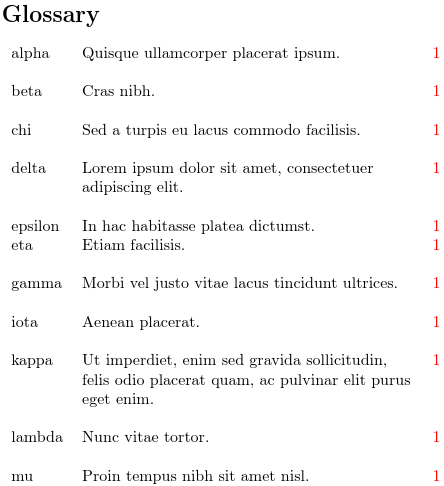
The result is essentially the same as for the
longragged3col style.
superragged3colborder 🔗
Thesuperragged3colborder style is like the superragged3col style, but includes vertical
and horizontal rules.
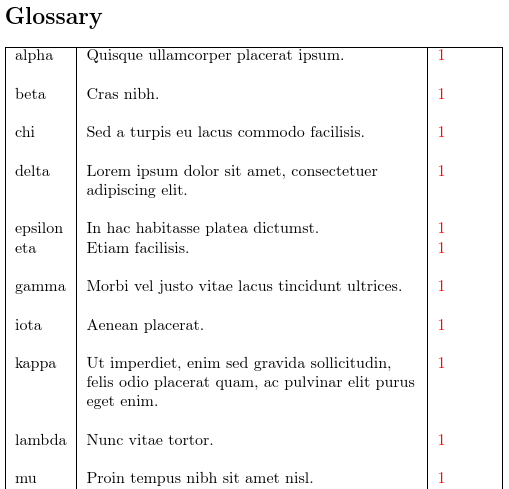
The result is essentially the same as for the
longragged3colborder style.
superragged3colheader 🔗
Thesuperragged3colheader style is like the superragged3col style, but
includes a header row.
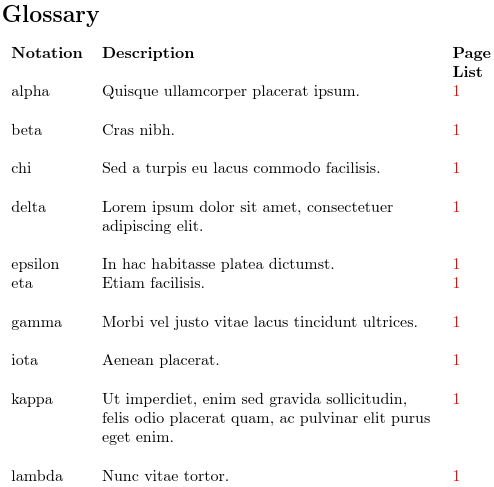
The result is essentially the same as for the
longragged3colheader style.
superragged3colheaderborder 🔗
Thesuperragged3colheaderborder style is like the superragged3col style, but
includes a header row and vertical and horizontal rules.

The result is essentially the same as for the
longragged3colheaderborder style.
altsuperragged4col 🔗
Thealtsuperragged4col style is similar the altsuper4col style, but in
this style, the supertabular environment is
begun with:
\tablehead{}\tabletail{}%
\begin{supertabular}{l>{\raggedright}p{\glsdescwidth}l%
>{\raggedright}p{\glspagelistwidth}}
As with the altsuper4col style,
an extra vertical gap is inserted between letter groups, so
use the nogroupskip option if your entries haven’t been
sorted alphabetically. Note that this style doesn’t use the post
description hook (unless you use
glossaries-extra-stylemods), so the nopostdot setting has no effect.

The result is essentially the same as for the
altlongragged4col style.
altsuperragged4colborder 🔗
Thealtsuperragged4colborder style is like the altsuperragged4col style, but includes vertical
and horizontal rules.

The result is essentially the same as for the
altlongragged4colborder style.
altsuperragged4colheader 🔗
Thealtsuperragged4colheader style is like the altsuperragged4col style, but
includes a header row.
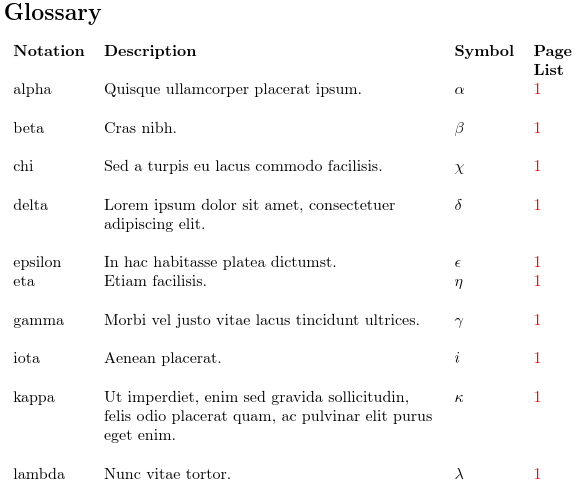
The result is essentially the same as for the
altlongragged4colheader style.
altsuperragged4colheaderborder 🔗
Thealtsuperragged4colheaderborder style is like the altsuperragged4col style, but
includes a header row and vertical and horizontal rules.
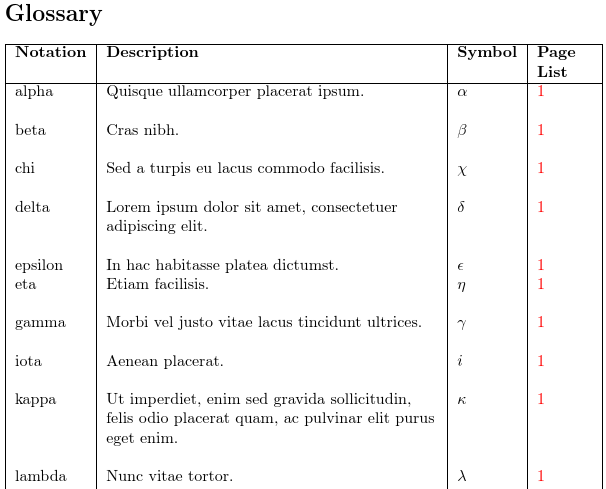
The result is essentially the same as for the
altlongragged4colheaderborder style.
glossary-bookindex
The glossary-bookindex package is provided with the glossaries-extra extension package. It needs to be explicitly loaded either with:
\usepackage{glossary-bookindex}
or with the stylemods package option:
\usepackage[stylemods=bookindex]{glossaries-extra}
This package only provides one style, which is based on the
index style, so this package
automatically loads the glossary-tree package.
The multicol
package is also loaded to provide multiple columns, but the
glossary-mcols package isn’t loaded as the
provided style is more complex than the mcol styles and is
not based on any of them.
bookindex 🔗
Thebookindex style is designed for indexes
rather than glossaries, so it only displays the name and location
list by default. It’s designed for use with bib2gls (with the
--group switch). It may also be used with the other
indexing methods, but some features won’t be available. In
particular, you may have problems with UTF-8 support with this style
if you don’t use it with bib2gls (unless you use XeLaTeX or LuaLaTeX).
There are a number of hooks that can be used to
adjust the style. You can also use the post-name hook, but you can’t
use the post-description hook as the description isn’t shown.
The default number of columns is 2, but this may be
changed by redefining \glsxtrbookindexcols. Each letter
group is headed by default and, if hyperref has been loaded, the
letter group will also be added to the PDF bookmarks.
The following glossary was created with the test file used to generate the documents in the above examples, which uses makeindex rather than bib2gls:
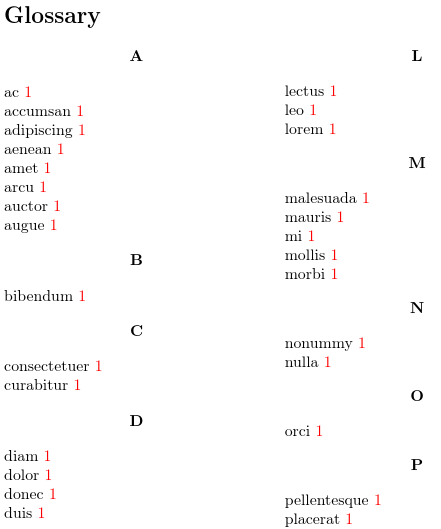
Each group header is centred (within the column) and shown in bold.
The header is followed by \indexspace (indirectly via
\glsxtrbookindexpostgroupskip). The group skip comes
before the header (except for the first header) and can be
suppressed with the nogroupskip option.
The test entries are all ASCII, so in this case there are no problems caused by extended characters in the letter group headings. The PDF bookmarks (as displayed in Okular) are shown below:
The exact style of the bookmarks varies according to the PDF viewer, but most have a tree-like format with collapsible elements.
Each top-level name is flush left, followed by a space and then the location list.
The location lists in the above document all simply contain “1”
because each entry was indexed on page one by the command
\glsaddall, which iterates over all the defined entries
and performs \glsadd for each one. This just indexes
without producing any text. Although this is useful in the test
document to show where the location appears, the locations aren’t
usually desired when using \glsaddall as it’s not
helpful to the reader to have the same page appearing in every
location list.
These types of iterative commands aren’t available with bib2gls as they require all the entries to be defined
first. However, with bib2gls, the required entries
aren’t defined on the first LaTeX run so the iterative commands have nothing to
loop over. Instead, bib2gls can be instructed to select all entries defined in
the designated .bib file with the
selection option:
\GlsXtrLoadResources[
   selection=all, % select all entries in the given .bib file(s)
   src={entries1,entries2}% data given in entries1.bib and entries2.bib
]
In real documents, this is better than \glsaddall as it
doesn’t automatically add an unnecessary location. This means that
the closest matching test file (test-styles-bib2gls.tex) to the
above doesn’t show any locations:

This now just shows the letter group headings and each entry’s name.
If I add the following line to the test file’s
document environment:
\Gls{lorem} and \gls{ac}.
then the difference in the style can now be observed:
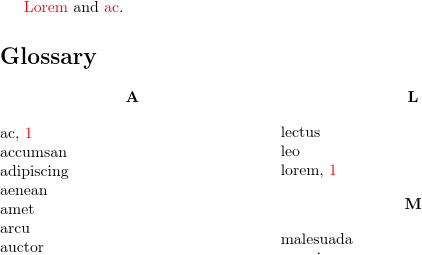
Now the “ac” and “lorem” terms are followed by a comma, a space and then the location list..
Another way of demonstrating the position of the locations is to fake a location for each entry with:
\forglsentries{\thisentry}{%
 \GlsXtrSetField{\thisentry}{location}{\glsnoidxdisplayloc{}{page}{glsnumberformat}{1}}%
}
(This is used for the longextra samples shown later.)
With the standard \makeglossaries method, there is
simply a space between the name and the location, but with bib2gls a
comma is inserted if the location list is non-empty. If you are
using bib2gls and don’t want any locations visible, then use the
resource option save-locations=false rather than the
package option nonumberlist. Otherwise you will end up
with spurious commas.
The name is displayed using
\glsxtrbookindexname{label}, which is simply
defined as:
\newcommand*{\glsxtrbookindexname}[1]{\glossentryname{#1}}
You can redefine this to show the description as well, if required.
For example:
\renewcommand*{\glsxtrbookindexname}[1]{%
 \glossentryname{#1} (\glsentrydesc{#1})%
}
To test if the entry has a description and to allow for the post-description hook and description-related category attributes, you can instead use:
\renewcommand*{\glsxtrbookindexname}[1]{%
 \glossentryname{#1}%
 \ifglshasdesc{#1}{ (\glossentrydesc{#1}\glspostdescription)}{}%
}
(This will also provide accessibility support, if enabled.)

You can add other fields in a similar manner. Alternatively, you can use the post-name hook to make minor adjustments according to the entry’s category.
A more comprehensive view of the
bookindex style can be obtained with the
testidx-glossaries package (provided with testidx). The
test file now implicitly loads
glossaries-extra with the record option, so
\usepackage[bib2gls]{testidx-glossaries}
internally does:
\usepackage[record]{glossaries-extra}
The bookindex style is then loaded and set using:
\usepackage{glossary-bookindex}
\setglossarystyle{bookindex}
The testidx-glossaries package provides
\tstidxmakegloss[options] which implements
\makeglossaries or \makenoidxglossaries or
a series of \GlsXtrLoadResources instructions,
depending on the package setup. In this case, the document is setup
to use bib2gls, so this command uses
\GlsXtrLoadResources. The optional argument is applied
to the final \GlsXtrLoadResources instance. For
example, you can change the sort method for the alphabetical entries
using:
\tstidxmakegloss[sort=sv](You can find the actual
\GlsXtrLoadResources commands
in the .log file if you use testidx-glossaries’s
verbose package option.)
The dummy text (which includes commands like \gls)
is generated with \testidx and the glossary is
displayed with:
\tstidxprintglossary[title=Index]
which, in this case, does
\printunsrtglossary[title=Index]
Since this page is about the way the glossary is displayed (the style) rather than how the glossary is sorted and collated, the testidx commands aren’t particularly important.
This example uses the fancyhdr package to display the first and last word in the page footer. The page style is switched on with:
\fancypagestyle{plain}{%
  \fancyhead{}%
  \lfoot{\glsxtrbookindexfirstmark}%
  \cfoot{\thepage}%
  \rfoot{\glsxtrbookindexlastmark}%
}%
\pagestyle{fancy}%
\lhead{\thepage}%
\lfoot{\glsxtrbookindexfirstmark}%
\cfoot{}%
\rfoot{\glsxtrbookindexlastmark}%
(See the fancyhdr documentation for more information about the
page style commands.) The two commands provided by the
glossary-bookindex package used in the page style are
\glsxtrbookindexfirstmark (which displays the first
marked word for that page) and \glsxtrbookindexlastmark
(which displays the last marked word for that page).
The top-level entries need to have the name added to the list of page marks (for access with the two commands described above):
\renewcommand{\glsxtrbookindexname}[1]{%
  \glsxtrbookindexmarkentry{#1}%
  \glossentryname{#1}%
}
The sub-entries are omitted from the page marks:
\renewcommand{\glsxtrbookindexsubname}[1]{%
  \glossentryname{#1}%
}
These adjustments to the style require an extra LaTeX run, so the complete document build is:
pdflatex test-bookindex
bib2gls --group test-bookindex
pdflatex test-bookindex
pdflatex test-bookindex
The locations are in different colours to test the location
encapsulator mechanism (the format key used in the
optional argument of commands like \gls) and are not
relevant to the style.
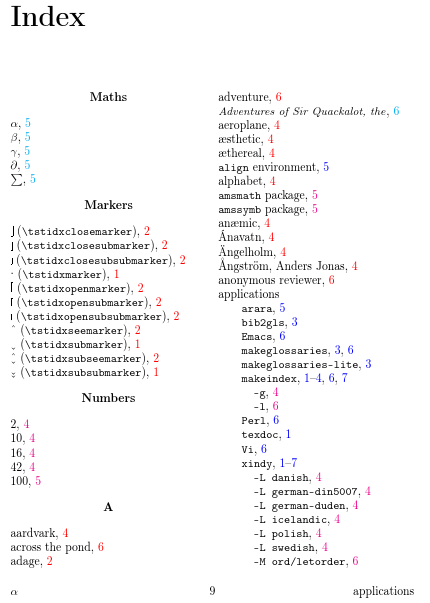
If you want to include descriptions in the style, you need to
instruct the testidx-glossaries package to provide descriptions for
the dummy entries with the desc option:
\usepackage[desc,bib2gls]{testidx-glossaries}
The name hook can be modified to include the description, as in the earlier example:
\renewcommand{\glsxtrbookindexname}[1]{%
  \glsxtrbookindexmarkentry{#1}%
  \glossentryname{#1}%
  \ifglshasdesc{#1}{: \glsentrydesc{#1}}{}%
}
If the sub-entries also need descriptions, then add similar code
to \glsxtrbookindexsubname.
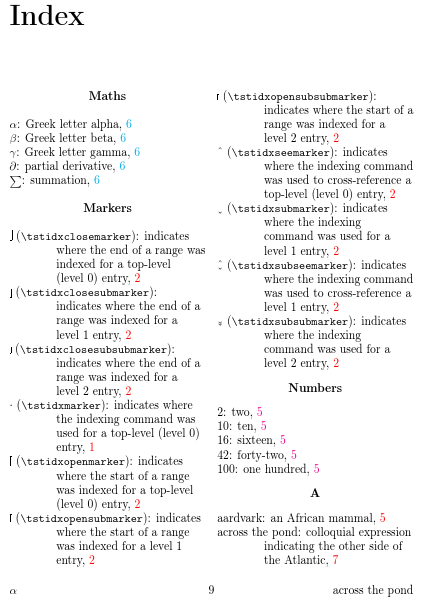
The indentation is governed by \glstreeitem (defined
in glossary-tree.sty) and is also used by the
index style. You can alter the
indentation by redefining this command. For example:
\renewcommand{\glstreeitem}{\par\hangindent 20pt\relax}
The following example fakes the page numbers just for entries with a parent:
\forglsentries{\thisentry}{%
 \ifglshasparent{\thisentry}
 {\GlsXtrSetField{\thisentry}{location}{\glsnoidxdisplayloc{}{page}{glsnumberformat}{1}}}%
 {}%
}
It uses the example-glossaries-parent.bib example file.
This results in a comma and location list for each sub-entry, but not for the top-level entry.
This style supports sub-groups, which can be enabled with the
group-level resource option:
\GlsXtrLoadResources[
 src={example-glossaries-parent},
 group-level=all
]
Remember that bib2gls will need to be
invoked with --group or use:
\BibGlsOptions{group}
The top-level group headings are centred, but the sub-headings have the same indent as their hierarchical level.
glossary-longextra
The glossary-longextra package is provided with the glossaries-extra extension package. It needs to be explicitly loaded either with:
\usepackage{glossary-longextra}
or with the stylemods package option:
\usepackage[stylemods=longextra]{glossaries-extra}
This package automatically loads the glossary-longbooktabs package.
The styles in this package use longtable by default. If you
have a single-paged glossary and you’d rather use tabular
then you can switch with \GlsLongExtraUseTabulartrue
before you set the style. If you switch, you can
change the default vertical alignment for the tabular
environment by redefining \glslongextraTabularVAlign.
There are four types of columns that may be displayed by these
styles: name, description, symbol and location. The style name
indicates which columns are shown by that style and their order. For
example, long-name-desc has just two columns: name and
description (no symbol or location list).
Version 1.49 introduced some extra styles that had columns for the short and long form of abbreviations, and version 1.50 introduced custom columns.
The column alignments are given by the commands:
\glslongextraNameAlign (defaults to l),
\glslongextraDescAlign (defaults to >{\raggedright}p{\glsdescwidth}),
\glslongextraSymbolAlign (defaults to c), and
\glslongextraLocationAlign (defaults to >{\raggedright}p{\glspagelistwidth}).
These may be redefined as required.
Unlike the base long styles, these styles have hooks to
calculate the value of \glsdescwidth (the width of the
description column). To take advantage of these hooks, it’s necessary
to provide the widest entry name. This can simply be done with
the set-widest resource option when using bib2gls.
Alternatively, you can use
\glslongextraSetWidest{text}, where
text is the widest name. If you don’t do this, the table
may end up too wide or too narrow.
The column headers are encapsulated with
\glslongextraHeaderFmt, which just uses \textbf by
default to give bold headers. As with the base long styles,
the header text is given by: \entryname (for the name
column), \descriptionname (for the description column),
\symbolname (for the symbol column) and \pagelistname
(for the location list column).
Unlike the other long styles provided with just the base
glossaries package, these styles have a hook to format the
group headings, but it does nothing by default. It’s defined as:
\newcommand{\glslongextraGroupHeading}[2]{}
The first argument is the number of columns provided by the style and
the second is the group label (not title). The following simply adds
the group header to the first column, without checking how many columns
are available:
\renewcommand*{\glslongextraGroupHeading}[2]{%
  \glsxtrgetgrouptitle{#2}{\thisgrptitle}%
  \glslongextraHeaderFmt\thisgrptitle
  \tabularnewline*\noalign{\vskip\normalbaselineskip}%
}
Note that this uses \glsxtrgetgrouptitle to fetch the group
title from the supplied label. The title is stored in my custom
\thisgrptitle command, which I then format in the same way
as the column headers. This doesn’t span the columns so be careful
of long group titles, as they can interfere with the column width.
There are commands that govern the way the name, description, symbol
and location are displayed. The name is formatted with
\glslongextraNameFmt{label}. There’s a bug in version 1.37
that’s been corrected in v1.38. The correct definition is:
\newcommand{\glslongextraNameFmt}[1]{%
 \glsentryitem{#1}\glstarget{#1}{\glossentryname{#1}}%
}
This picks up the entrycounter package option (if given),
sets the hypertarget (if hyperlinks are supported), checks the
glossname and glossnamefont attributes, includes
accessibility support (if enabled), and
applies the post-name hook (if set).
The description is formatted with \glslongextraDescFmt{label}
which is defined as:
\newcommand{\glslongextraDescFmt}[1]{%
  \glossentrydesc{#1}\glspostdescription
}
This checks the glossdesc and glossdescfont
attributes, includes accessibility support (if enabled), and applies
the post-description hook.
The symbol is formatted with \glslongextraSymbolFmt{label}
which is defined as:
\newcommand{\glslongextraSymbolFmt}[1]{\glossentrysymbol{#1}}
This includes accessibility support (if enabled).
The location is formatted with
\glslongextraLocationFmt{label}{location
list}
which is defined as:
\newcommand{\glslongextraLocationFmt}[2]{#2}
The location list supplied in the second argument may
include a prefix, suffix or cross-reference list, depending on the
document settings.
As with the base long styles, child entries are assumed to be homographs. The helper commands can be redefined to change this, but the tabular style will mask the hierarchical structure.
The name column for child entries is formatted with
\glslongextraSubNameFmt{level}{label}
but this just does the sub-entry counter
(if enabled) and the hypertarget (if supported):
\newcommand{\glslongextraSubNameFmt}[2]{%
 \glssubentryitem{#2}\glstarget{#2}{\strut}%
}
The description column for child entries is formatted with
\glslongextraSubDescFmt{level}{label}
which defaults to the same as the top-level:
\newcommand{\glslongextraSubDescFmt}[2]{%
  \glslongextraDescFmt{#2}%
}
Similarly for the child symbols:
\newcommand{\glslongextraSubSymbolFmt}[2]{%
  \glslongextraSymbolFmt{#2}%
}
The location for child entries is formatted with
\glslongextraSubLocationFmt{level}{label}{location
list}
which is defined as:
\newcommand{\glslongextraSubLocationFmt}[3]{#3}
long-name-desc 🔗
Thelong-name-desc style just has two columns: the name in
the first column and the description in the second column. Neither
the symbol nor the location list is displayed.
I’ve used the example-glossaries-brief.bib example file
for the sample document shown below.

The result is very similar to the
longragged-booktabs
style but without the location list.
If the following code is added, then the group headings appear. If
you are using bib2gls remember that you will need the
--group (or -g) switch.
\renewcommand*{\glslongextraGroupHeading}[2]{%
  \glsxtrgetgrouptitle{#2}{\thisgrptitle}%
  \glslongextraHeaderFmt\thisgrptitle
  \tabularnewline*\noalign{\vskip\normalbaselineskip}%
}

The group header is just in the first column, in bold, followed by a vertical space of the same height as a normal line.
The following example has the subentrycounter package
option and uses the example-glossaries-childnoname.bib
sample file. Note that all child entries are treated the same way,
regardless of their hierarchical level.

This puts the sub-entry counter in the name column (without the name).
I haven’t used the set-widest resource option in any of the
above, but the default setting produces a fairly reasonable width. In the
next example below, I’ve included the geometry package with
the showframe option to show the table in relation to the
available text area:
\usepackage[a4paper,showframe]{geometry}
This demonstrates that the table is actually slightly too wide for
the page:
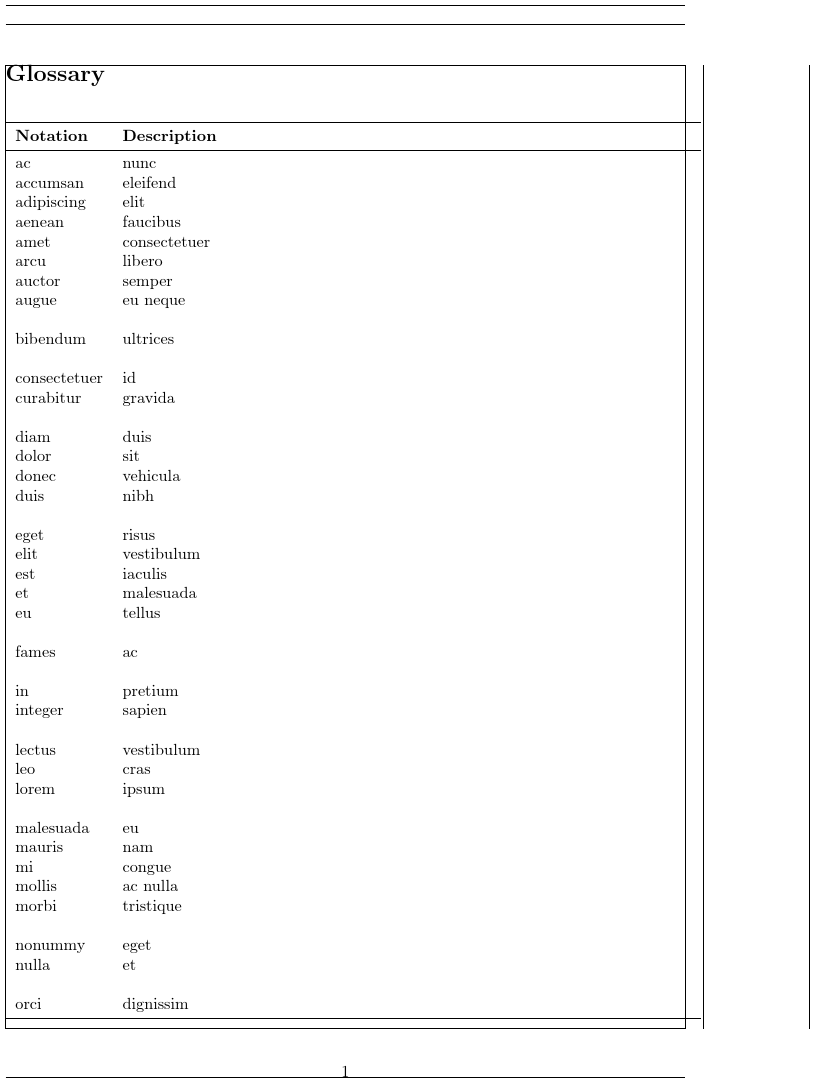
The horizontal rules that span the entire table poke out into the right margin.
If I add the set-widest option to
\GlsXtrLoadResources then the result shows a better fit:
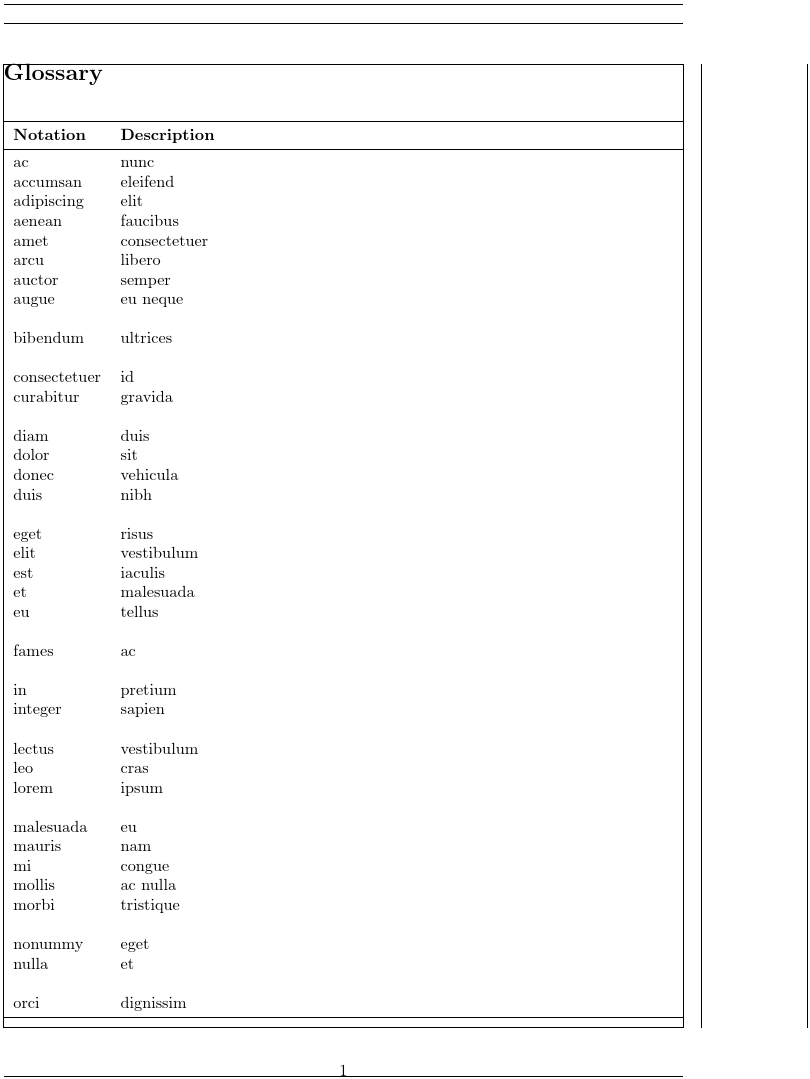
long-name-desc-loc 🔗
Thelong-name-desc-loc style has three columns: the name in
the first column, the description in the second column and the
location list in the third column. The symbol isn’t displayed.
The description width is calculated at the
start of the style by \glslongextraLocSetDescWidth.
This first uses \glslongextraSetDescWidth to calculate
the width assuming just a name and description column, and then
subtracts 2\tabcolsep+\glspagelistwidth, which is the
width of the page list column and the width of the separator at
either side of the column.
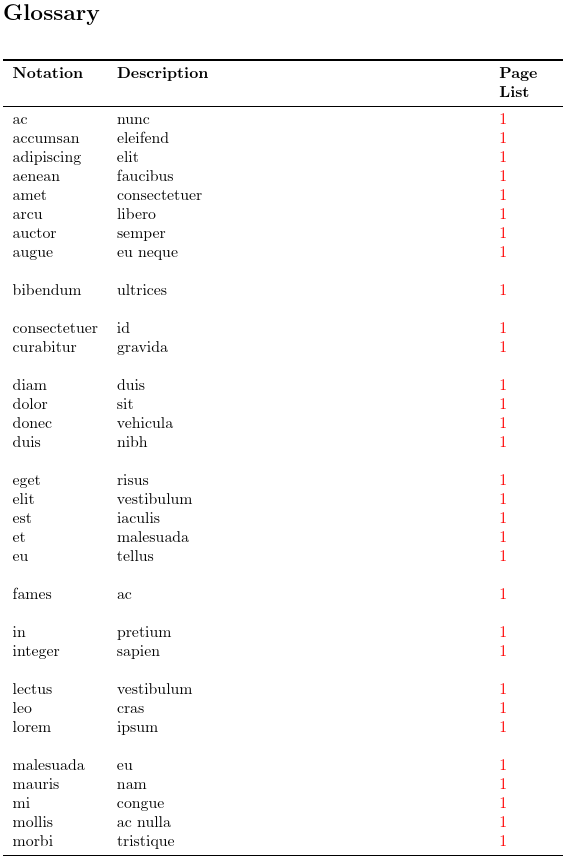
The result is very similar to the
longragged3col-booktabs
style.
long-desc-name 🔗
Thelong-desc-name style just has two columns: the
description in the first column and the name in the second column. Neither
the symbol nor the location list is displayed.
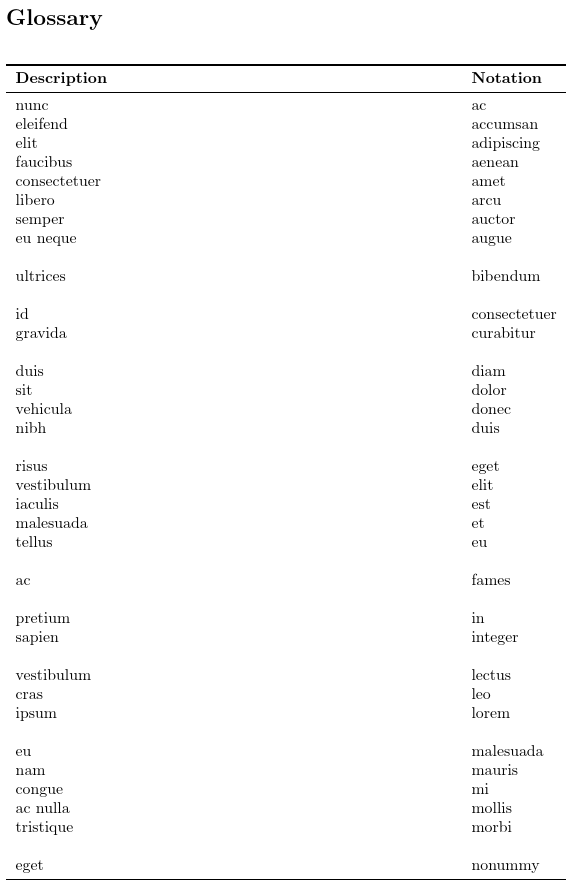
This is essentially the same as the
long-name-desc
style with the columns switched round.
long-loc-desc-name 🔗
Thelong-loc-desc-name style has three columns: the
location list in the first column, the description in the second
column and the name in the third column. The symbol isn’t displayed.
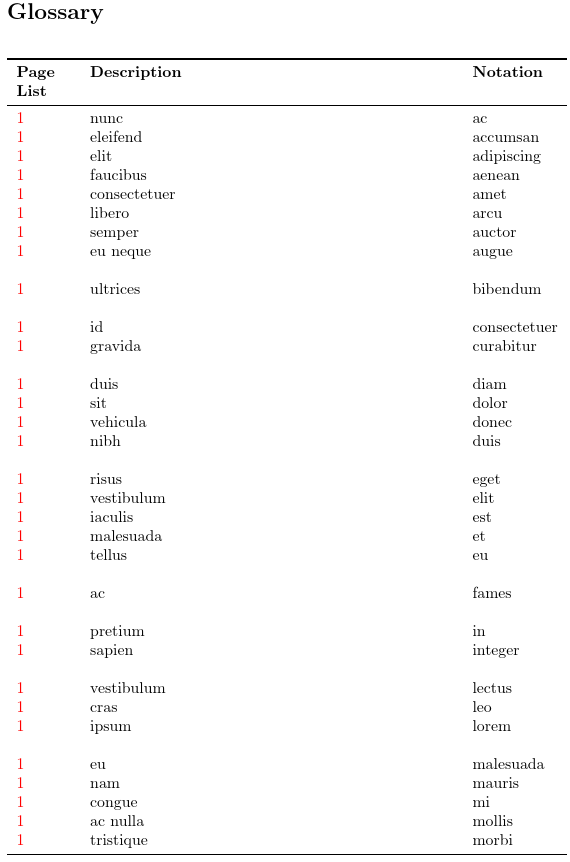
This is essentially the same as the
long-name-desc-loc
style with the columns switched round.
long-name-desc-sym 🔗
Thelong-name-desc-sym style has three columns: the name in
the first column, the description in the second column and the
symbol in the third column. The location list isn’t displayed.
I’ve used the example-glossaries-symbols.bib example file
for the sample document shown below.
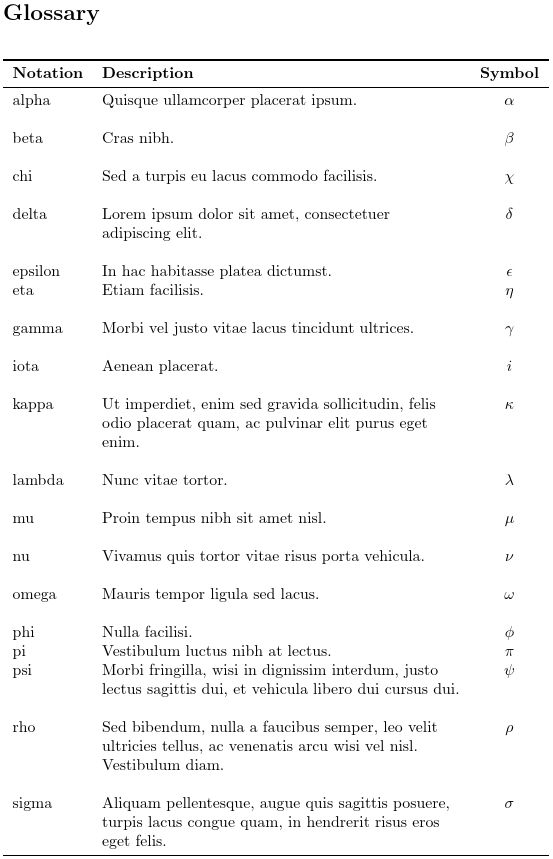
The result is similar to the
altlong4col-booktabs
style, but without the page list column and the symbol is centred.
long-name-desc-sym-loc 🔗
Thelong-name-desc-sym-loc style has four columns: the name in
the first column, the description in the second column, the symbol
in the third column and the location list in the fourth column.
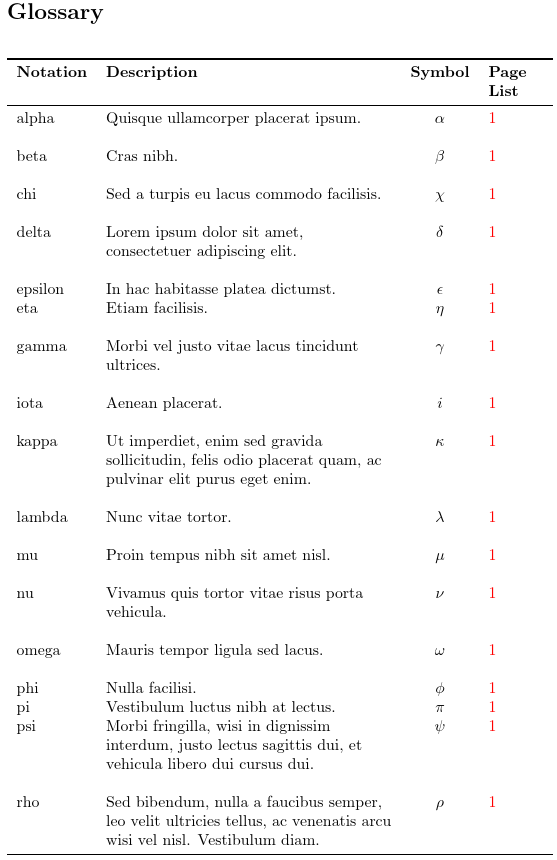
The result is similar to the
altlong4col-booktabs
style (except that the symbol is centred).
long-name-sym-desc 🔗
Thelong-name-sym-desc style has three columns: the name in
the first column, the symbol in the second column and the
description in the third column. The location list isn’t displayed.
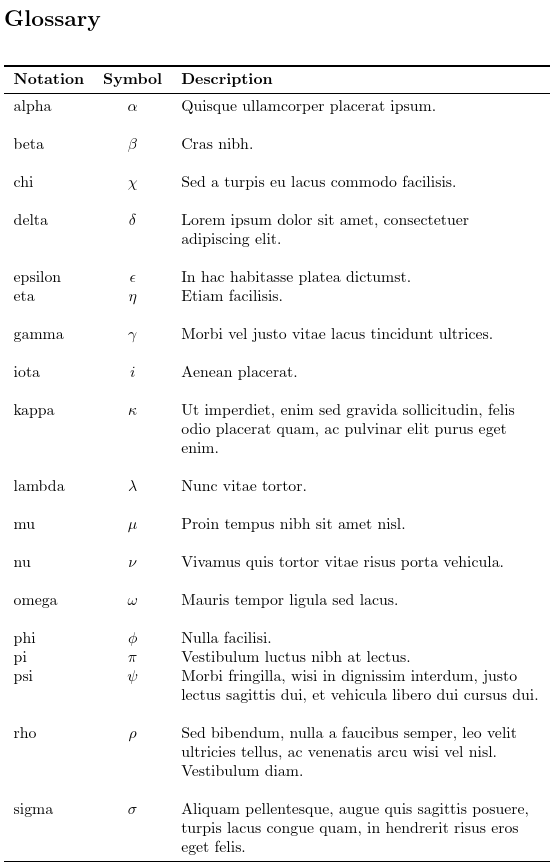
This is essentially the same as the
long-name-desc-sym
style with the description and symbol columns switched round.
long-name-sym-desc-loc 🔗
Thelong-name-sym-desc-loc style has four columns: the name in
the first column, the symbol in the second column, the description
in the third column and the location list in the fourth column.
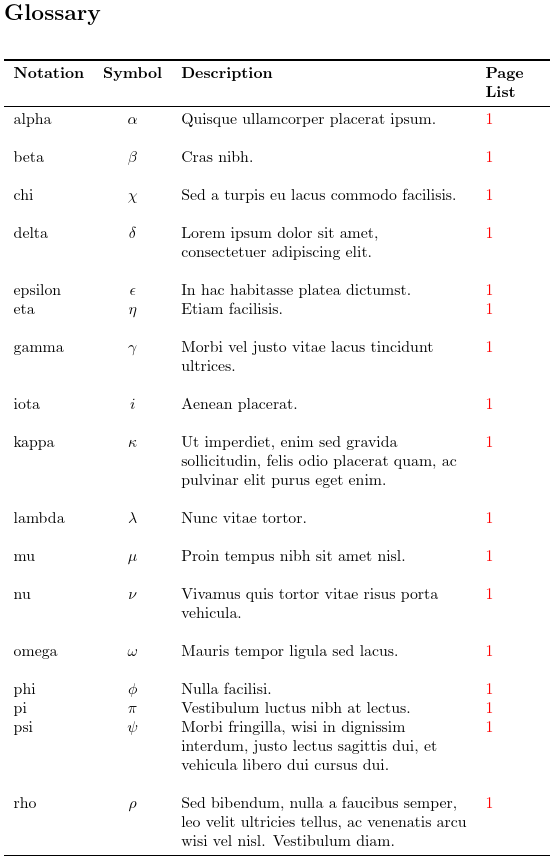
This is essentially the same as the
long-name-desc-sym-loc
style with the description and symbol columns switched round.
long-sym-desc-name 🔗
Thelong-sym-desc-name style has three columns: the symbol
in the first column, the description in the second column and the
name in the third column. The location list isn’t displayed.
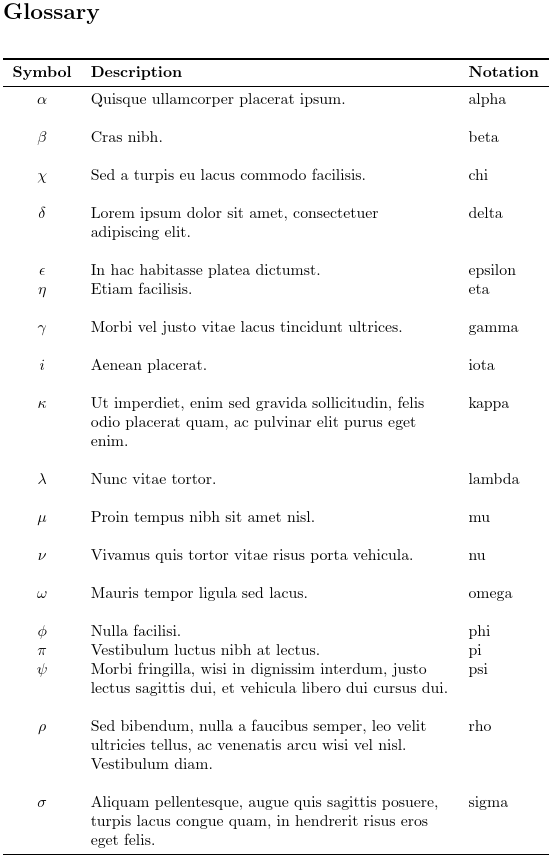
This is essentially the same as the
long-name-desc-sym
style with the columns switched round.
long-loc-sym-desc-name 🔗
Thelong-loc-sym-desc-name style has four columns: the
location list in the first column, the symbol in the second column,
the description in the third column and the name in the fourth
column.
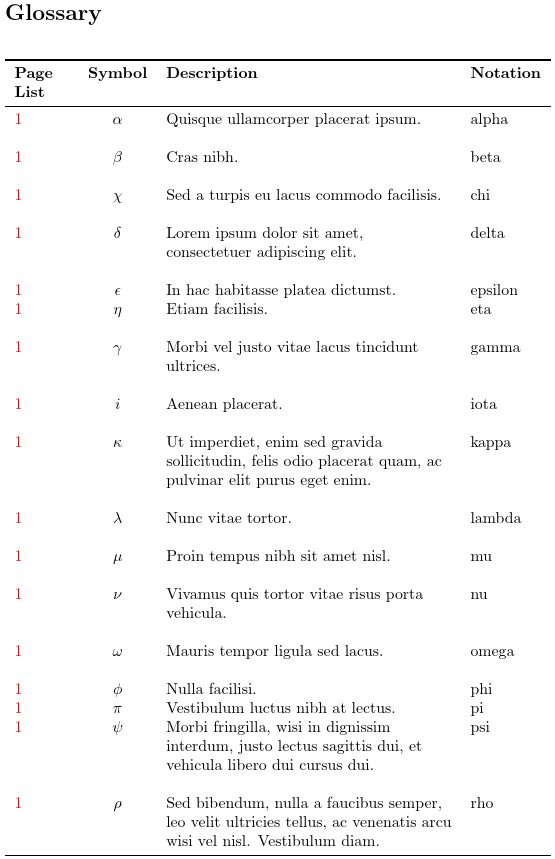
This is essentially the same as the
long-name-desc-sym-loc
style with the columns switched round.
long-desc-sym-name 🔗
Thelong-desc-sym-name style just has three columns: the
description in the first column, the symbol in the second column and
the name in the third column. The location list isn’t displayed.
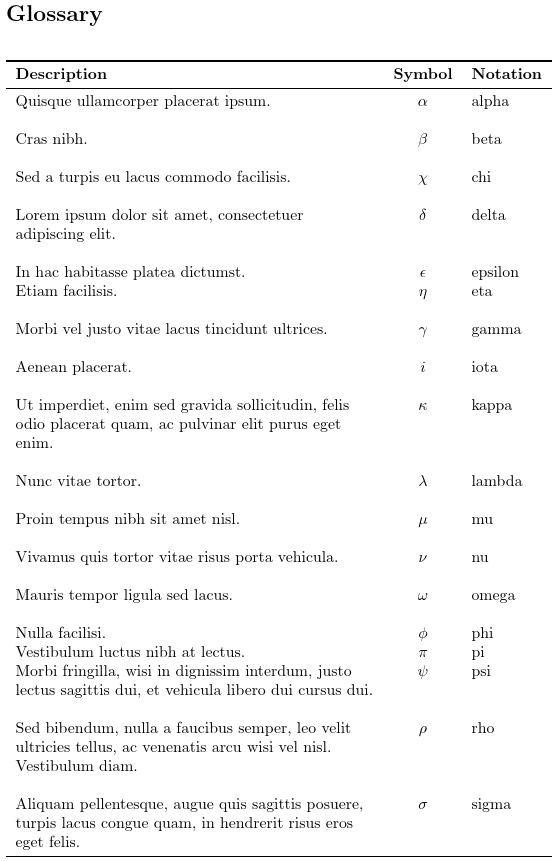
This is essentially the same as the
long-name-desc-sym
style with the columns switched round.
long-loc-desc-sym-name 🔗
Thelong-loc-desc-sym-name style has four columns: the
location list in the first column, the description in the second column,
the symbol in the third column and the name in the fourth
column.

This is essentially the same as the
long-name-desc-sym-loc
style with the columns switched round.
long-sym-desc 🔗
Thelong-sym-desc style (new to v1.49) has two columns: the
symbol (or name, if the symbol isn't supplied) is in the first column
(with the header given by \symbolname)
and the description is in the second column. Note that the name will
only be shown if the symbol hasn't been set. In this example, the
example-glossaries-symbols.bib is used,
which has the symbol field set for all entries. The default
nogroupskip=false setting is on, which means there’s a
vertical gap between letter groups.

This is like the
long-name-desc
style but the first column is headed “Symbol” and the symbol is
shown instead of the name. Note that it’s left-aligned not centred.
The following adjustment also includes entries from the example-glossaries-brief.bib file:
\GlsXtrLoadResources[
 selection=all,
 src={example-glossaries-brief,
 example-glossaries-symbols}
]
Note that this style doesn’t take the widest name setting into
account (since the widest name may not actually be shown). If there
are any names that are wider than the column header, then you will
need to redefine \glslongextraSymNoNameSetDescWidth to
adjust \glsdescwidth as appropriate.
In this example, the widest name is “consectetuer”, which is
wider than the header “Symbol”.
The table width can be automatically adjusted by adding the
set-widest resource option and add the following
redefinition:
\renewcommand{\glslongextraSymNoNameSetDescWidth}{%
 \glslongextraSetDescWidth
}
long-desc-sym 🔗
Thelong-desc-sym style has two columns: the
description is in the first column and the symbol (or name, if the
symbol isn't supplied) is in the second column (with the header
given by \symbolname). Note that the name will only be
shown if the symbol hasn't been set. In this example, the example-glossaries-symbols.bib is used, which
has the symbol field set for all entries. The default
nogroupskip=false setting is on, which means there’s a
vertical gap between letter groups.

This is essentially the same as the
long-sym-desc
style with the columns switched round.
abbr-short-long 🔗
Theabbr-short-long style (v1.49+) is designed for abbreviations
and has two columns: the
short form (or name, if the short form isn't supplied) is in the first column
and the long form (or description, if the long form isn't supplied) is in the
second column. The column headers are obtained from
\glslongextraShortHeader (defined to just
\entryname) and \glslongextraLongHeader
(defined to just \descriptionname).
In this example, the
example-glossaries-acronym-desc.bib is used,
which has the description field set for all entries. I’ve used the
long-short-desc abbreviation style:
\setabbreviationstyle[acronym]{long-short-desc}
The default nogroupskip=false setting is on, which means there’s a
vertical gap between letter groups.
As with the
long-sym-desc
style, the assumption is that the width of the column header will be
wider that the width of the short form for each entry.
The width of the second column is given by
\glsdescwidth. Its value is calculated by
\glslongextraShortNoNameSetDescWidth.
In this example, I’ve used the
long-short-desc abbreviation style, which means that
the name will contain the long form as well as the short form, so
using the widest name will be inappropriate.
abbr-long-short 🔗
Theabbr-long-short style (v1.49+) is designed for abbreviations
and has two columns:
the long form (or description, if the long form isn't supplied) is in the
first column and the
short form (or name, if the short form isn't supplied) is in the
second column. The column headers are obtained from
\glslongextraLongHeader
(defined to just \descriptionname) and
\glslongextraShortHeader (defined to just
\entryname).
In this example, the
example-glossaries-acronym-desc.bib is used,
which has the description field set for all entries. I’ve used the
long-short-desc abbreviation style:
\setabbreviationstyle[acronym]{long-short-desc}
The default nogroupskip=false setting is on, which means there’s a
vertical gap between letter groups.

This is essentially the same as the
abbr-short-long
style with the columns switched round.
long-name-custom1 🔗
Thelong-name-custom1 style (v1.50+) is like the
long-name-desc
but has a custom field instead of the description in the second
column. The internal field name of the custom field is supplied in the definition
of \glslongextraCustomIField. This defaults to
useri, which corresponds to the user1 key.
The column header for the custom field is given by
\glslongextraCustomIHeader, which has the following
definition:
\newcommand{\glslongextraCustomIHeader}{%
 \MFUsentencecase{\glslongextraCustomIField}}
This simply converts the field label to sentence case, which means
that with the default definitions it will appear as “Useri”.
If you redefine \glslongextraCustomIField to another
field label, the header may become suitable, otherwise you will need
to redefine \glslongextraCustomIHeader as appropriate.
The alignment for the name column is given by
\glslongextraNameAlign, which is as for styles such as
long-name-desc.
The alignment for the user column is given by
\glslongextraCustomIAlign. This defaults to
l (left-aligned). If your custom field values are long
and likely to need a paragraph cell, you will need to redefine this
as appropriate.
This example uses the example-glossaries-user.bib test file, which is provided with glossaries-extra v1.50+, and corresponds to the example-glossaries-user.tex test file. This test set has all six user fields set for the top-level entries and a random selection set for child entries.
This results in a very narrow table as neither the names nor the
user1 values are wide. Child entries don’t have the
name display, which means that if the user1 field also
isn’t set, it will result in blank rows.
long-custom1-name 🔗
Thelong-custom1-name style (v1.50+) is like the
long-name-custom1
but with the columns switched round.

long-name-custom2 🔗
Thelong-name-custom2 style (v1.50+) is similar to the
long-name-custom1
style but is a three column style with an extra custom field, which is
given by \glslongextraCustomIIField. The default
label for the second custom field is
userii, which corresponds to the user2 key.
The header is given by \glslongextraCustomIIHeader,
which again simply converts the first letter of the field label to
uppercase, so it may need redefining. The column alignment for the
second custom field is given by
\glslongextraCustomIIAlign, which defaults to
l (left aligned).
The first two columns are as for the
long-name-custom1
style. As above, this example uses the
example-glossaries-user.bib test file.
long-custom2-name 🔗
Thelong-custom2-name style (v1.50+) is like the
long-name-custom2
style but the name column is at the other end so that the column
order is: first custom field, second custom field, name.

long-name-custom3 🔗
Thelong-name-custom3 style (v1.50+) is similar to the
long-name-custom2
style but is a four column style with an extra custom field, which is
given by \glslongextraCustomIIIField. The default
label for the third custom field is
useriii, which corresponds to the user3 key.
The header is given by \glslongextraCustomIIIHeader,
which again simply converts the first letter of the field label to
uppercase, so it may need redefining. The column alignment for the
third custom field is given by
\glslongextraCustomIIIAlign, which defaults to
l (left aligned).
The first three columns are as for the
long-name-custom2
style. As above, this example uses the
example-glossaries-user.bib test file.
long-custom3-name 🔗
Thelong-custom3-name style (v1.50+) is like the
long-name-custom3
style but name column is at the other end, so that the column order
is: first custom field, second custom field, third custom field,
name.

long-name-custom1-desc 🔗
Thelong-name-custom1-desc style (v1.50+) is similar to the
long-name-custom1
style but has three columns, with the description in the third column.
The first two columns are as for the
long-name-custom1
style.
The description column is as for the
long-name-desc
style but the description width \glsdescwidth is
calculated using \glslongextraCustomISetDescWidth.
This first calculates the width according to \glslongextraSetDescWidth
and then subtracts the width of the first custom column header.
If the description width is incorrect, you will need to redefine
\glslongextraCustomISetDescWidth to set
\glsdescwidth to a more appropriate value.
Alternatively, redefine \glslongextraDescAlign.
As above, this example uses the example-glossaries-user.bib test file.
long-name-custom2-desc 🔗
Thelong-name-custom2-desc style (v1.50+) is similar to the
long-name-custom2
style but has four columns, with the description in the fourth column.
The first three columns are as for the
long-name-custom2
style.
The description column is as for the
long-name-desc
style but the description width \glsdescwidth is
calculated using \glslongextraCustomIISetDescWidth.
This first calculates the width according to
\glslongextraCustomISetDescWidth
and then subtracts the width of the second custom column header.
If the description width is incorrect, you will need to redefine
\glslongextraCustomIISetDescWidth to set
\glsdescwidth to a more appropriate value.
Alternatively, redefine \glslongextraDescAlign.
As above, this example uses the example-glossaries-user.bib test file.
long-name-custom3-desc 🔗
Thelong-name-custom3-desc style (v1.50+) is similar to the
long-name-custom3
style but has five columns, with the description in the fifth column.
The first four columns are as for the
long-name-custom3
style.
The description column is as for the
long-name-desc
style but the description width \glsdescwidth is
calculated using \glslongextraCustomIIISetDescWidth.
This first calculates the width according to
\glslongextraCustomIISetDescWidth
and then subtracts the width of the third custom column header.
If the description width is incorrect, you will need to redefine
\glslongextraCustomIIISetDescWidth to set
\glsdescwidth to a more appropriate value.
Alternatively, redefine \glslongextraDescAlign.
As above, this example uses the example-glossaries-user.bib test file.
long-desc-custom1-name 🔗
Thelong-desc-custom1-name style (v1.50+) is like the
long-name-custom1-desc
style but the name and description columns are swapped.

long-desc-custom2-name 🔗
Thelong-desc-custom2-name style (v1.50+) is like the
long-name-custom2-desc
style but the name and description columns are swapped.

long-desc-custom3-name 🔗
Thelong-desc-custom3-name style (v1.50+) is like the
long-name-custom3-desc
style but the name and description columns are swapped.

glossary-topic
The glossary-topic package is provided with the glossaries-extra extension package. (New to version 1.40.) It needs to be explicitly loaded either with:
\usepackage{glossary-topic}
or with the stylemods package option:
\usepackage[stylemods=topic]{glossaries-extra}
If you want to use this package with the set-widest
resource option in bib2gls you will also need the
glossary-tree package:
\usepackage[stylemods={tree,topic}]{glossaries-extra}
This package provides styles designed for glossaries that are
lists of topics. That is, the top-level entries are considered topic
titles (which may or may not have an associated symbol or
description) and the sub-entries are items within that topic. By
default the number list isn’t shown for the top-level entries but is
shown after the description for sub-entries (unless suppressed with
nonumberlist or save-locations=false).
The glossary-topic package automatically loads the multicol package.
topic 🔗
Thetopic style displays the name with the first letter
converted to upper case in a large, bold font
(\glstopicTitleFont). This includes the symbol in
parentheses if supplied. A paragraph break follows.
There’s a hook \glstopicMarker before the name,
which does nothing by default, but can be redefined to add the topic
to the PDF bookmarks or the table of contents. For example:
\renewcommand*{\glstopicMarker}[1]{%
 \pdfbookmark[1]{topic.#1}{\glsentryname{#1}}}
If the description is set, this is shown with the first letter converted to upper case and is followed by the post-description hook.
The sub-entries are indented from the second level onwards in a
similar manner to the tree style.
If you want an effect like the alttree style then you need to
load the glossary-tree package to provide
\glssetwidest.
There are no letter group separators with this style by default
so the nogroupskip option has no effect. If you want
letter groups as well, you can redefine
\glstopicGroupHeading. For example:
\renewcommand*{\glstopicGroupHeading}[1]{%
  \glsxtrgetgrouptitle{#1}{\thisgrptitle}%
  \section*{\thisgrptitle}%
}
The example below was created with:
\usepackage
 [
   record,% using bib2gls
   stylemods={topic},% load glossary-topic.sty
   postdot% add post-description dot
 ]
 {glossaries-extra}
and uses the hierarchical test set
example-glossaries-parent.bib.
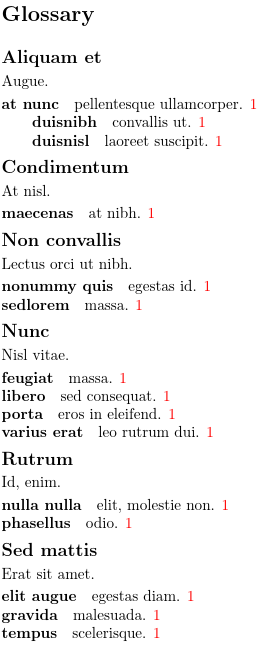
Adding glossary-tree.sty and the set-widest option
produces a different result:
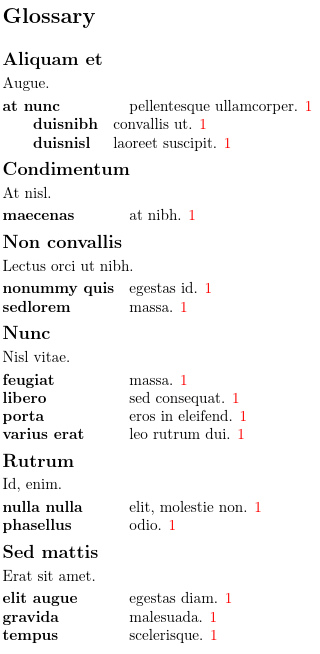
topicmcols 🔗
Thetopicmcols style is very similar to the topic
style but the child entries are placed inside a multicol
environment. The default number of columns is 2. This can be changed
by redefining \glstopicCols. If you prefer the starred
form you can redefine \glstopicColsEnv:
\renewcommand*{\glstopicColsEnv}{multicols*}
As with the topic style, the formatting
changes if the set-widest option is used.
Example without set-widest:
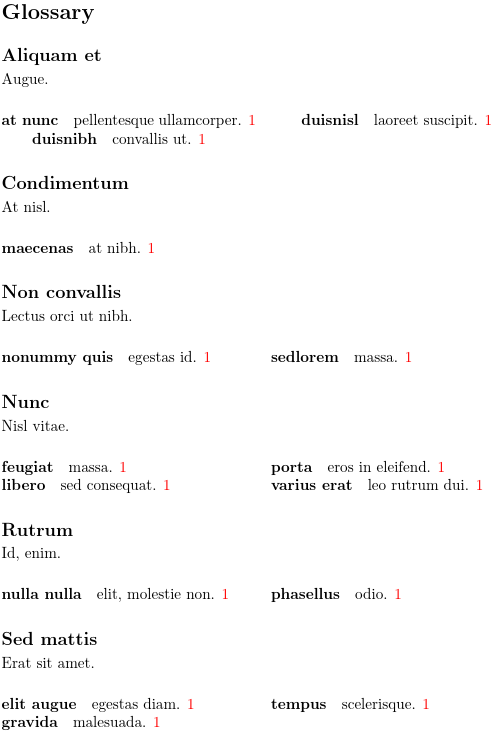
Example with set-widest:
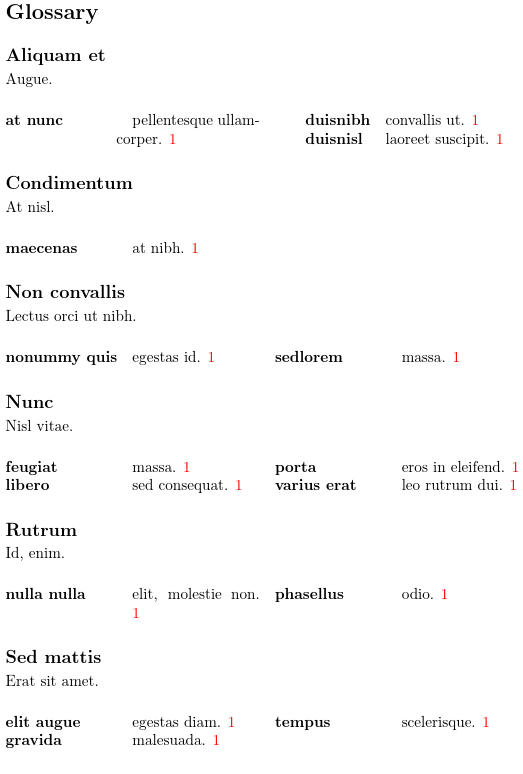
glossary-table
The glossary-table package is provided with the glossaries-extra extension package. (New to version 1.49.) It needs to be explicitly loaded either with:
\usepackage{glossary-table}
or with the stylemods package option:
\usepackage[stylemods=table]{glossaries-extra}
This package doesn’t provide a general glossary style, but a
single highly customised style that’s used by an accompanying
command (also defined in glossary-table.sty)
\printunsrttable that uses the style. The style should
not be used in any other context and will be implicitly set by
\printunsrttable (so don’t use the style option).
Most of the options that can be passed to \printunsrtglossary
can also be passed to \printunsrttable.
The nonumberlist setting is ignored, as the style
doesn’t show the location list. (The location list is stored in the
location field, unless you use the
save-locations=false option, so it can be accessed if
required.) Groups (heading and group skip) are
off by default. If you want them, you need the groups
option in \printunsrttable as well as invoking bib2gls with the --group switch.
You will also need to load glossary-longbooktabs to support the
group skip. Group headings will span across all columns of the
table, which may leave some empty blocks at the end of the previous
row.
Since \printunsrttable internally uses
\printunsrtglossary, all entries will be listed in
order of definition. Although this command is designed for use with
bib2gls (which ensures that the order of
definition matches the requested order), you can use \printunsrttable
in addition to using \printglossary if the order of definition is
suitable, but child lists and groups won’t be supported.
The purpose of \printunsrttable is to display the
glossary as a table with the glossary title in the caption (not as a
section title). What’s normally the table of contents title will be
used in the list of tables. Any preamble or postamble provided will
be incorporated into the table header or footer (spanning the table).
The aim is to allow multiple entries to appear on a single row.
Consider the earlier
long-name-custom1
style example, which had a very narrow table because the name and
custom values were all quite short. A more compact table with
multiple entries per row may be more desirable (particularly if
print cost is an issue).
The nature of tabular-like environments, such as the
longtable environment, makes it hard to have
conditionals and increment a count register to keep track of when to
start a new column and when to start a new row. Attempts to do this
in a glossary style frequently cause errors, such as missing
\omit or misplaced \noalign.
The \printunsrtglossary command has to construct the
contents of the glossary by iterating over all entries. In order to
avoid the tabular problems, it appends each entry item to an
internal command until that command contains the entire content of
the glossary. That means that the problematic loop and conditionals
are performed outside of the tabular context. The
\printunsrttable command makes use of the
\printunsrtglossary hooks to insert the appropriate
alignment or new row commands while the glossary content is being
constructed. With par=justified or par=ragged
the hooks can also be used to calculate the column widths.
Child entries are automatically filtered out, but level 1 entries
can still be shown if you use the save-child-count
resource option. In that case, they will be appended to the parent
entry information. The child name isn’t shown by default, but if you
want it displayed, use the following redefinition:
\renewcommand{\glstableSubNameFmt}[1]{#1}
(by default, this command ignores its argument).
The child list is set inside a tabular environment and will be at
the end of the column with the default par=false or on
the next line with the other par settings.
The subentrycounter option is supported.
If you want to apply any additional filtering, you can redefine
\glstableiffilter. This takes three arguments. The
first is the entry label. This command should do the second argument
if the entry should be filtered and the third argument otherwise.
Only top-level entries will be passed to this command.
If child lists are visible, you can filter child entries by
redefining \glstableiffilterchild, which has the same
syntax as \glstableiffilter.
Each entry is displayed in a block. The block may be a single
table cell or may comprise multiple columns. The
block style determines how the entry is displayed and how
many columns a single entry requires and where, if applicable, the
child entries should be shown. The block style is set with the
block-style option, and the number of blocks per row is
set with the blocks option. The total number of columns
in the table will be the number of columns per block multiplied by
the number of blocks per row.
The following examples are all based on the file test-table.tex, which contains:
\documentclass{article}

\usepackage[T1]{fontenc}
\usepackage[stylemods=table,record]{glossaries-extra}

\GlsXtrLoadResources[
  src={example-glossaries-user},
 % resource options
  selection=all
]

\renewcommand{\glstableotherfield}{useriii}

\begin{document}
\printunsrttable[
 % table options
]
\end{document}
The default setting is blocks=2,block-style=name-desc
which indicates two blocks per row using the
name-desc
block style. Predefined block styles are illustrated below using the
default blocks=2 setting.
Block styles may show the name. In example-glossaries-user.bib, the name for top-level entries is in the form “letter name”, where letter is a lowercase letter. Child entry names are in the form “letter/n name”, where n is a number.
Block styles may show the description. In example-glossaries-user.bib, the description for top-level entries is in the form “letter description”, where letter is a lowercase letter. Child entry descriptions are in the form “child n of letter”, where n is a number.
Block styles may show the symbol. In
example-glossaries-user.bib, the symbol,
if set, will be a mathematical symbol, such as
\alpha, possibly with a subscript or superscript.
The symbols aren’t unique (for example, there are two top-level
entries that both have symbol={\ensuremath{\lambda}}).
Block styles may support a custom
“other” field. If required, the internal field label for this field
should be in the definition of \glstableotherfield. The
default definition is empty, which means no other field is required.
The example document redefines this command to useriii,
which corresponds to the user3 key. In
example-glossaries-user.bib,
this value, if set, is a lowercase Roman numeral.
(Again, these aren’t unique.)
Block styles default to using horizontal rules provided by the
booktabs package. If you don’t want them,
use the rules=false option. There is a header row by
default. If you don’t want it, use the header=false
option. Each block is separated by a vertical line by default.
If you don’t want it, use blocksep={}.
If you don’t want a caption, use caption=false.
Each column within a block may be designated for a single field (such as the name) or may include other fields, if they are set. The header is determined by the primary field for the column. The associated commands are:
\glstablenameheader- The header for the name column. Default:
\entryname \glstabledescheader- The header for the description column. Default:
\descriptionname \glstablesymbolheader- The header for the symbol column. Default:
\symbolname \glstableotherheader- The header for the other column. Default:
\MFUsentencecase{\glstableotherfield}
By default, the column alignment specifiers will be single-line
specifiers: l (left), c (centred) or
r (right) according to the column designation.
If you need line-wrapping, use par=justified or
par=ragged.
name 🔗
Thename block style has a one-column block. Without
the save-child-count resource option, no child entries
will be included, as illustrated below.
This shows the name followed by the symbol, other and description (if set) in parentheses. Note that the symbol is followed by a space but the other value is followed by a comma. If the other value isn’t present, the comma won’t be present either.
If you want the child entries, you will need the
save-child-count resource option:
\GlsXtrLoadResources[
  src={example-glossaries-user},
  save-child-count,
  selection=all
]
It’s likely that you will also need par=ragged,
otherwise the table will be too wide:
\printunsrttable[
  block-style=name,
  par=ragged
]
By default, the child name isn’t shown.
name-desc 🔗
Thename-desc block style has a two-column block with
the name in the first column and the description in the second.
If the other field is set, if will be shown before the description
in the same column. The symbol isn’t shown.
With the save-child-count option, the child list
will be placed in the same column as the description. Remember that
you will need to use par=ragged, otherwise the table
will be too wide. The child list is like the child list for the
name block style, but doesn’t
include the symbol.
name-symbol 🔗
Thename-symbol block style has a two-column block with
the name in the first column and the symbol in the second.
If the other field is set, if will be shown after the name
in the first column. The description isn’t shown. The symbol column
is centred.
With the save-child-count option, the child list
will be placed at the end of the name column (with par=false).
You may need to use par=ragged (as in the example shown below),
if the table ends up too wide. The child list shows the other value
(if set) followed by the symbol, but doesn’t include the description.
Note that the child symbol is in the name column, not in the symbol column. This is because the child list is contained within a tabular environment in the same cell as the parent name.
desc-name 🔗
Thedesc-name block style has a two-column block with
the description in the first column and the name in the second.
The symbol isn’t shown.

The result is like the name-desc block style example, but with the columns switched round.
symbol-name 🔗
Thesymbol-name block style has a two-column block with
the symbol in the first column and the name in the second.
The description isn’t shown.

The result is like the name-symbol block style example, but with the columns switched round.
The child list can be shown with the save-child-count
resource option. Note that the child symbol comes before the other
value.
name-symbol-desc 🔗
Thename-symbol-desc block style has a three-column block with
the name in the first column, the symbol (centred) in the second, and the
description in the third. The other value, if set, is at the start
of the description column.
In this example, the table ends up too wide with the default
par=false, so you may need to change that setting to
allow line wrap with this block style.
The child list can be shown with the
save-child-count resource option. The example below
also uses par=ragged otherwise the table will be too
wide. The child list is in the description column with the child symbol,
other value (if set) and description. Note that the
par=ragged setting also enables line wrap for the child
entries.
name-other-desc 🔗
Thename-other-desc block style has a three-column block with
the name in the first column, the other value in the second, and the
description in the third. The symbol isn’t shown.
The child list can be shown with the
save-child-count resource option. The example below
also uses par=ragged otherwise the table will be too
wide. The child list is in the description column with the child
other value (if set) and description. Note that the
par=ragged setting also enables line wrap for the child
entries.
desc-other-name 🔗
Thedesc-other-name block style has a three-column block with
the name in the first column, the other value in the second, and the
description in the third. The symbol isn’t shown.
This block style is essentially the same as the
name-other-desc
block style, but with the name and description columns switched.

The child list can be shown with the
save-child-count resource option. The example below
also uses par=ragged otherwise the table will be too
wide. Note that the
par=ragged setting also enables line wrap for the child
entries.
The child list is in the description column with the child
description and (if set) the other value. This is the reverse of the
name-other-desc
block style, which has the other value before the description.
name-symbol-other-desc 🔗
Thename-symbol-other-desc block style has a four-column block with
the name in the first column, the symbol (centred) in the second,
the other value in the third, and the description in the fourth.
In this example, the table ends up too wide with the default
par=false. However, if you change this to allow line
wrapping, the columns will end up too narrow. The header text is also
likely to be too long, so you may either need to suppress it with
header=false or redefine the commands used to produce
the header text (\glstablenameheader,
\glstablesymbolheader,
\glstableotherheader, and
\glstabledescheader).
The child list can be shown with the
save-child-count resource option, however this is
likely to make the table too wide unless you have a wide page or
unless you have just one block per row (blocks=1).
The child list will be in the description column and is formatted
like the child list for the
name-symbol-desc
block style.
name-desc-symbol 🔗
Thename-desc-symbol block style has a three-column block with
the name in the first column, the description in the second, and the
symbol (centred) in the third. The other value, if set, is at the
start of the description column.
In this example, the table ends up too wide with the default
par=false, so you may need to change that setting to
allow line wrap with this block style.

The result is like the
name-symbol-desc
example, but with the symbol and description columns swapped.
With the save-child-count resource option,
the child list will be in the description column with the child
other value (if set), description and symbol.
This is like the
name-symbol-desc
block style, but has the symbol after the description.
desc-symbol-other-name 🔗
Thedesc-symbol-other-name block style has a
four-column block with the description in the first column, the
symbol (centred) in the second, the other value in the third, and
the name in the fourth.
In this example, the table ends up too wide with the default
par=false, so you may need to change that setting to
allow line wrap with this block style.

The result is like the
name-symbol-other-desc
example, but with the name and description columns swapped.
With the save-child-count resource option,
the child list will be in the description column with the child
description, symbol and (if set) the other value.
desc-other-symbol-name 🔗
Thedesc-other-symbol-name block style has a
four-column block with the description in the first column,
the other value in the second, the
symbol (centred) in the third, and
the name in the fourth.
In this example, the table ends up too wide with the default
par=false, so you may need to change that setting to
allow line wrap with this block style.

The result is like the
desc-symbol-other-name
example, but with the symbol and other columns swapped.
With the save-child-count resource option,
the child list will be in the description column with the child
description, the other value (if set) and the symbol.
name-other-symbol-desc 🔗
Thename-other-symbol-desc block style has a
four-column block with the name in the first column,
the other value in the second, the
symbol (centred) in the third, and
the description in the fourth.
In this example, the table ends up too wide with the default
par=false, so you may need to change that setting to
allow line wrap with this block style.

The result is like the
name-symbol-other-desc
example, but with the symbol and other columns swapped.
With the save-child-count resource option,
the child list will be in the description column with the child
other value (if set), symbol and description.
name-other 🔗
Thename-other block style has a two-column block with
the name in the first column and the other value in the second.
The description and symbol aren’t shown.
With the save-child-count resource option,
the child list will be in the other column and will just show the
child other value. This will lead to blank rows if the other field
isn’t set. (It’s possible to filter them out by redefining
\glstableiffilterchild.)
other-name 🔗
Theother-name block style has a two-column block with
the other value in the first column and the name in the second.
The description and symbol aren’t shown.

name-other
example, but with the name and other columns switched.
other-symbol 🔗
Theother-symbol block style has a two-column block with
the other value in the first column and the symbol in the second.
The description and name aren’t shown.
With the save-child-count resource option,
the child list will be in the other column and will show the
child other (if set) and the symbol. Note that if both the other
value and the symbol aren’t set, this will lead to blank rows.
(It’s possible to filter them out by redefining
\glstableiffilterchild.)
symbol-other 🔗
Thesymbol-other block style has a two-column block with
the symbol in the first column and the other value in the second.
The description and name aren’t shown.

The result is like the
other-symbol
example, but the symbol and other columns are switched.